The World in His Hands Part 1 (Updated Fall 2022)
We are excited to share The World in His Hands Part 1 as a complete curriculum with over 150 pages of lesson plans, activity guides, printables, vocabulary cards, investigation guides, and scaffolded listening guides. We cover geography and connect the flora and fauna in a specific biome to the Creator who equipped them to thrive ... even in the most extreme of conditions.
|

|
The World in his hands
Ecology and Ecosystems Week 14: Migration and Mountains
|
Migration- The moving from one area to another for a particular season.
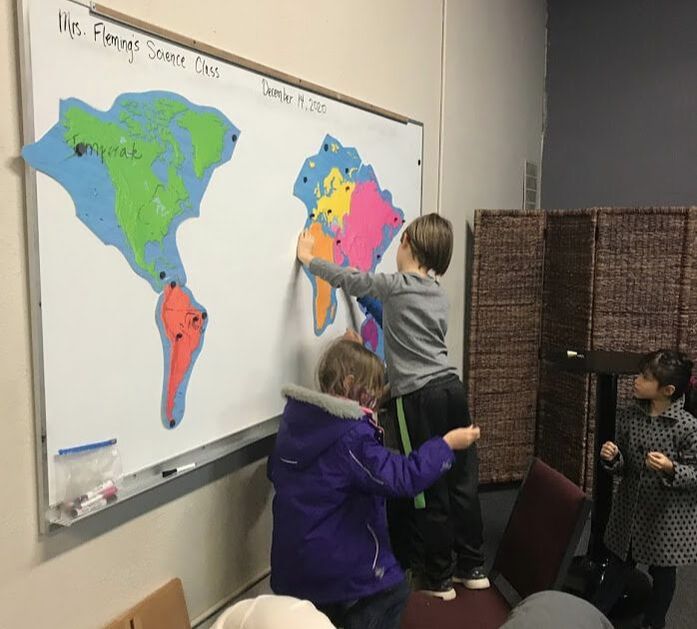
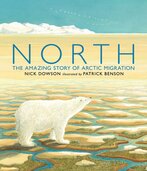
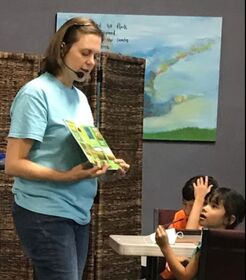
At the beginning of class, I had my students put up my world map together. This class works together so well!!! After they put up the map, I placed animals in the places where they winter and after we finished the read aloud, they would then take the animal that I gave them and have it migrate towards the arctic circle. The Read Aloud that I did was North, The Amazing Story of Arctic Migration by Nick Dowson |

|

|
God moves mountains! The next ecosystem we learned about today was mountains. The handout that I gave them had the areas on the mountain that could have different kinds of ecosystems within the same mountain. Please note that typically a mountain does not have all the ecosystems but that several are possible on different mountains. The different ecosystems included some of the different ecosystems we have already covered and so it also became a great review for the students.
At the bottom of the mountain could be a grassland with the different kinds of grasses and animals that inhabit the Grasslands. Next you could have a Deciduous Forest with all the wonderful beech, oak, basswood, maple, ash trees there along with the bears, owls, squirrels, and the many other animals that live in the deciduous forest. Next would be the Evergreen Forest in which there are the coniferous trees that do not lose their leaves in the fall but stay green throughout the season. At the end of this forest would be the Timberline where it would get too cold and the altitude would be too high for trees to grow. After the Timberline is the Alpine meadows with the shrubs, grasses, flowers, mountain goats and sheep. Finally, there is the Alpine Tundra which is different from the Arctic Tundra in that it does not have permafrost, no polar bears, but you can find foxes, hares, squirrels, birds, and insects. To top off the mountain is the Snowline. This is where the snow on the mountain does not melt because even in the summer it is too cold.
At the bottom of the mountain could be a grassland with the different kinds of grasses and animals that inhabit the Grasslands. Next you could have a Deciduous Forest with all the wonderful beech, oak, basswood, maple, ash trees there along with the bears, owls, squirrels, and the many other animals that live in the deciduous forest. Next would be the Evergreen Forest in which there are the coniferous trees that do not lose their leaves in the fall but stay green throughout the season. At the end of this forest would be the Timberline where it would get too cold and the altitude would be too high for trees to grow. After the Timberline is the Alpine meadows with the shrubs, grasses, flowers, mountain goats and sheep. Finally, there is the Alpine Tundra which is different from the Arctic Tundra in that it does not have permafrost, no polar bears, but you can find foxes, hares, squirrels, birds, and insects. To top off the mountain is the Snowline. This is where the snow on the mountain does not melt because even in the summer it is too cold.
Since we had covered some of these ecosystems already, I had the students review some previous food chains and then fill in their food chain on their own. I used some Dyno cards for this activity.
We will continue our study of ecology and ecosystems in the spring. See you there!
We will continue our study of ecology and ecosystems in the spring. See you there!
the world in his hands
Ecology and Ecosystems Week 13: Caves, Bats, and Hibernation

|
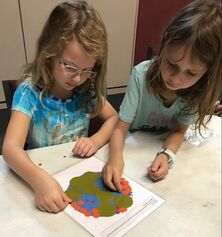
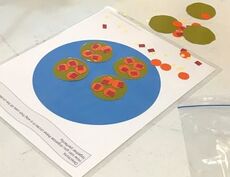
pulled out the Circle Puzzles that we did the first day of class this semester to review with the students about what a Biosphere, Biome and Ecosystem are. My focus for today was on the ecosystem of a cave. The big blue circle symbolizes the Biosphere which is the part of the earth that contains life. Inside the big blue circle you would put several slightly smaller circles that represent the different biomes within the biosphere. Then you had even smaller circles that fit inside the biome circles that symbolized the ecosystems within biomes. Finally, I had them place little tiny circles and squares within the ecosystem that represented the abiotic and biotic items that make up an ecosystem. This was a great time of review with the students. I love to see how much they have learned through our weeks of science class!
|

Last week, we learned about grasshoppers and today, since I had brought my microscopes to class, I had some slides of the different parts of a Locust and so each student was able to see the intricate design of a locust's wing under the microscope. God's design is best!
Next, I taught them about the unique ecosystem of a cave and what lives in the cave and what comes and visits the cave. Caves can be located in any biome and so we did not document the average temperature of a cave because it would be dependent on where it is located in the world. We also did not document average rainfall as it would be zero. We did talk about how run off water from rain can seep through limestone rock and make caverns with stalagmites and stalactites but I did not put that on our handout.
There are very interesting animals that live in a cave all the time. This is a very difficult environment to live in for animals as there is no light so plants do not grow and so what could possibly live in this ecosystem.
The food chain that we covered today was a little different. Always, the food chain begins with the sun. The sun gives energy to plants to grow fruit. There are bats that eat fruit but still roost in caves. So I placed fruit and then a bat next. There is nothing inside a cave that would eat a bat that I know of however, there are organisms that depend on guano (bat poop) from bats to live. Bacteria and Fungi feed on the guano. These are decomposers and decomposers breakdown waste and turn it into nutrients for other organisms like crickets that can live in caves. Because there are crickets, there are scorpions that would feed on the crickets and there is your food chain.

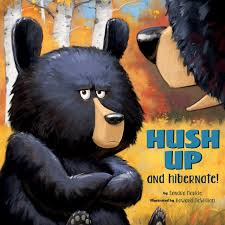
While the students filled in their Cave Handout, I read to them Hibernation by Mel Higginson and the different animals that take part in a winter hibernation. One of the animals was bats. I was also able to read a fun book to them call Hush Up and Hibernate by Sandra Markle
|
|
I was able to teach them that bears do hibernate but when they do their body temperature does not drop as low as other animals that hibernate which allows them to 'wake up' easier during the winter.

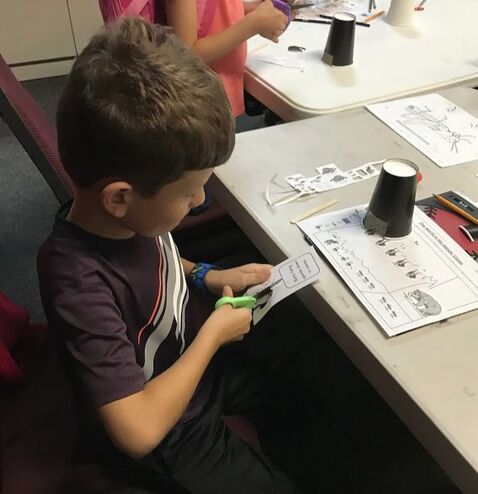
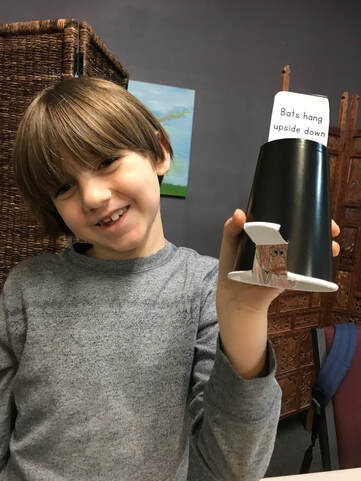
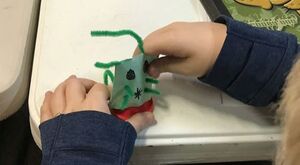
The last activity that we did before we left was make a Bat Cave out of a black paper cup. This free printable you can find here.
|
|
The world in his hands
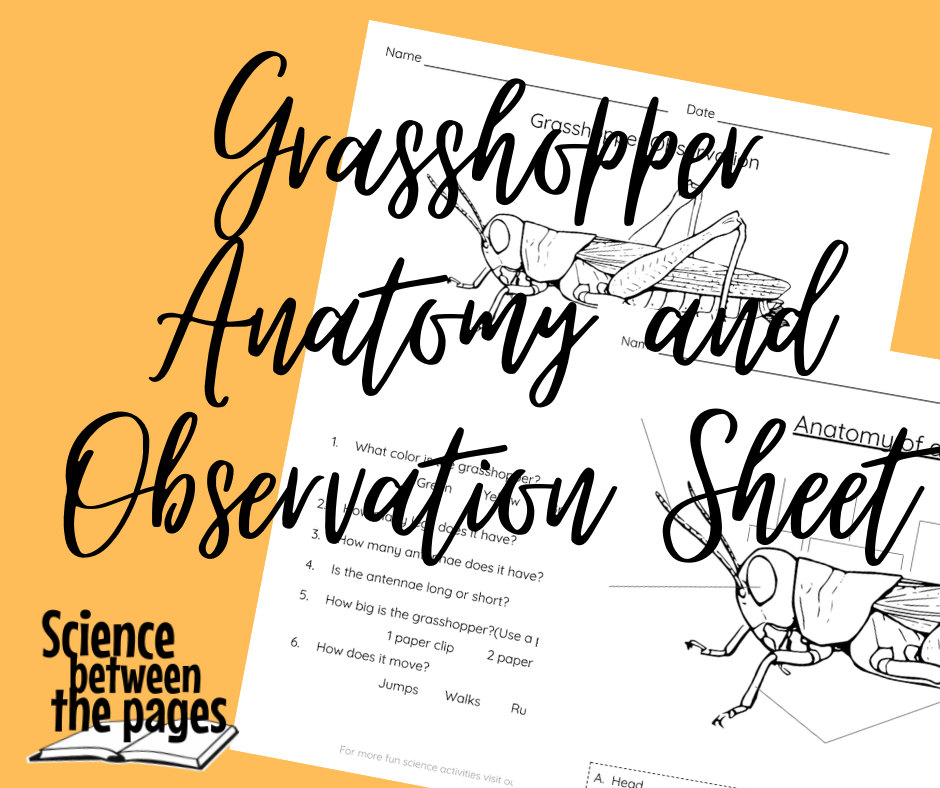
Ecology and Ecosystems Week 12: Grasshoppers
|
Grasshoppers were found in three of the four biomes that we have covered so far this semester. The Grasslands, the Temperate Deciduous Forest and the Rainforest. Today we went a little deeper into learning about Grasshoppers.
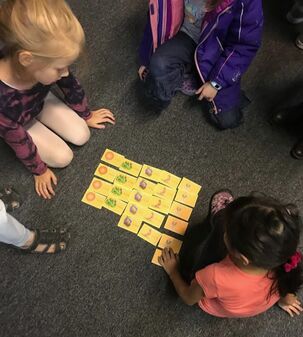
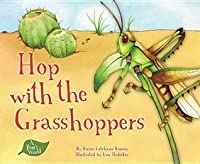
As the students came in , I gave them a puzzle that would tell them of the stages in the life cycle of a grasshopper. You can download this from here. As we were figuring out the different stages, we were able to talk about what we know about grasshoppers. We then sat down to read Hop with the Grasshoppers by Karen Latchana Kenney |
I could barely get through all the exciting information before they were clamoring at the terrarium to see the different kinds of grasshoppers that I had in there. We talked about how they were camouflaged really well and that you really had to look closely into the terrarium in order to see them.
I showed them that one of the grasshoppers did lay a pod. A pod is a little sac of grasshopper eggs. This is the time of year that they do that. They will lay their eggs in the dirt and in the spring the eggs will hatch into nymphs.
Some of the key points about the grasshoppers:
I showed them that one of the grasshoppers did lay a pod. A pod is a little sac of grasshopper eggs. This is the time of year that they do that. They will lay their eggs in the dirt and in the spring the eggs will hatch into nymphs.
Some of the key points about the grasshoppers:
- They breathe from spiracles on their abdomen.
- They feel and smell from their antennae
- Some grasshoppers have short antennae and others long.
- They have many lenses in their eyes which allows them to see things moving all around themselves.
- They have 6 legs, 2 hind jumping legs, and 4 walking legs
- They eat grass and only need the water they get from the grass.

After they found all the grasshoppers in the terrarium, they filled out the observation sheet that I had made along with learning the anatomy of the grasshopper. We learned the anatomy of the grasshopper together as a class.
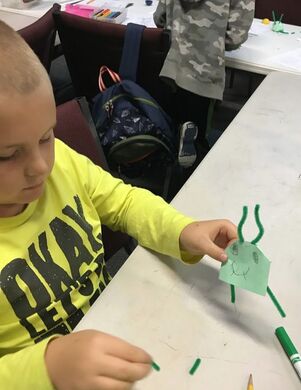
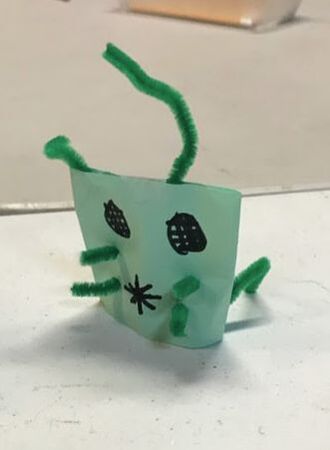
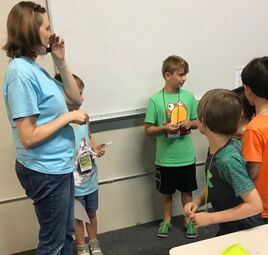
Finally, to end the class, I had each student make a Grasshopper Popper. They made a little grasshopper to place on top of a popper and when the popper popped, so did the grasshopper. In many ways there are similarities between the popper and the grasshopper in relation to their jumping.
Finally, to end the class, I had each student make a Grasshopper Popper. They made a little grasshopper to place on top of a popper and when the popper popped, so did the grasshopper. In many ways there are similarities between the popper and the grasshopper in relation to their jumping.
|
|
|
To make a Grasshopper Popper
Materials:
6x2.5 inch cut green paper (or color of your choice
2 green chenille sticks
scotch tape
2 inch popper
1. Wrap the green paper around the popper and secure with a piece of tape.
2. Fold the corners down on the green tube to get the shape of the grasshoppers head
3. Draw the compound eyes in a criss cross way
4. Place a small piece of tape in between the folded parts of the grasshopper's head.
5. Feed half a chenille stick through the head to make the antennae.
6. Cut the other half of the green chenille stick in two and use those for the hind jumping legs.
7. Cut another chenille stick in half, and then in half again, until you have walking legs that are about half to a third of the chenille stick for the jumping legs.
8. Use the wire in the chenille sticks to poke through holes in the grasshopper.
9. Finally turn your popper inside out, place on the table, place your grasshopper on top and wait for it to erupt with joy.
For a neat video on a bird tenderizing a grasshopper during the summer, go to the Growing Up Wild page under the Science at the CHC column above.
the world in his hands
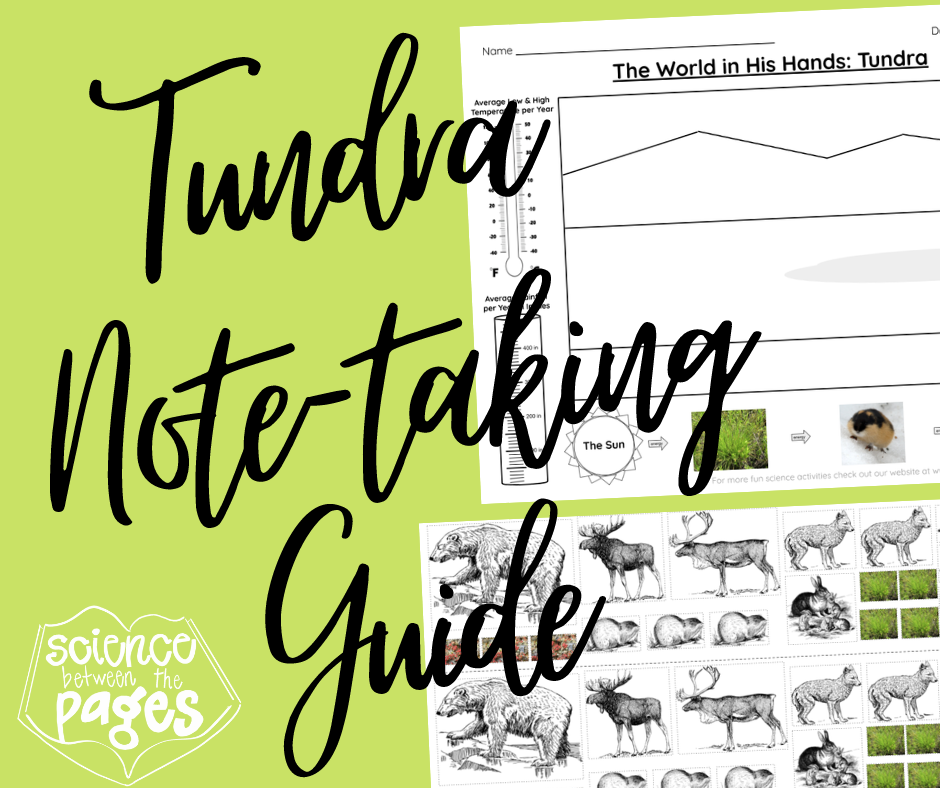
Ecology and Ecosystems Week 11: The Tundra Part 2
|
We began class with a review game. Every question that a student answered correctly, I gave them a block. When all the questions were asked and answered correctly, the students came together to build the tallest tower they could. I absolutely loved playing this game, as they had to collaborate in order to make a large tower. There was no question that everybody's blocks together would make a taller tower than one indivdual's blocks.
A prayer of my heart in teaching science is to form great habits such as collaboration and teamwork among each other. To place others before self is a habit that we can encourage now in our children. The students below tore down and rebuilt at least three times to get this tower as tall as they could. I am so proud of them working so well together!
|


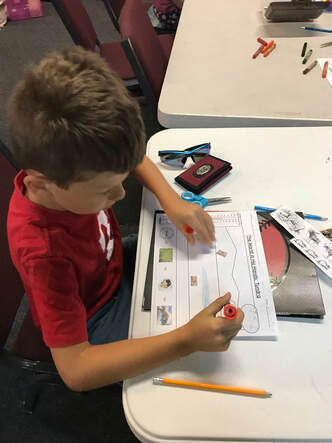
To continue where we left off with the Tundra. I sat down with the students and taught them about the Tundra. The book I used was The Frozen Tundra; A Web of Life By Philip Johansson. I only covered about the Tundra Biome itself and its special plants and animals. This was enough information to be able to fill in our Tundra sheet.
|
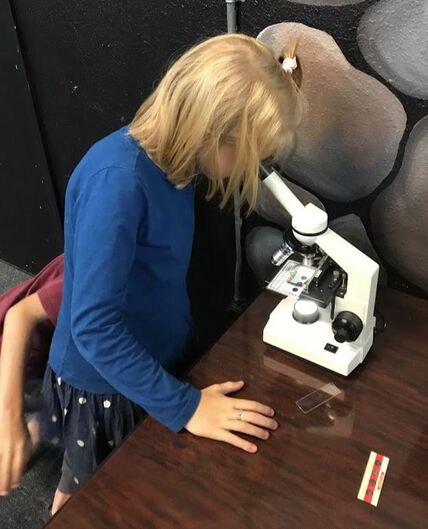
While the students were filling in their Tundra sheet, I set up a microscope so that they could see some plants and animals on a microscopic level. The students were surprised to see what pine wood looks like close up as well as hare hair (fur).
May we magnify the Lord with science! |
|
The World in His Hands
Ecology and Ecosystems Week 10: The Tundra
|
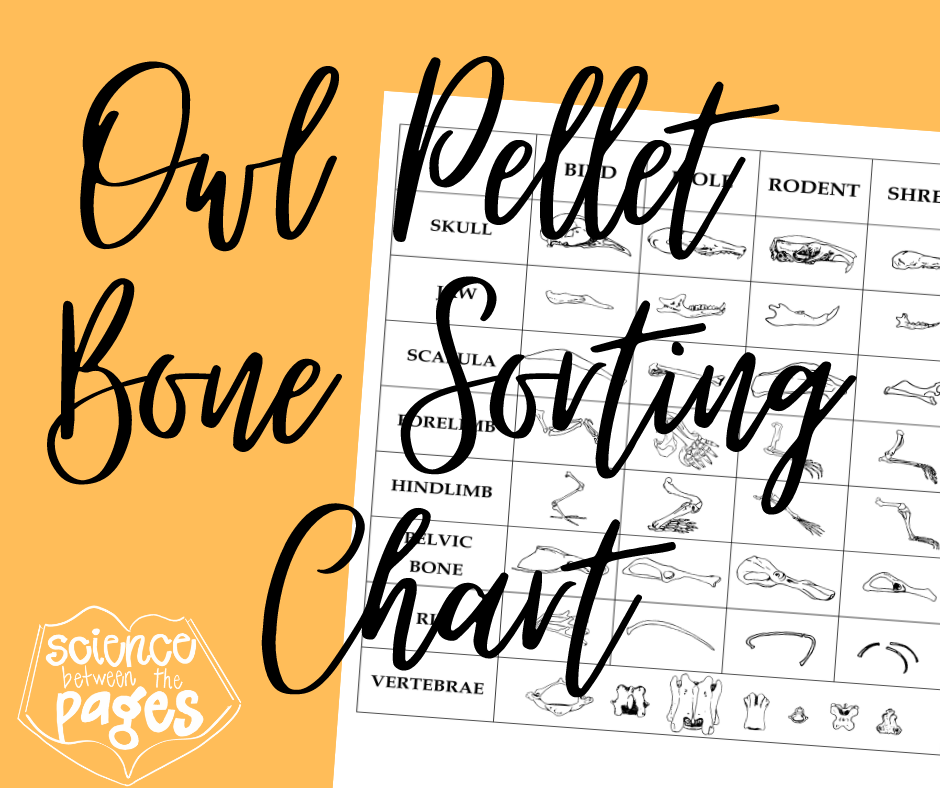
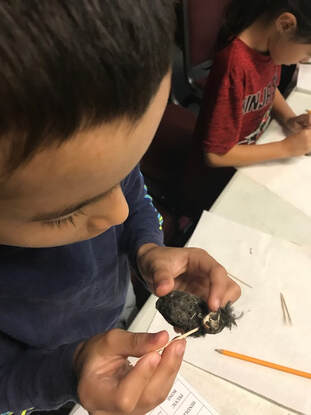
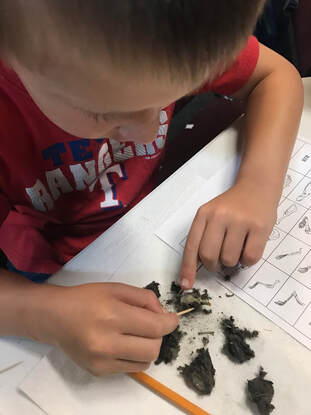
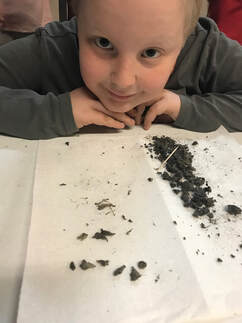
I prepared this lesson first and finished it. Then I planned the younger class and realized I had enough owl pellets for both classes to use and dissect and so I changed my lesson plans. I also noticed that a different type of owl lives in every biome that we have learned about so far including the Tundra that we just barely touched on today. We will be doing our Tundra note taking guide next week during class. However, you can download a free owl pellet chart from our Teachers Pay Teachers page.
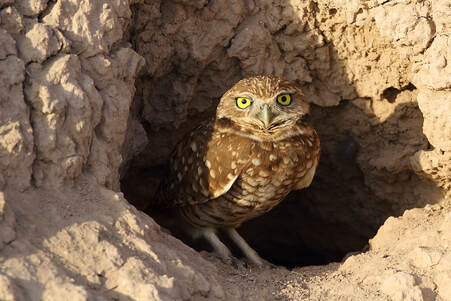
Grasslands have burrowing owls. Pictured here. |

The Temperate Deciduous Forest has the Great Horned Owls (pictured here) along with barn owls, barred owls, spotted owls, great gray owls, northern pygmy owls and western screech owls
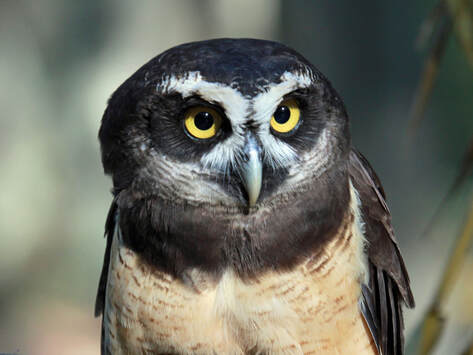
The Tropical Rainforests have Spectaculed Owls. Not speckled but specTACuled! Maybe because they are spectacular animals. Pictured here
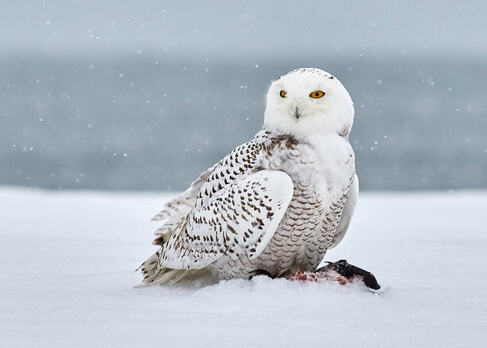
And then in the Tundra, there are Snowy Owls, pictured here.
So in honor of having owls in every biome, we dissected owl pellets today. These students really got into it and did an awesome job excavating the bones.
|
|
|

|

|

One of my students didn't know what animal they had but they had significantly larger bones than the others. One of them broke open. What kind of animal has hollow bones? A bird of coarse! This owl ate a bird!!!
|
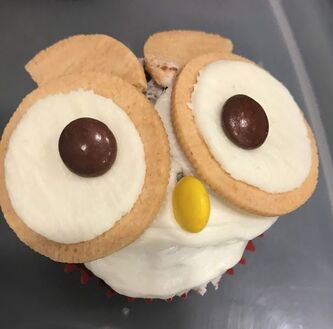
My oldest daughter made these sweet cupcakes for my students to compliment my lesson. What a blessing!
God's creation is wonderful to explore!!!
God's creation is wonderful to explore!!!
The World in His Hands
Ecology and Ecosystems Week 9: Tropical Rainforest
|
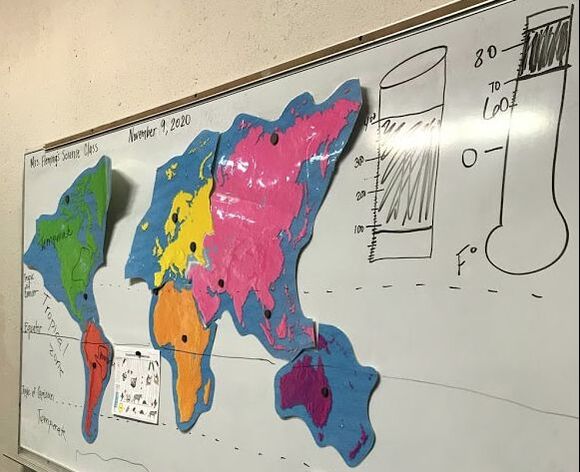
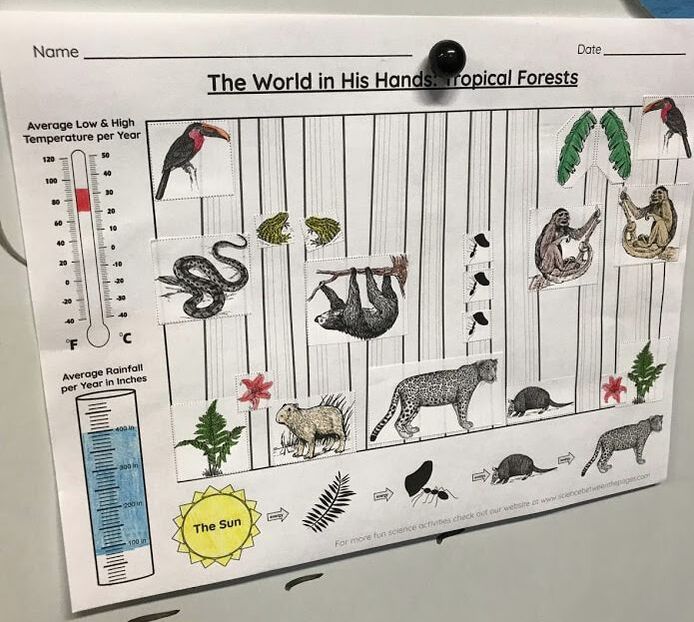
I began this class with a short geography lesson. My goal is to teach the students where in the world the biomes we are covering in class are located in the wide wide world. I showed them where the Tropic of Cancer and the Tropic of Capricorn are and that in between those two imaginary lines is another imaginary line called the Equator that gets the most sunlight year round. This is also the Tropical Zone where you will find the Tropical Rainforests that we were learning about today. 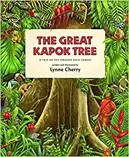
The book that I read aloud to the students was The Great Kapok Tree. Through this read aloud we learned about how many animals need the rainforest to survive.
As we are doing with every biome, we are completing a biome sheet that documents the flora and fauna of a biome as well as the annual rainfall and temperature range. Being able to read and record data on thermometers and rain gauges is very important to gathering and comparing data.
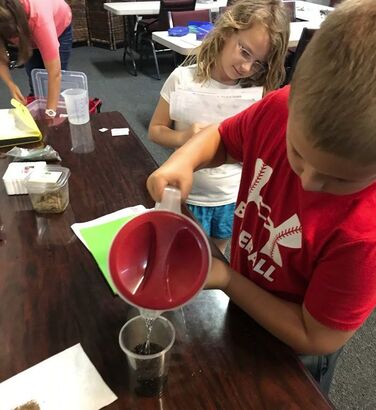
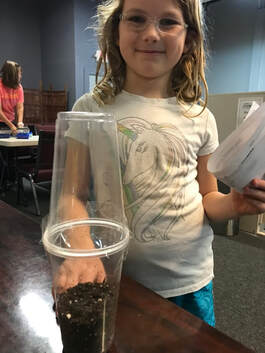
Finally, I sent the students home with a rainforest terrarium. I bought some potting soil, clear cups and some carrot seeds. I instructed them to NOT open the terrarium but to only place the terrarium in a sunny spot in their house. Our experiment is to see if we can grow carrots using the water cycle within our two plastic cups similar to how rainforests receive precipitation.
|

I love how God provides for us through the water cycle. The water cycle not only recycles our water but it was cleans it. Through the water cycle He has provided for a very basic need of life on earth and likewise through Jesus, He has provided for our most desperate need, salvation. Thank you Jesus
Proclaiming God's Excellencies 2 Peter 1:9-11
Proclaiming God's Excellencies 2 Peter 1:9-11
The World in His Hands
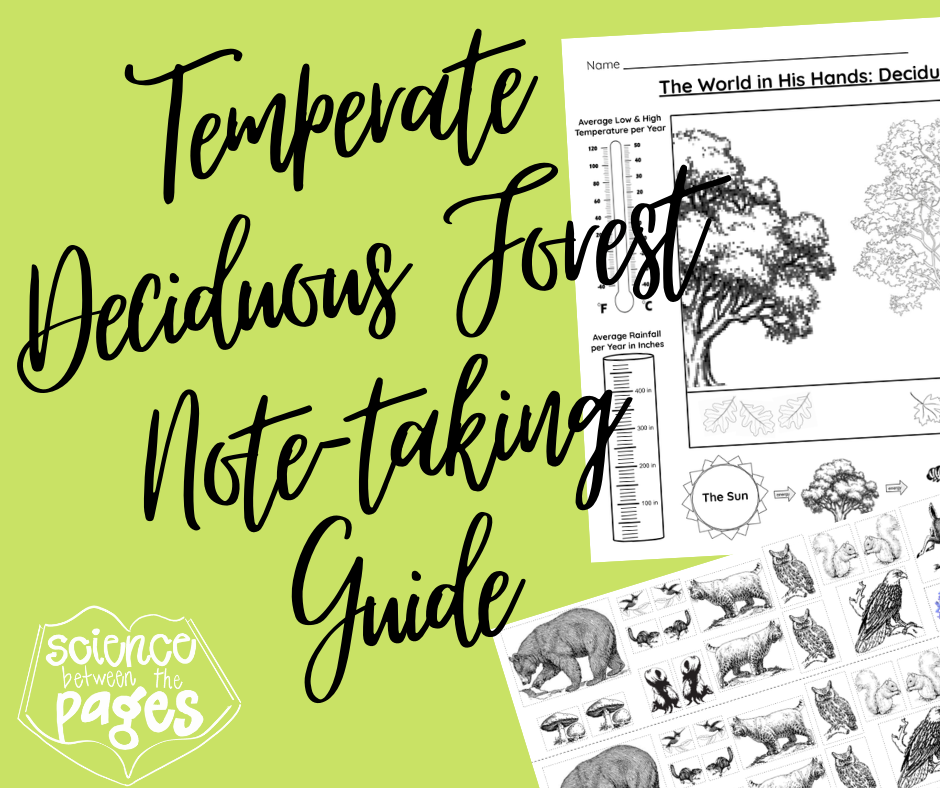
Ecology and Ecosystems Week 8: Deciduous Temperate Forests
|
When the students brought back their chlorophyll paintings we were able to review what chlorophyll is and how in the winter, trees stop making chlorophyll which is why leaves change color.
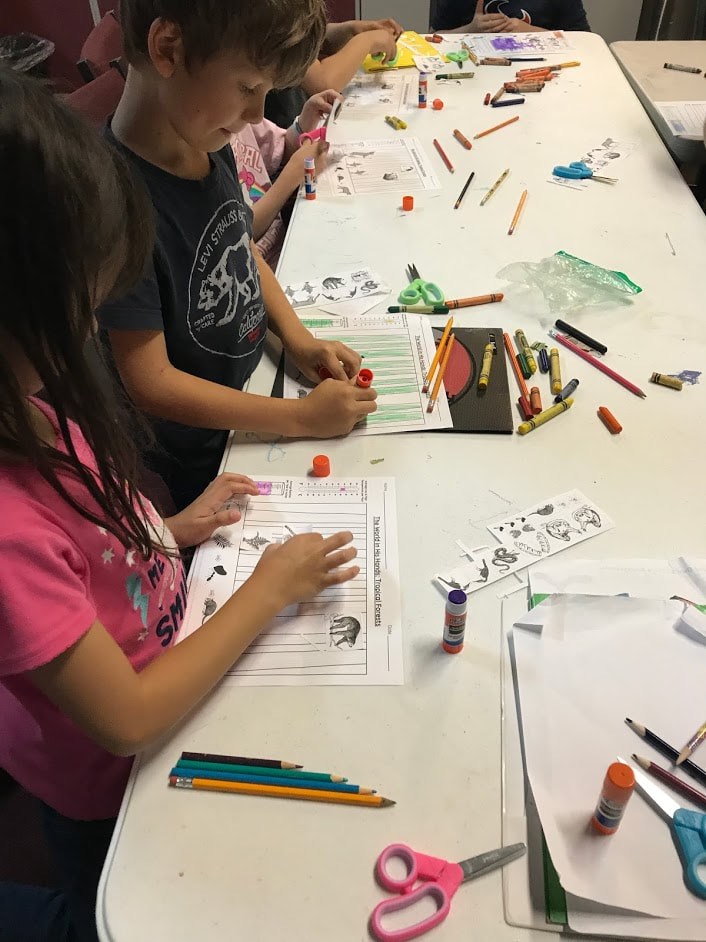
Since we have been learning about food chains and webs, predators and prey, I read a devotion from Indescribable call Who’s Hunting Who which mentions that we are familiar with lions being predators and bears but not necessarily ladybugs which are carnivorous and sweet little birds that eat worms with their seeds. Prey has to stay alert so that they don’t become a predators next meal. This devotion warned that we have a predator, Satan who is a prowling lion that seeks to destroy. God who is more powerful can help us make sure that we do not fall into Satan’s traps I had the students line up and review the different layers of the forest and then pick a vocabulary word to define from the wall. Next, I showed students my world map and pinned each of the places on the map that has different biomes to show them where all these biomes are located. Finally, we filled in our Temperate Deciduous Forest printable with all the flora and fauna that we could manage to glue on our papers. These forests have such a diverse amount of plants and animals, it was hard to pick just a few to place on our paper. We did learn that the average temperature of this kind of forest is 50 degrees Fahrenheit and the average amount of rainfall a year is 30-60 inches. |
The World in His Hands
Ecology and Ecosystems Week 7: Welcome to the Forest

|
Practicing scientific collaboration- I had the students come in and place my producer, consumer, herbivore, carnivore, omnivore and decomposer cards in an organized way according to the flow of energy. They had to discuss with each other which animal went in what category and the readers had to communicate with the non readers. Oh my prayer is that my students that become scientists would collaborate and share for the good of the Kingdom and not for selfish gain.
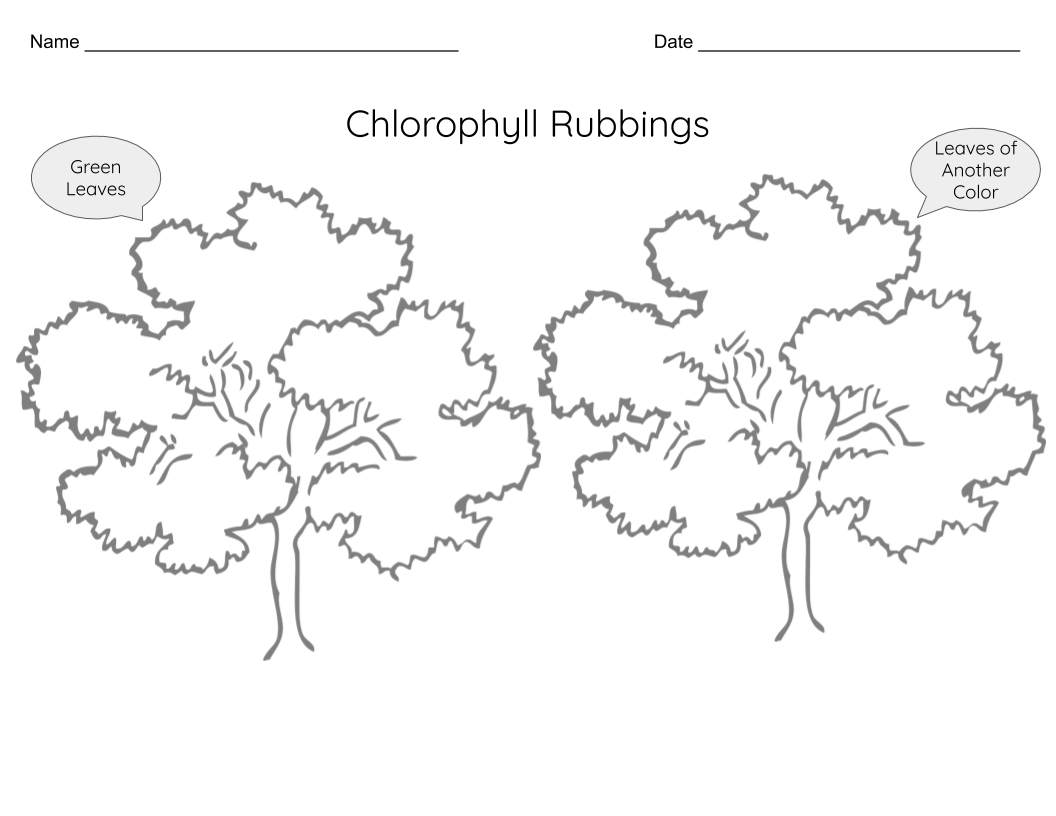
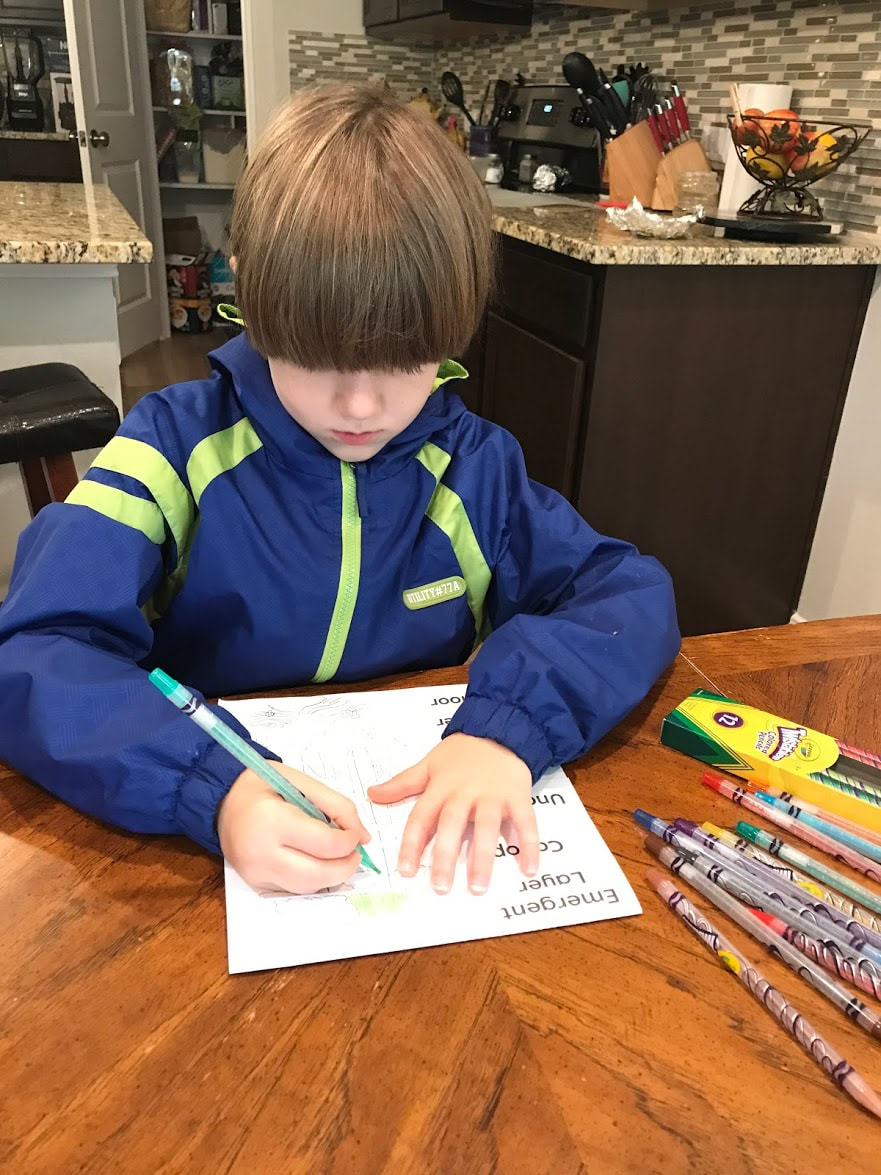
Next, I read to them a devotional from Louie Giglio's devotional Indescribable. The devotional was titled “Fruit-full” and it tied in directly with producers and consumers. The main idea in this devotion was that just like our bodies cannot produce food for our physical body, we cannot produce the fruit of the Spirit without God and knowing His word. (Galatians 5:22-23) After the devotion, we read Moira Butterfield's The Secret Life of Trees to go over the different parts of the tree. When we came to the leaves, I explained why leaves change color in the fall. I introduced the students to chlorophyll in the leaves. Chlorophyll is the pigment in leaves that gives it their green color. Chlorophyll is also where the leaf takes the energy from the sun and makes food for the plant. In the fall, the tree is preparing to go dormant for the winter, there is less sunlight and so therefore, the tree does not produce more leaves with chlorophyll. The chlorophyll in the old leaves dulls turning the leaves beautiful shades of yellow, orange and red. I did an experiment at home with my son about the different pigments in leaves. We see mostly green but when there is no more green, there are yellows and depending on the tree, reds, and oranges. I followed the experiment from here https://www.howweelearn.com/science-experiments-for-kids/ We let our leaves soak in the rubbing alcohol for a little over an hour with the hot water. Then when I placed the coffee filter strip in, I left that in for about 4 hours to really see the chromatography. I was able to show this to my students in class. For homework, I gave this class the assignment of finding some green leaves and then other color leaves to rub on their papers. Would the leaves that were not green, be able to rub off their yellows and such onto their paper. We shall see the results next week. Finally, I taught the students the layers of a forest and the different animals that reside in each layer. My very talented husband drew the tree on the printable and managed to make it a layered printable where the students could add the animals to each layer. Before each student left the classroom, they had to go through my Layers of the Forest ladder on their way out the door. They actually went through this ladder several times to practice. |
The World in His Hands
Ecology and Ecosystems Week 6: Going Further with the Grasslands
|
To get the kids oxygen flowing and their thinking revved up, we played the fly swatter vocabulary review game over our words from Week 2; Habitat, Biome, Biosphere, Ecosystem, Ecology, Flora, Fauna, Abiotic, Biotic.
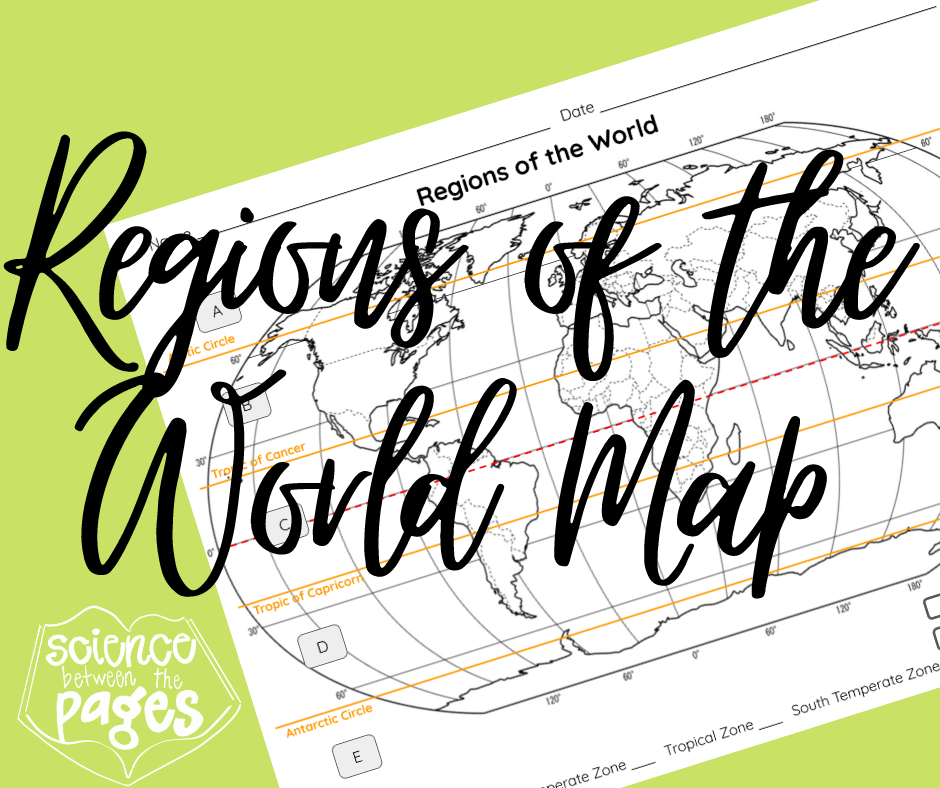
We then returned to review our Regions of the World map. I found this geography to be difficult for my age group. I am teaching primarily second and third graders these lessons. I brought it up again this week as a brief review but it was still very confusing for them. Next, after we reviewed where in the world the grasslands are located, we designed our own grassland biome on paper with the flora and fauna relative to the North American prairie. We talked about the temperature ranges of the grasslands as well as it’s annual rainfall. We integrated our food chain knowledge and made a food chain for the grasslands with our animals and then the kids created. I gave them one tree because the trees in the grasslands are sparse. I gave them some grass, grasshoppers, prairie dogs, snakes, owls, bison, pronghorn antelope and whitetailed deer. I thought the students did an excellent job!!! |


The World in His Hands
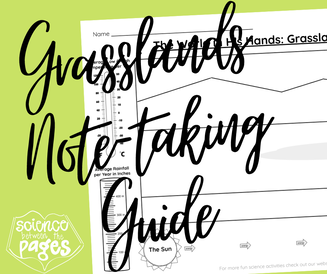
Ecology and Ecosystems Week 5: Regions of the World ... Grasslands
|
We reviewed our food chain and food web vocabulary that we learned last week by swatting the cards on the dry erase board using fly swatters. The students really have a fun time with this and it is great repetition.

Next I introduced the students to the Regions of the World by helping them label the zones in order to be able to identify the different types of grasslands in the world. I mentioned the different types of grasslands are prairie, savanna, steppe, pampas depending on where they are located around the world. Also, there are two types of grasslands in the world depending on which zone of the world they are located. They could be temperate grasslands located in the temperate zones of the world or they could be tropical grasslands located in the tropical zone of the world. Since we live in North America, I focused on Prairies.
We read David C. Lion's A Home on the Prairie that introduced the animals and habitat that live there in a simplistic form.
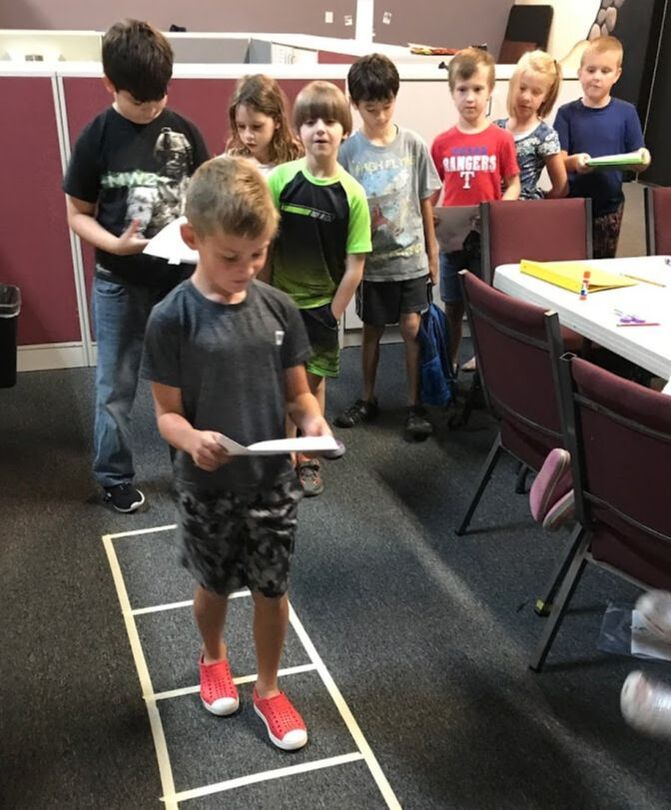
Finally, we played our food chain game. First, I asked for volunteers to be producers. At first when they didn’t know what producers were all the hands would go up, but now only 2 students wanted to be producers because they knew that they would be plants and would have to remain in one place throughout the game. Some students prefer this however. I told them that if there weren’t more producers, the other animals couldn’t live and this would be a very short game. I had a few more volunteers. I took the producers and planted them around the room. Then I asked for volunteers to be herbivores, omnivores and carnivores. I typically plan for more herbivores than omnivores and carnivores to let the game keep going. I also appointed a scavenger. I would be the sun and I would give little pieces of paper with squares on it to each producer symbolizing energy. The sun gives energy to the plants to help them make food. An herbivore needs to go up to a plant and receive energy so the plant would give them a stick of energy. As the herbivore moves, every step it takes it has to tear off a square of energy to the floor. Then I let the omnivores go ad finally the carnivores. When a carnivore or omnivore tags a herbivore or other, they take a stick of energy from them. If they don’t have any sticks left they die and are out of the game. As the squares are falling to the floor, my scavenger is picking them all up. Finally as the game ends, I have everyone turn into a scavenger to pick up all the pieces off the floor and deposit them into the decomposer aka trash can. The kids had a lot of fun. The first time takes some explaining but as you practice the kids get more acclimated to the game and have more fun. You can play around with it and only have 1 or 2 producers and see if the animals survive etc.
|

The World in His Hands
Ecology and Ecosystems Week 4: Going Out to Eat

|
We started out lesson with a review of the water cycle using our observation sheet from Week 3 and these DynaNotes Water Cycle cards.

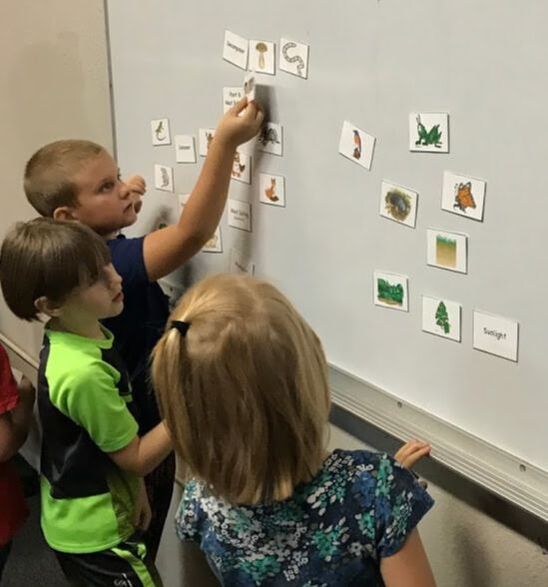
Then we used cards with magnets to introduce these new vocabulary words:
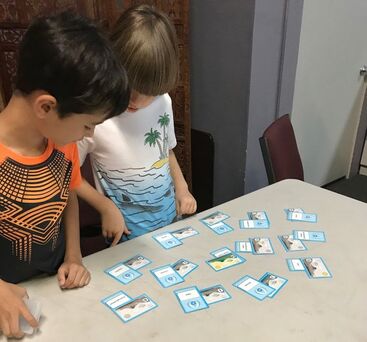
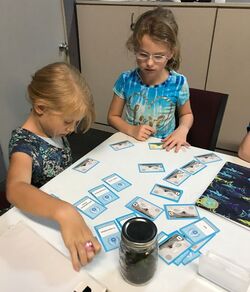
Then we sorted and organized food chains using the DynaNotes Food Chain cards from five different ecosystems to see if they could put those together. They did a great job. This is a foreshadowing of the ecosystems that we will be covering throughout the school year. 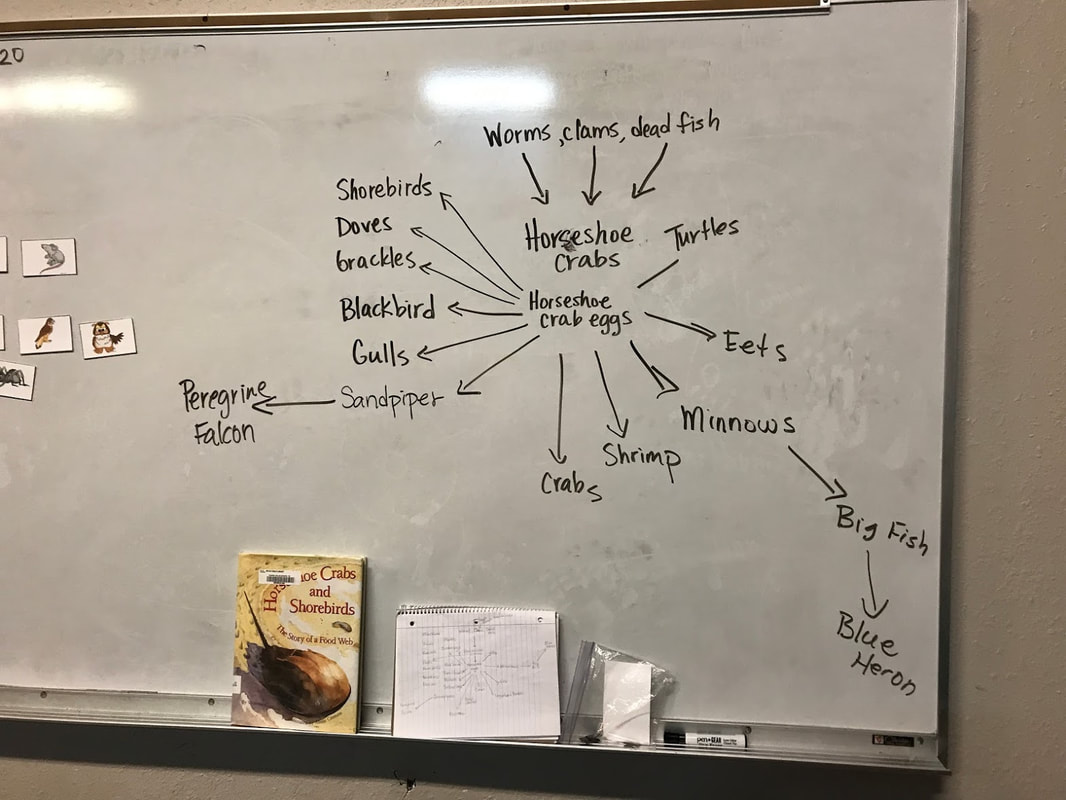
Finally we read Victoria Crenson's Horseshoe Crabs and Shorebirds taking notes about the animals that were mentioned and how they formed an important food web.
|
The World in His Hands
Ecology and Ecosystems Week 3: The Water and Air We Share
Isaiah 55:10-11 As the rain and the snow come down from heaven, and do not return to it without watering the Earth and making it bud and flourish, so that it yields seed for the sower and bread for the eater, so is my word that goes out from my mouth: It will not return to me empty, but will accomplish what I desire and achieve the purpose for which I sent it.

Acts 14:17 "Yet he has not left himself without testimony: He has shown kindness by giving you rain from heaven and crops in their seasons; he provides you with plenty of food and fills your hearts with joy.”
|
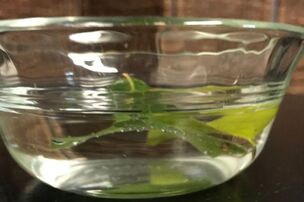
We started this week's lesson with some observations. We observed a leaf floating in a glass bowl of water. Each student got to make observations about what they saw in the bowl. After a few minutes, the children were able to see and record small bubbles appearing on the underside of the leaf. These tiny bubbles were oxygen released by the leaf. Normally we wouldn't even notice these bubbles but because the leaf was underwater, the bubbles appeared and rose to the top of the water.
This transitioned into the Oxygen cycle where an animal will exhale carbon dioxide needed for plants to make food and consequently the plants would exhale oxygen for us to be able to breath. Both of which are necessary for life for both of us. The oxygen cycle is a demonstration of the law of conservation of mass that requires all elements be conserved or recycled since no new matter can be made by natural processes.
I passed out balloons to the students and had them stand in a circle. Half of them were purple balloons and the other half were white. The purple balloons stood for carbon dioxide and the what balloons represented oxygen. I had them pass the balloons from the animals to the plants in a circle demonstrating the oxygen cycle. 
I then introduced the Water cycle to the students. We read the book The Water Cycle by Bobbie Kalman. While I was explaining the water cycle to the students, they were following the cycle on their handout.
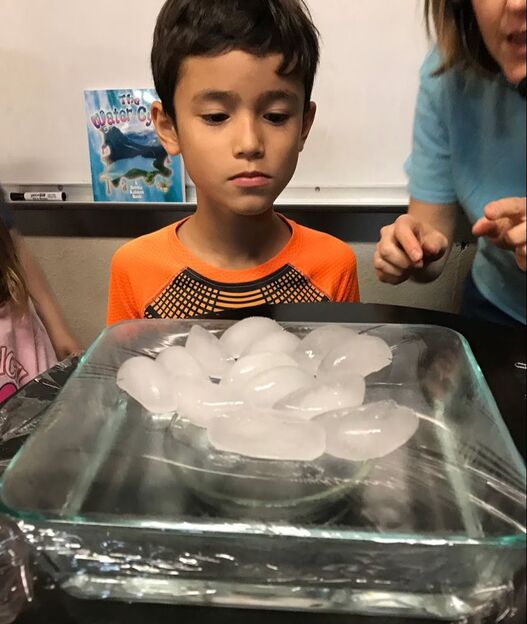
Next, we did a demonstration of the water cycle. I grabbed a clear glass pyrex container and another smaller glass bowl to place inside the class pyrex container. I poured boiling water on the outside of the smaller bowl. Then I placed a piece of saran wrap quickly over the top. After, I placed ice on top of the saran wrap. In a few moments, we could see the condensation and precipitation happening in the demonstration. It was was pretty neat. 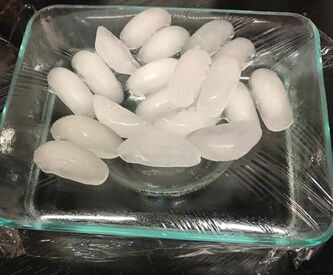
Finally, I taught them the Water Cycle song to the tune of She’ll be Comin’ Around the Mountain. It goes like this:
Water travels in a cycle yes it does, clap clap clap Water travels in a cycle yes it does, clap clap clap It goes up as Evaporation Forms clouds as Condensation Then falls down as Precipitation yes, it does Clap clap Clap For homework this week, I gave each student a jar with some potting soil, grass and some water. They were to place the jar in a sunny spot in their home and observe the water cycle throughout the week. |
The World in His Hands
Ecology and Ecosystems Week 2: Providing for Plants with Photosynthesis
We learned some pretty big vocabulary words last week and so we started this week's lesson by reviewing these words today in class using a fly swatter review game. I placed the flashcards on the board and as I called out the definition of the word, two students would race to swat the card first. We played several rounds.
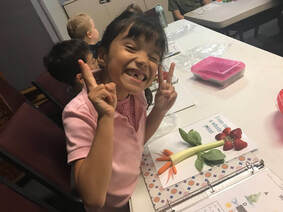
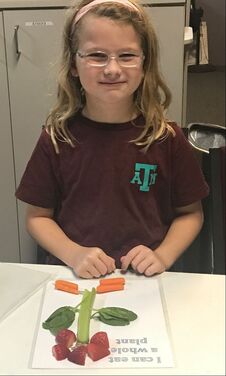
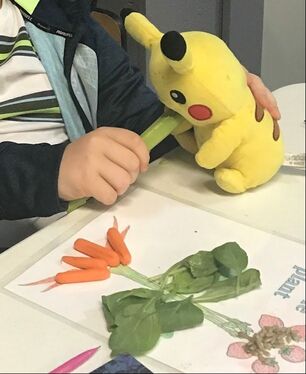
We turned over a different leaf and focused on flora, or the world of plants. We read Molly Aloian's Plants are Alive together to introduce the parts of a plant and how a plant makes food through photosynthesis. Can you eat every part of a plant? We investigated this question with a snack time place mat. We placed each snack on the part of the plant that it represented. We placed carrots over our roots, celery on our stem, spinach our leaves, strawberries as our flower and sunflower seeds as our seeds. As I passed each item out, we discussed the important role each part of the plant plays in the overall design of the plant. We finished with a fun racing game related to photosynthesis, or the process plants use to make their own food as a producer. The students had to race the necessary ingredients back and forth between the "in" and "out" envelopes cleverly attached to large leaves. The game worked by having the first student take water to the leaf, the next person would take carbon dioxide, the third student would have to shine a flashlight on the leaf to model sunlight. The next student would then need to flip the leaf and bring back one thing that photosynthesis produces, either glucose (sugar) or oxygen and the last student would bring back the other product. We did this a few times until it was time to clean up and go God made fruit bearing plants and trees for us to enjoy. Add some veggies to your next meal and think about how amazing God is for creating and sustaining the flora on our planet. The students lined up and answered this exit question as the left for the day: What is one thing that a plant uses to make their own food?
|
And God said, “Let the earth sprout vegetation, plants yielding seed, and fruit trees bearing fruit in which is their seed, each according to its kind, on the earth. And it was so."
Genesis 1:11 |
The World in His Hands
Ecology and Ecosystems Week 1: Parts of the Puzzle
Sandwiched between calls to praise God, verse 4 and 5 of Psalm 95 declare that God holds the depths of the Earth, the heights of the mountains, the seas and the dry land in His capable hands. Each week learners in this class will explore the features present in each of the primary levels of organization used to describe our biosphere.
This first week, we learned about ecology, or the study of how organisms interact with each other and their environment to survive. Our young science learners worked in pairs to create a representative model that nested biotic and abiotic resources with flora and fauna, flora and fauna in habitats, habitats in ecosystems, and ecosystems in biomes. This model became a tool we used to talk about how resources or organisms from one biome like the tundra might differ from those in another biome like the rainforest. Ultimately, the focus of this week's lesson was to familiarize ourselves with the special words scientist use to talk about how these organisms interact with their environment. We organized our words using a handout and then played a vocabulary game with fly swatters and picture vocabulary cards on the floor. The students did a great job swatting the word that matched my definition. |
Oh come, let us sing to the LORD; let us make a joyful noise to the rock of our salvation! Let us come into his presence with thanksgiving; let us make a joyful noise to him with songs of praise! For the LORD is a great God, and a great King above all gods. In his hand are the depths of the earth; the heights of the mountains are his also. The sea is his, for he made it, and his hands formed the dry land. Oh come, let us worship and bow down; let us kneel before the LORD, our Maker!
Psalm 95:1-6 |