Lesson 13: Recycle-lympics
This class was amazing!!!
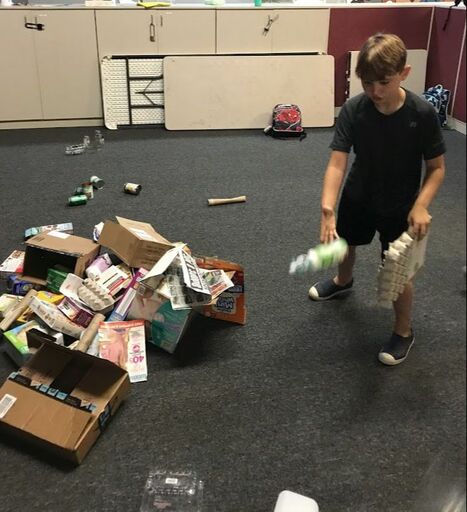
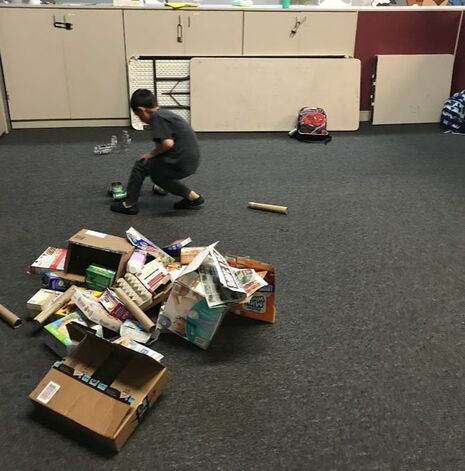
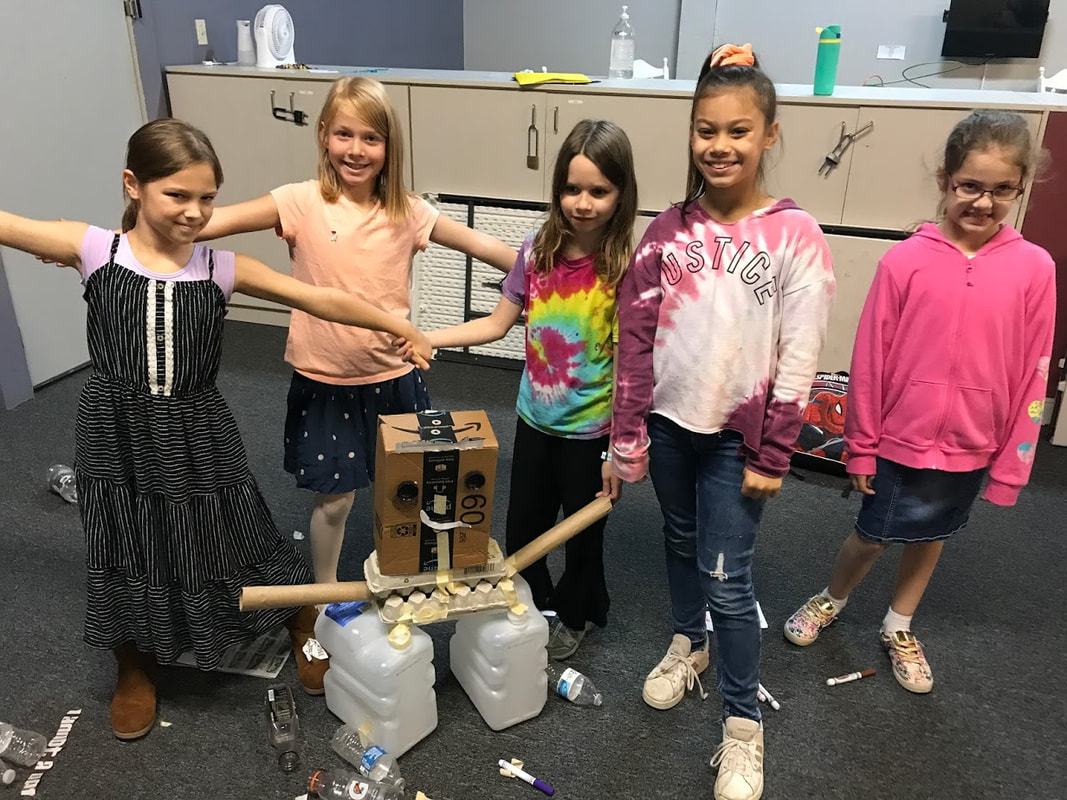
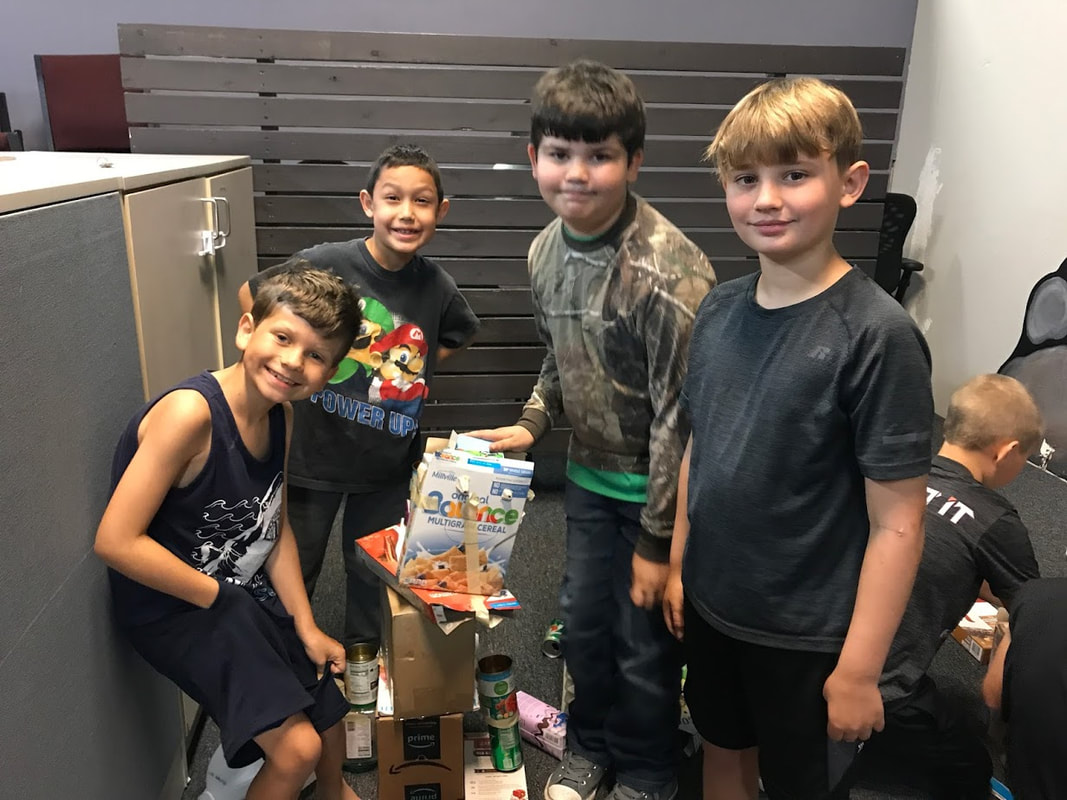
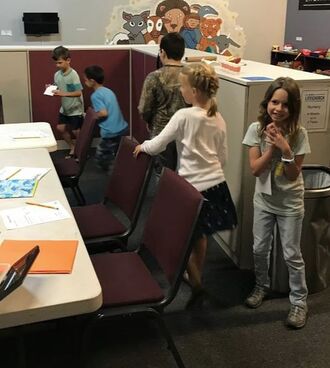
To finish this class, we played Recycle-lympics. The students got into teams of 4-5 students each. I had three teams. They each could earn points through three challenges that I laid out before them using recyclables from home.
To finish this class, we played Recycle-lympics. The students got into teams of 4-5 students each. I had three teams. They each could earn points through three challenges that I laid out before them using recyclables from home.
The first challenge: Relay sort
The students were lined up at one end of the classroom. They had a mountain of recyclables before them. They had to grab a recyclable and place it in the correct pile, run back, tag the next person in line until all the recyclables were gone. Each time I saw them sort, I gave the team a point. This was a little tricky as many didn't want to wait until their team member tagged them. At the end of the few minutes, all the recyclables were sorted.

|
|
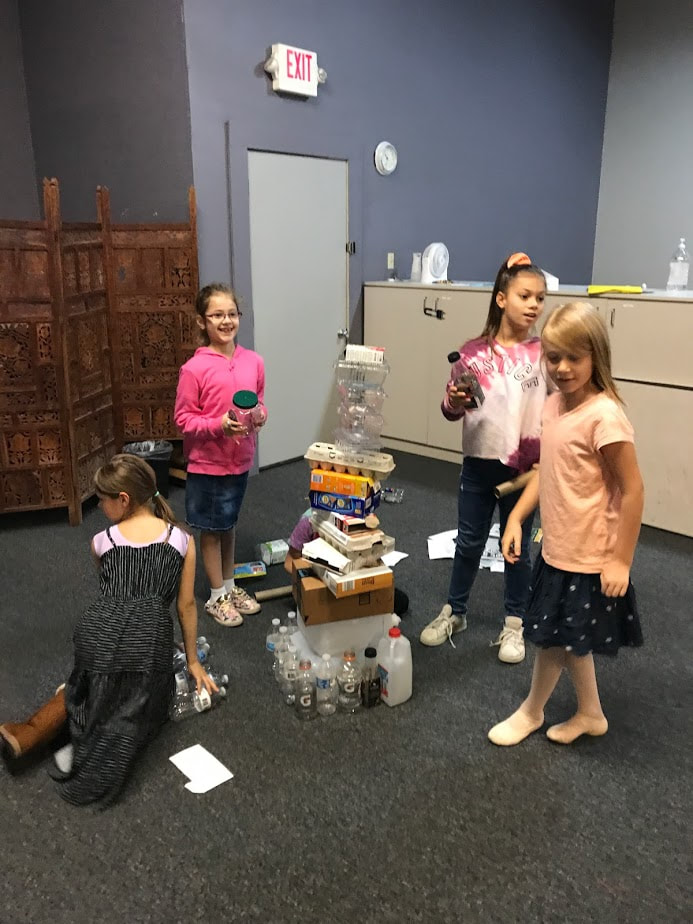
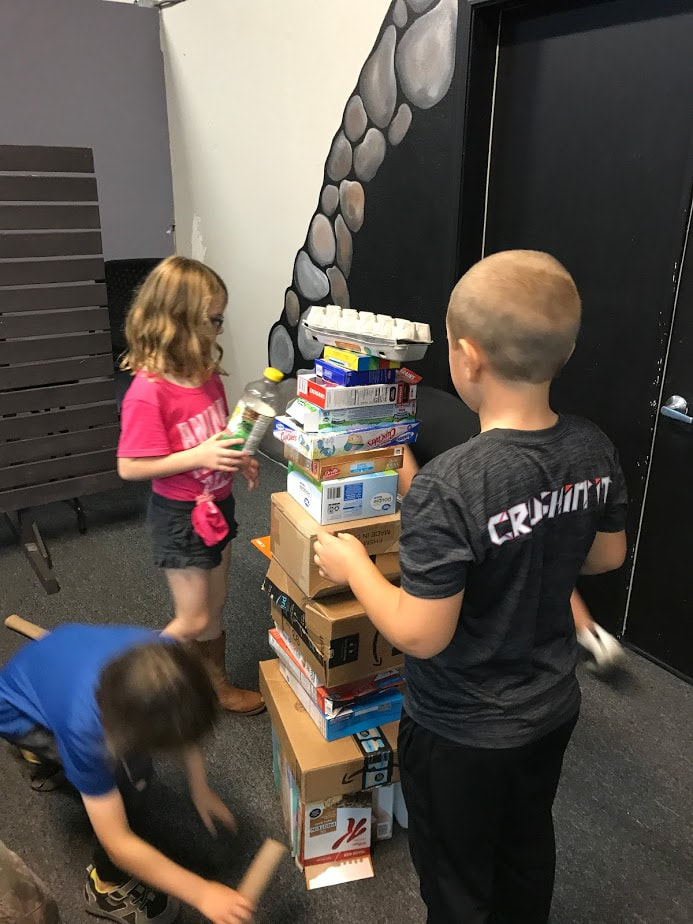
The second challenge: Tallest Tower
The next challenge was for the teams to gather the recyclables they wanted in order to make the tallest tower.

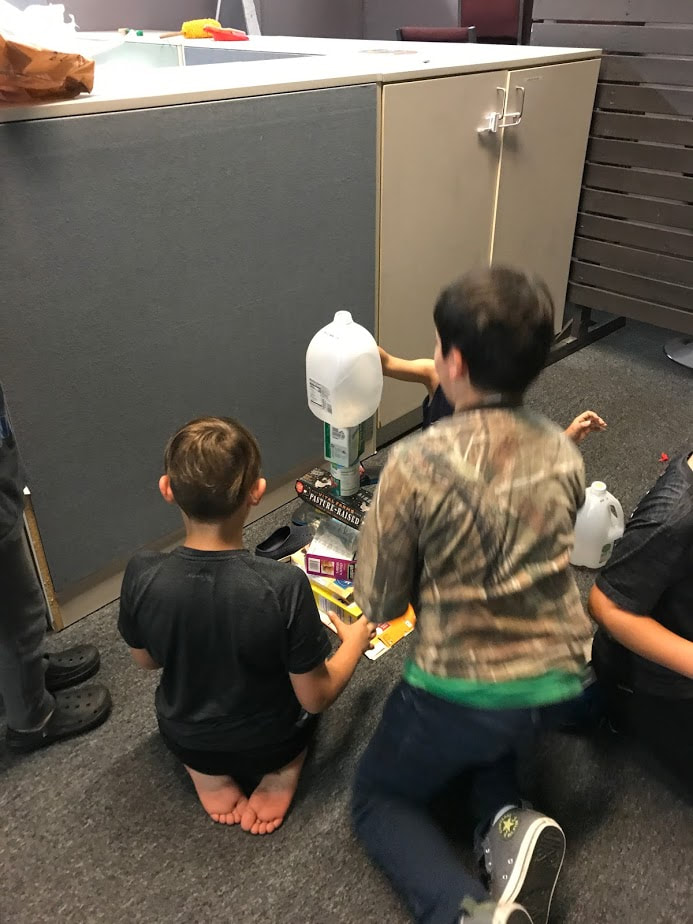
Final challenge: Build a robot
Using the recyclables, scissors and masking tape, the students were to build a robot. To get the points, it had to look like a type of robot.

The World in His Hands was a wonderful walk through different biomes and ecosystems. Learning about how these places function. Learning about the different animals that live in those places and then finishing up with different ways to take care of our world.
The whole world is definitely in our Creator God's Hands.
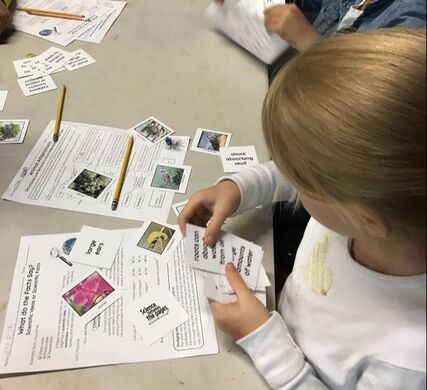
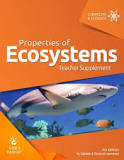
I covered most of the lessons in Properties of Ecosystems from the God's Design curriculum from Answers in Genesis. I made different flashcards, games and handouts to go with the different lessons that was 2nd and 3rd grade friendly. If you are looking for a year long science class, give this one a shot.
The whole world is definitely in our Creator God's Hands.
I covered most of the lessons in Properties of Ecosystems from the God's Design curriculum from Answers in Genesis. I made different flashcards, games and handouts to go with the different lessons that was 2nd and 3rd grade friendly. If you are looking for a year long science class, give this one a shot.
Lesson 12: Conservation
|
The World in His Hands class has been about the biomes and ecosystems in God's world and the processes that our Creator God set into motion to sustain the biomes and ecosystems.
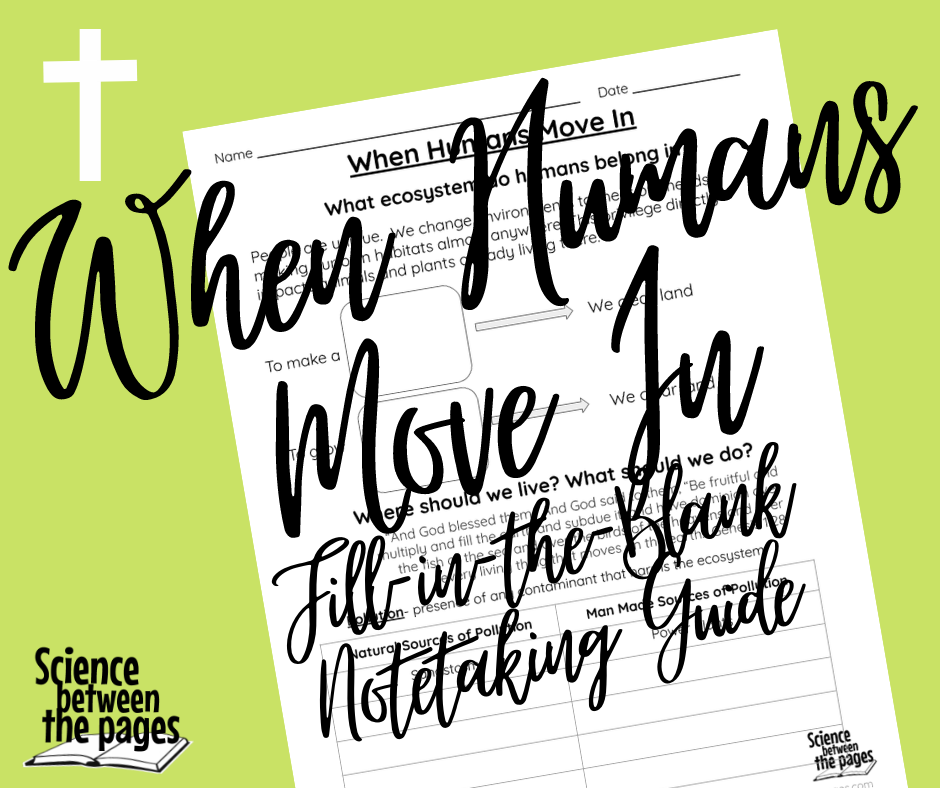
Today, I asked the students "What ecosystem do humans belong in?" Everywhere we live or go impacts the animals and plants that live in any particular area. We need a home to live in but in order for us to build a home we must clear land. In clearing land, we destroy plants and animals that lived there. The animals would have to move. We also need food to live. In order for us to grow our own food, we also must clear land to farm. The growing of food is also a process and the fertilizers and pesticides can also adversely impact the animals in an ecosystem. So, where should we live? What should we do? When we are not sure what to do and we want to make a good and right decision, we need to look to the Bible for direction and God for answers through prayer. I read to the students Genesis 1:28. This is what God tells Adam and Eve in the beginning. "And God blessed them. And God said to them, "Be fruitful and multiply and fill the earth and subdue it, and have dominion over the fish of the sea and over the birds of the heavens and over every living thing that moves on the earth." Should we stop having children because more people makes more problems for the environment? No. God said be fruitful and multiply. From the beginning, God has communicated His love for life and people and children. Children are not a burden or inconvenience as our culture tells us, they are a blessing, an inheritance (Psalm 127) Who has dominion? control? God has placed the responsibility of taking care of His creation into our hands. We have been given a beautiful and wonderful place to live and He has given us the dominion over it. So we can choose to clear land for our homes but always be mindful of the impact that it has on the environment. We can cut down trees for all that we need but we need to be planting more. We can hunt but we should not hunt to extinction. We can build factories and power plants but we must have a good plan for the the waste that is produced so that the environment is protected as well. We must be responsible. Finally, we talked about pollution. Pollution is the presence of any contaminant that harms the ecosystem. Pollution is not just man-made although we are responsible for a good majority of it, there are natural sources of pollution. Natural sources of pollution include sandstorms, erupting volcanoes, and wildfires. Man-made sources of pollution include power plants, factories, trash, controlled burns. All of this information I placed in a handout in order that we might have a good interactive conversation. This class did amazing with it. |
|
read aloud
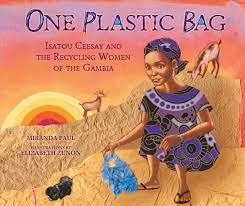
Funneling down the idea of pollution in a small way and showcasing one woman's desire to help, I read aloud to them One Plastic Bag by Miranda Paul
This is a true story of a woman wanting to make a positive impact in her environment.
This is a true story of a woman wanting to make a positive impact in her environment.
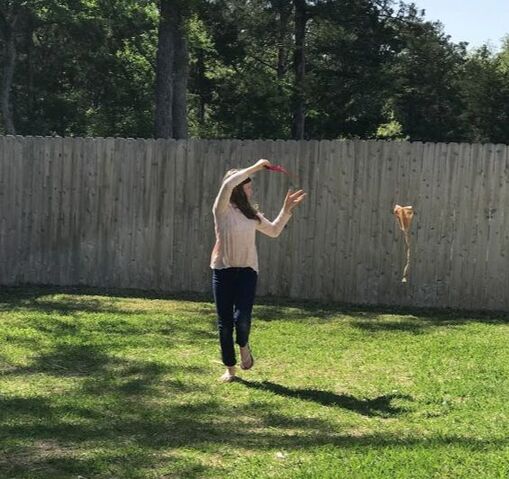
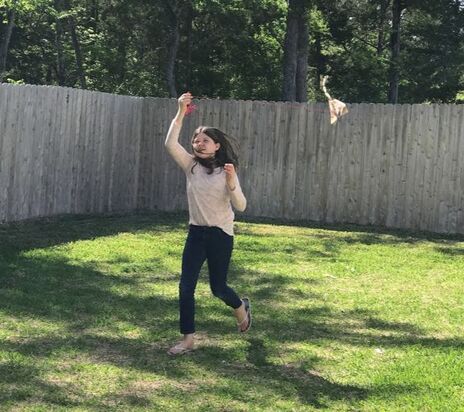
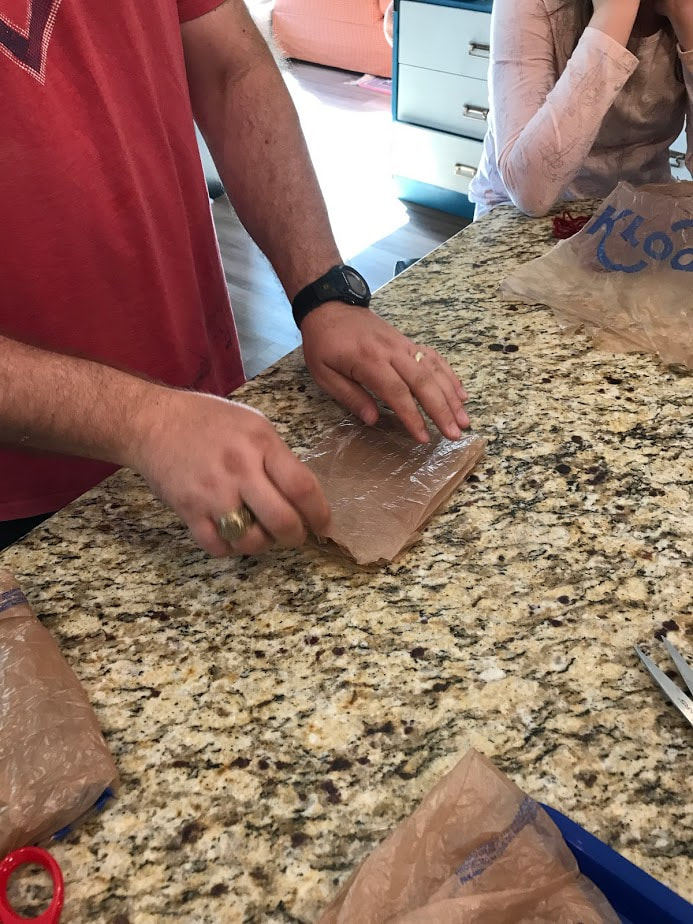
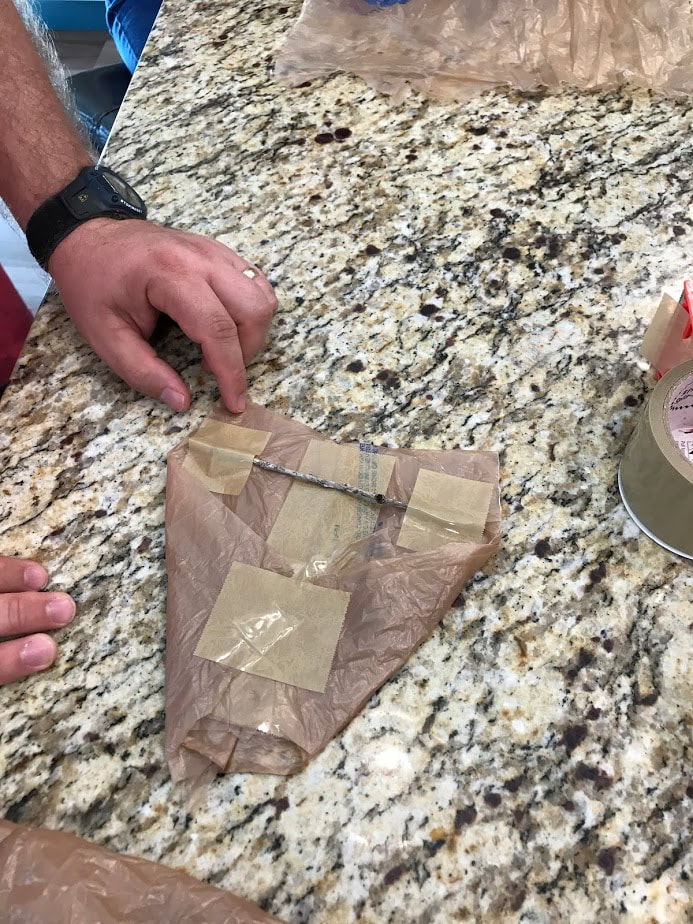
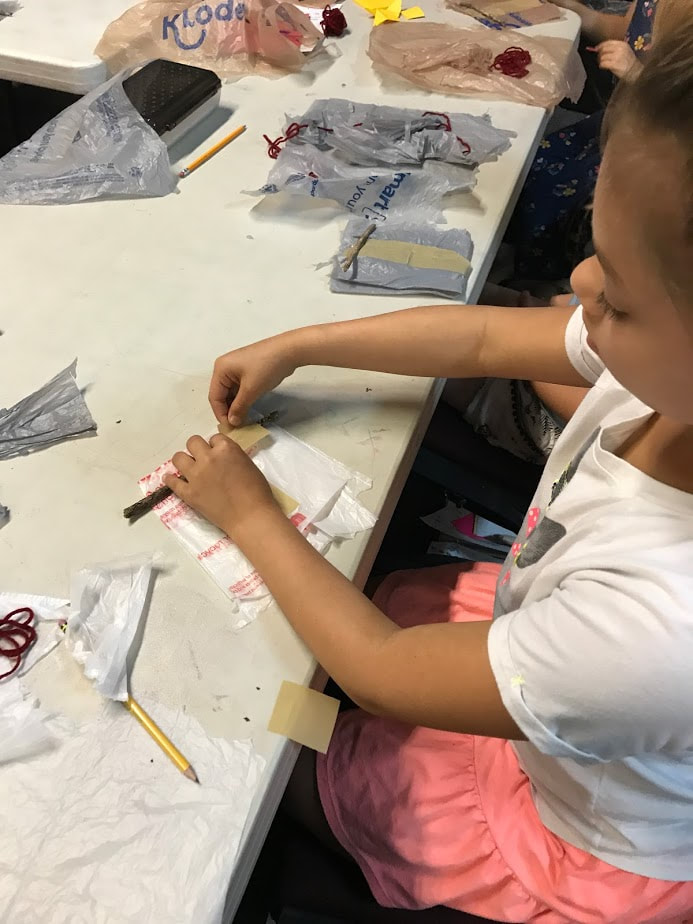
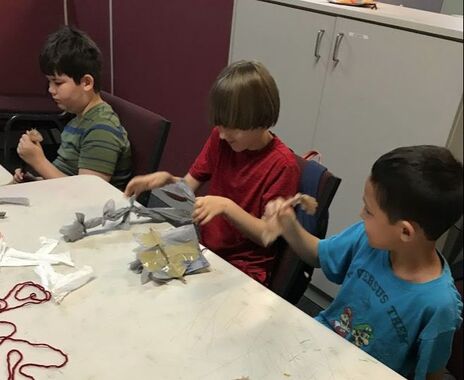
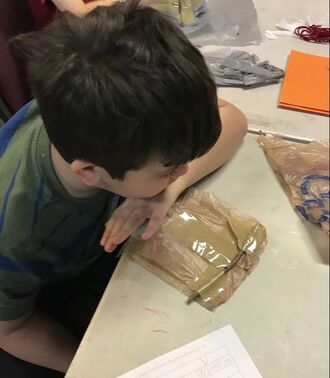
In honor of trying to reuse the many plastic bags in my house, we make Plastic Bag Kite kits for the students to build during class. As with all engineering feats, it takes a couple of times to perfect the design.
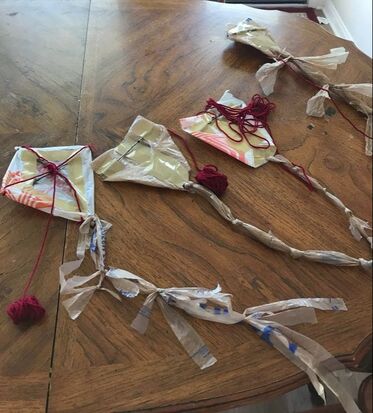
After testing all of these kites, I felt like the second one from the left flew the best. There are so many options for this.
|
|
How to make a simple plastic bag kite
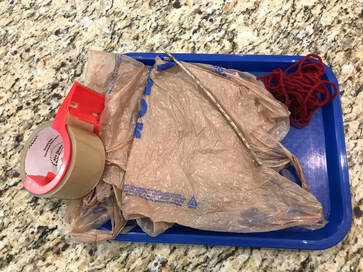
The supplies are very simple. You will need:
- a plastic grocery bag
- yarn or string,
- packing tape
- scissors
- stick
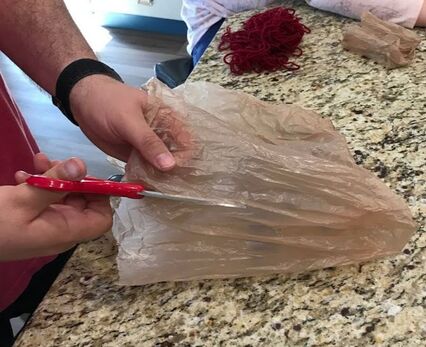
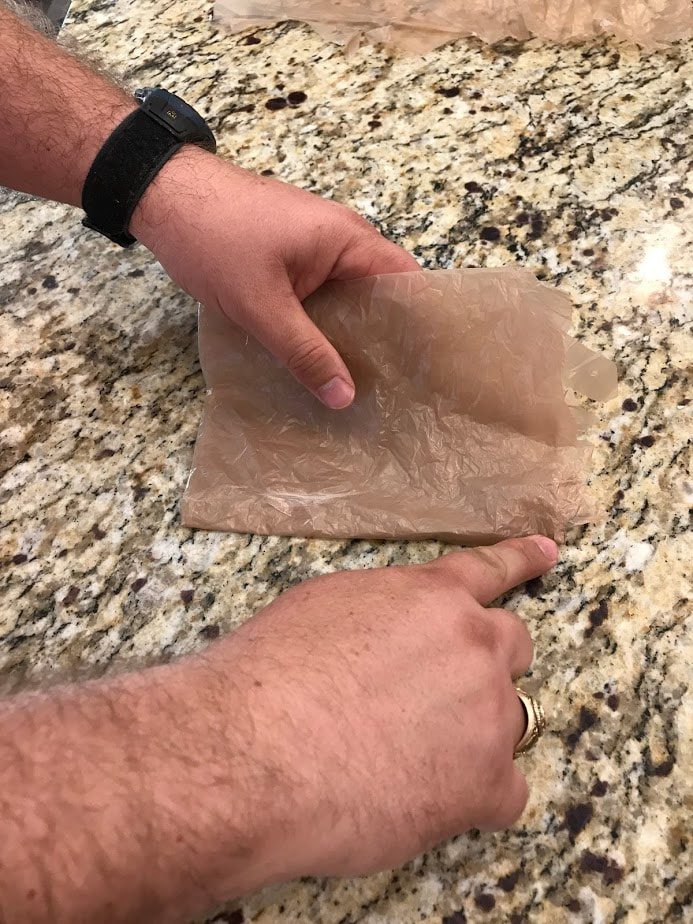
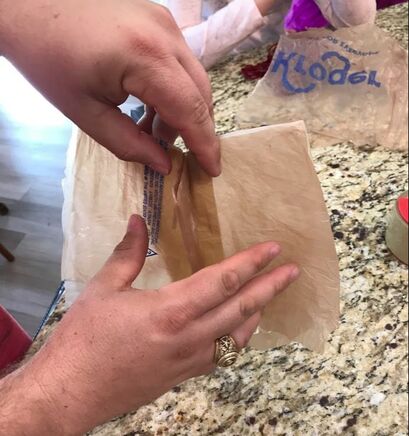
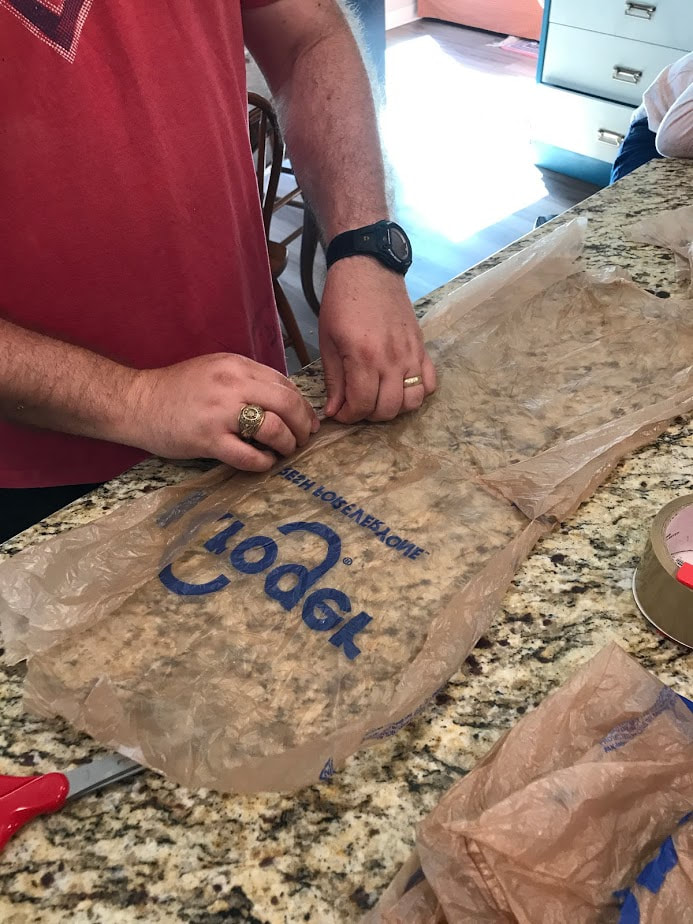
First, cut the handles off
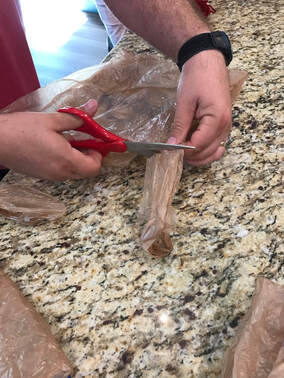
Cut the plastic bag so that it lays out flat by cutting down the sides.
Once the bag is flat, cut it in half. One half is for the body of the kite, the other half can be used for the tail.
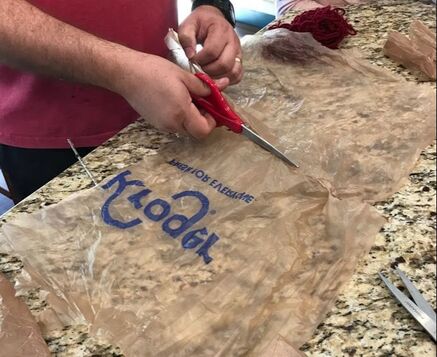
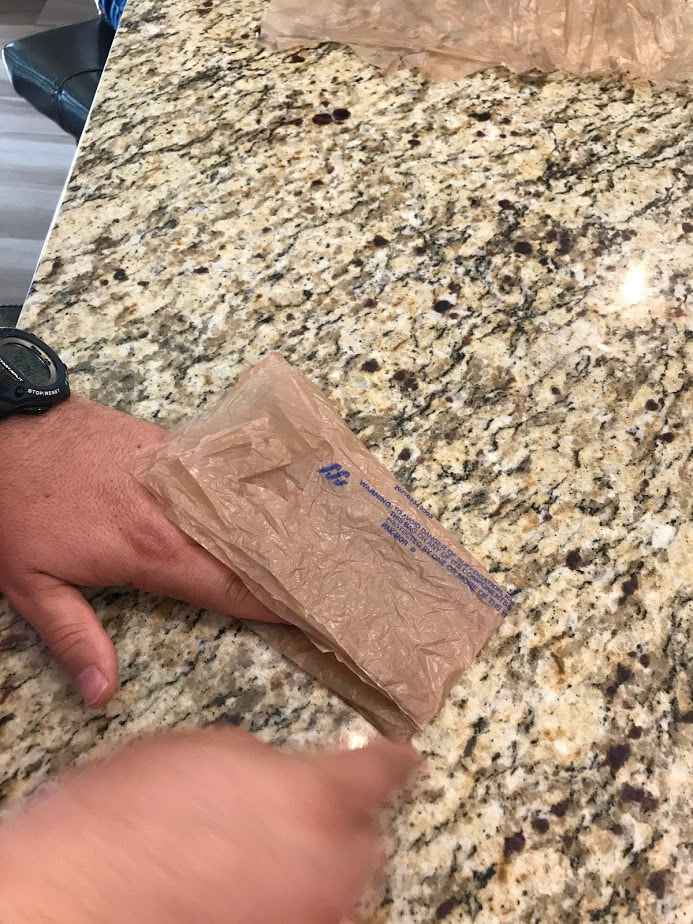
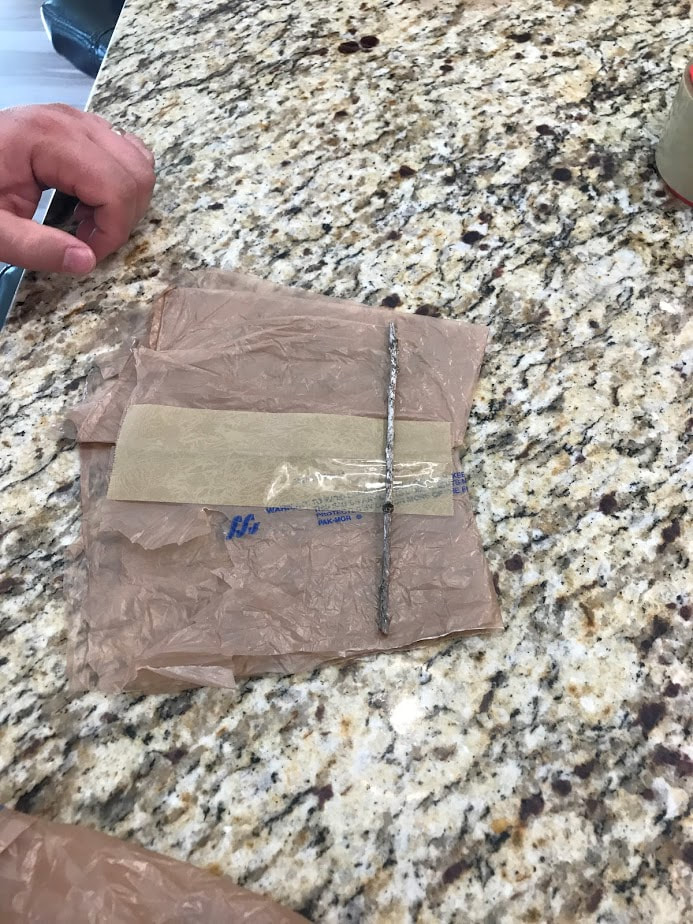
Next, do three hamburger folds.
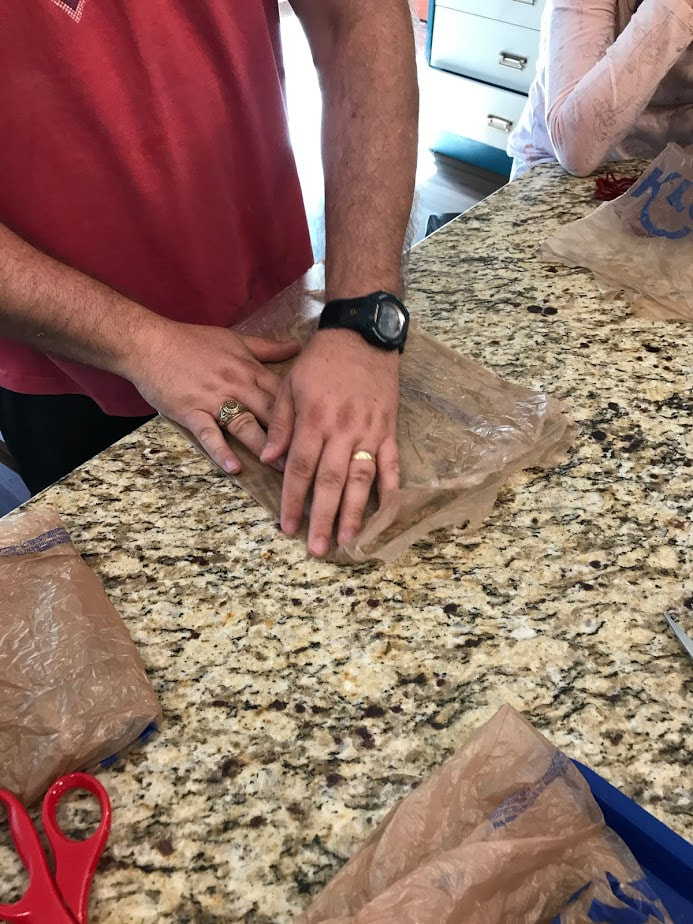
Next, you will attempt to fold the bag like a paper airplane making the fold at an angle from about 1 inch up on the left to the corner at the bottom of the folded plastic bag. You will fold half of the bag one way, flip it and match the fold on the other side just like folding a paper airplane.

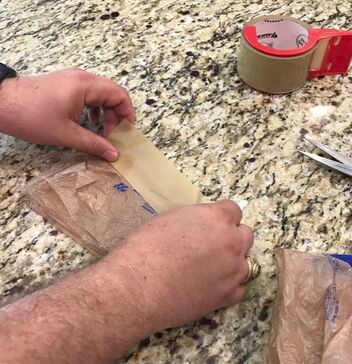
Take a piece of packing tape and tape the fold so that it makes a flap on the inside to place the hole for the string.
|
|
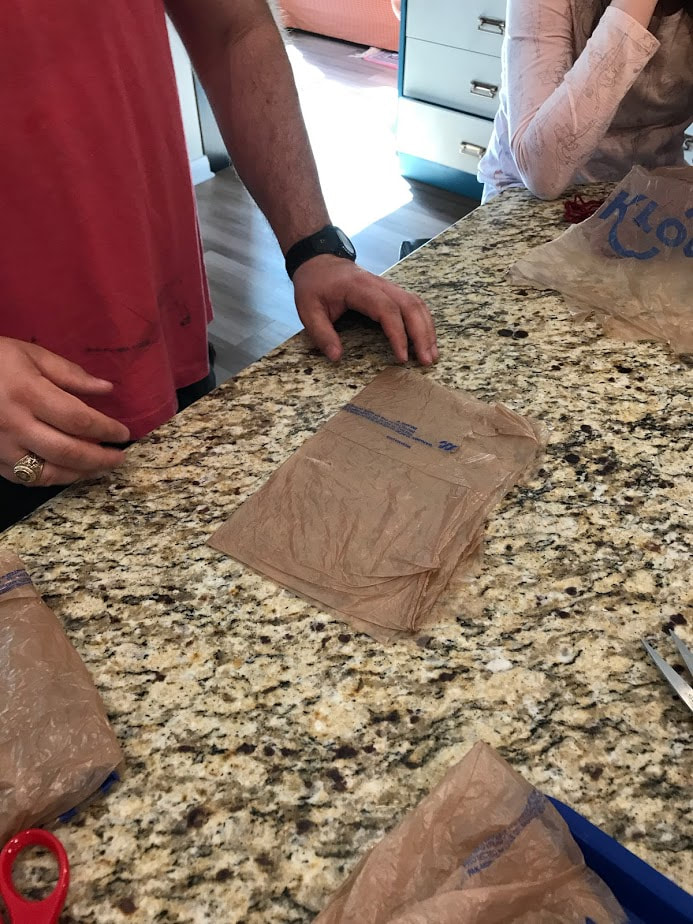
Lay the kite with the tape facing up and place a stick the length of the kite and tape it on both sides
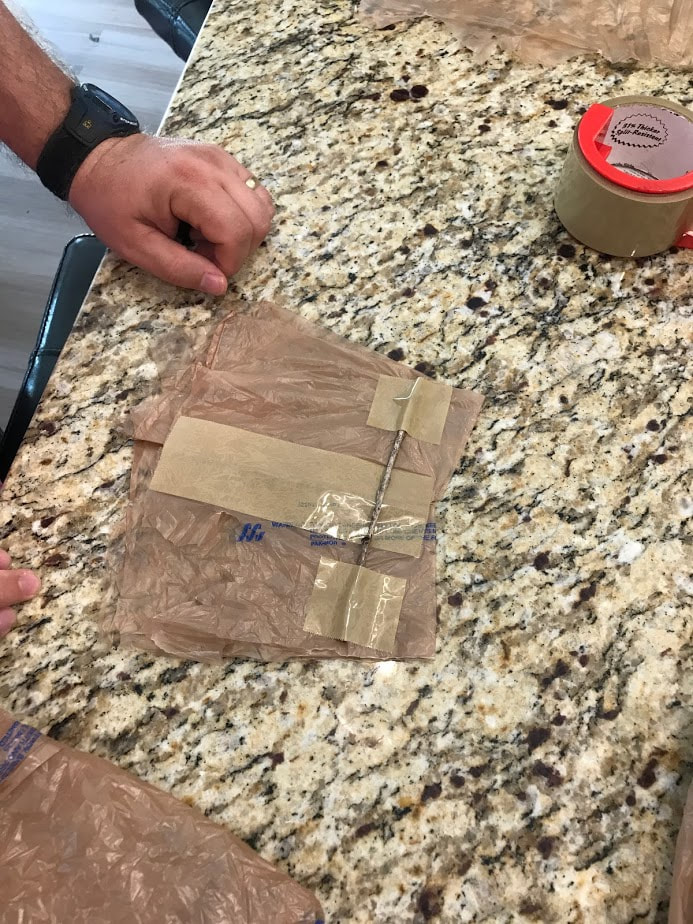
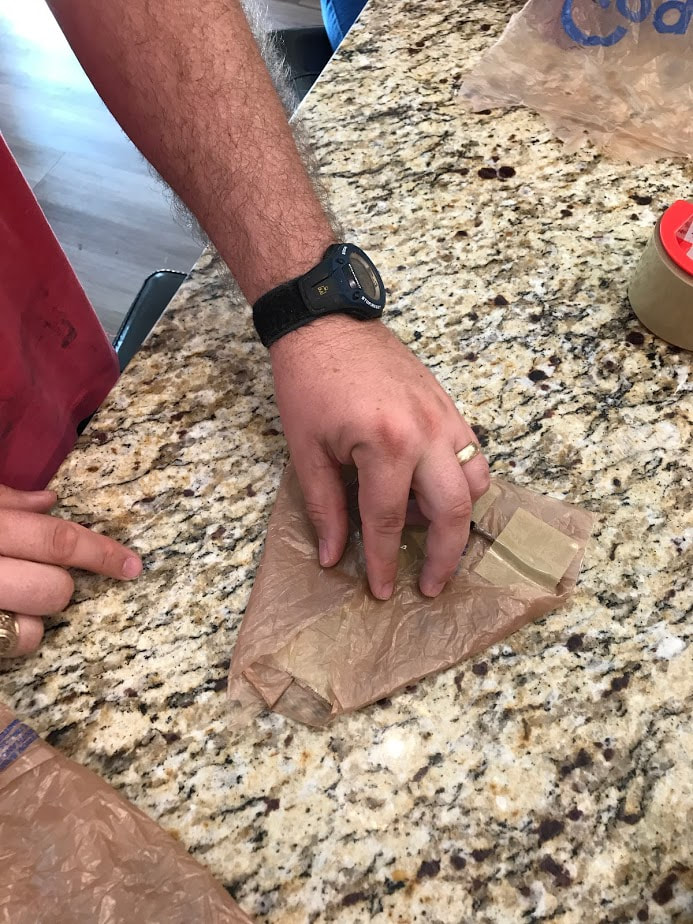
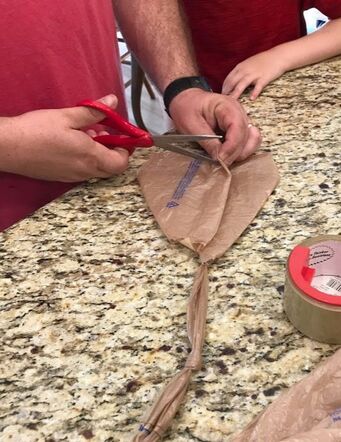
Fold the bottom corners of the kite in to make a kite-shape and tape.
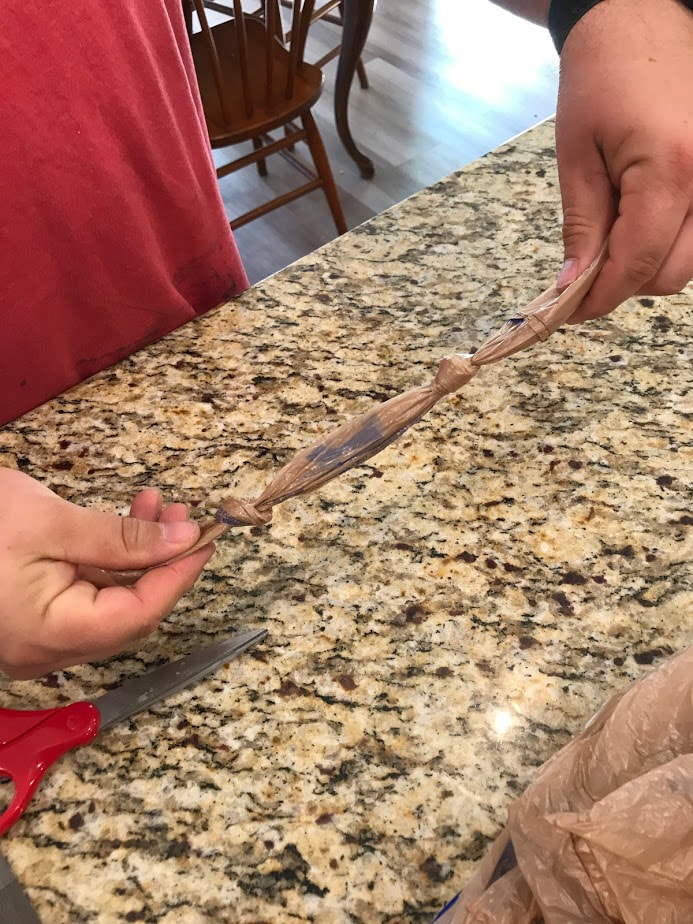
You can either use the other half of the plastic bag OR you can cut another plastic bag flat and use this to roll up into a kite tail. I did it both ways and the longer tail seems to add a measure of stability to the kite when flying. Also, you can knot the tail or use the handles to make bows. I found that the knots helped the kite fly better than the bows but the bows are cute.

Flip the kite over and put a hole into the flap for the string to go through. My husband used scissors here but I used a pencil in my science class and found that it worked well.
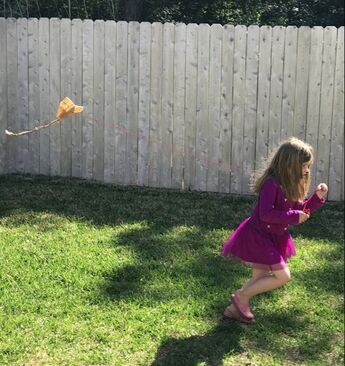
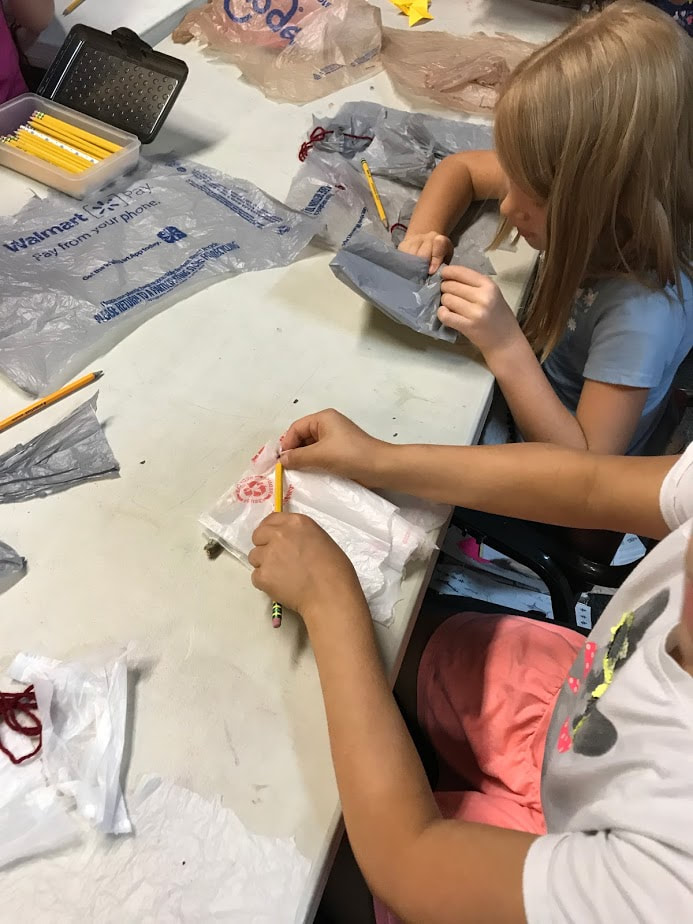
Science Class
For class, we put little kits together for the students. We cut the bags into sheets already, placed a stick, and the yarn that they would need. I walked around and checked their work as I gave them tape.


|
|
Lesson 11: balance of nature
review
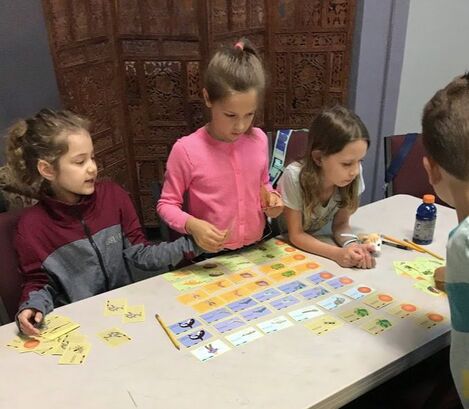
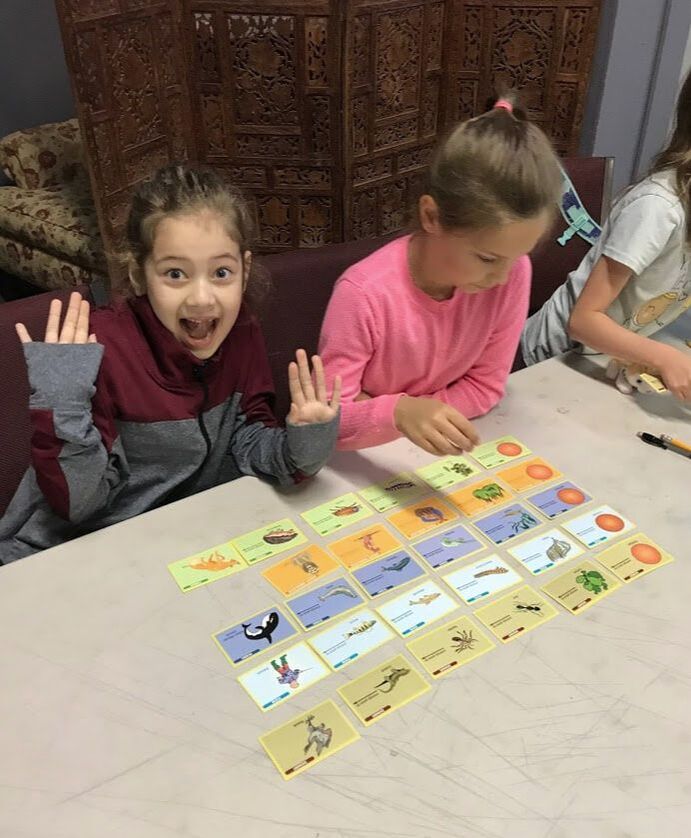
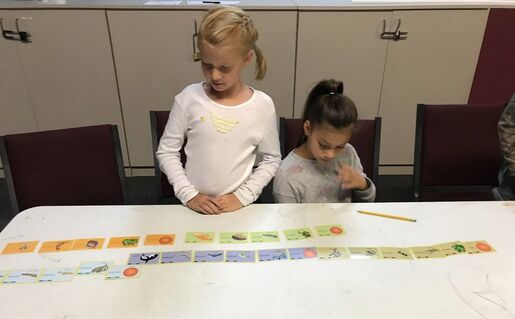
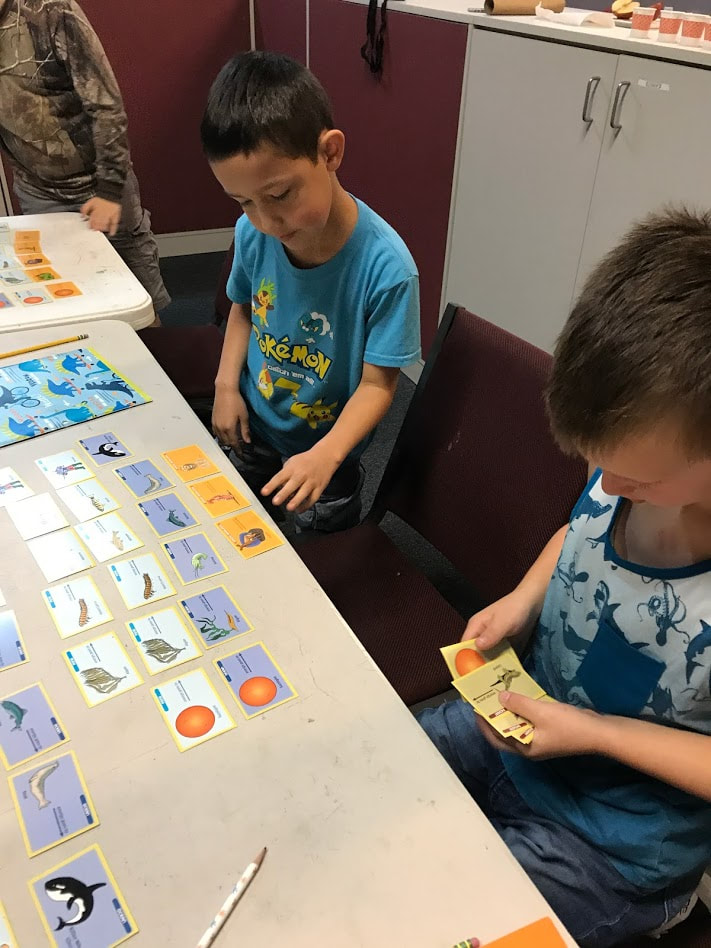
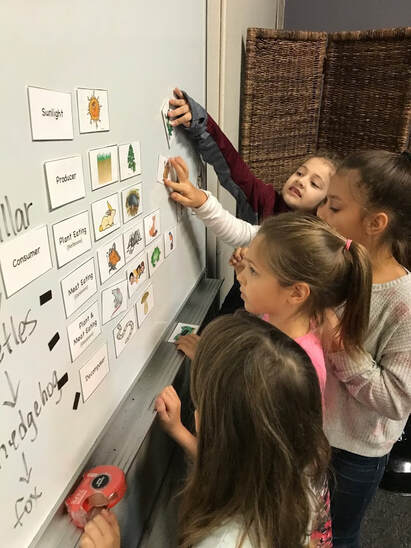
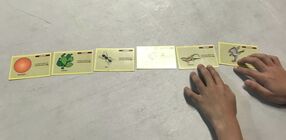
We began our review using the food chain Dyno Cards for five of the biomes/ecosystems that we discovered this past year. After learning about each ecosystem and now reviewing them together, they are able to recognize the patterns that have been made by our Creator to sustain life. Energy comes from the sun and always helps plants (producers produce, flora to grow). Then the consumers come and eat, receiving energy and so on and so forth transferring energy from one organism to the next and then recycling.
|
|
|
|
After we reviewed the flow of energy as seen through the different food chains in biomes all over the world, we reviewed what a producer, consumer and de-composer were.
taking notes
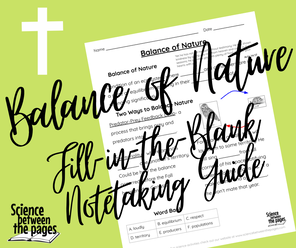
I introduced today the Balance of Nature. I used these notes to help us. This handout was very helpful as it defined what the balance of nature was and two ways that God has made to keep the balance of nature.
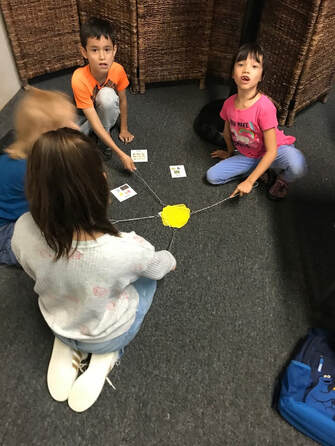
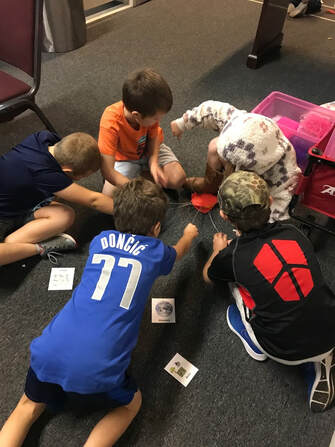
The way that we are most familiar with is the Predator/Prey Feedback Loop where when there isn't enough producers, the consumers will starve. Once the consumers die off, then the producers can start growing again and once they begin to grow again, then the consumers will come back. This is yet still another amazing process that God has put into place by His grace. We as humans are often the reason there is an imbalance of nature. Humans see an animal with something of value, they hunt this animal, this animal is taken out of the Feedback Loop effecting other organisms that depend on that animal for life thus killing off other organisms unknowingly. For instance, humans hunted otters for their fur. Otters really love sea urchins. Sea Urchins love kelp. When all the otters were killed, it left the sea urchins to really thrive thus destroying the kelp forests. Eventually the sea urchins died off because there was not enough food to eat. After a while, the kelp forest came back, so did the sea urchin and humans stopped killing the otter and there was balance again. Despite human involvement, God's processes remain and redeem. Praise!
Another way that can balance out nature is territoriality where animals will mark their territory and other animals will respect that territory and not try to infringe on it. This is the way it might have been before the Fall in the Garden of Eden. There was no Predator/Prey in the beginning as there was no death. Death entered the world when sin was begat.
Read Aloud
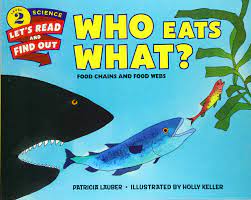
We read Who Eats What? Food Chains and Food Webs by Patricia Lauber in order to give us more examples of food chains and how every meal we eat, we are at the end of a food chain/transfer of energy.
Food Chain Game
To demonstrate the balance of nature, we made these cards for the students to hang around their necks. They were to 'tag' each other if that was the right food they were to eat. This food chain comes from the book Who Eats What? mentioned above.
|
|

|
|

|
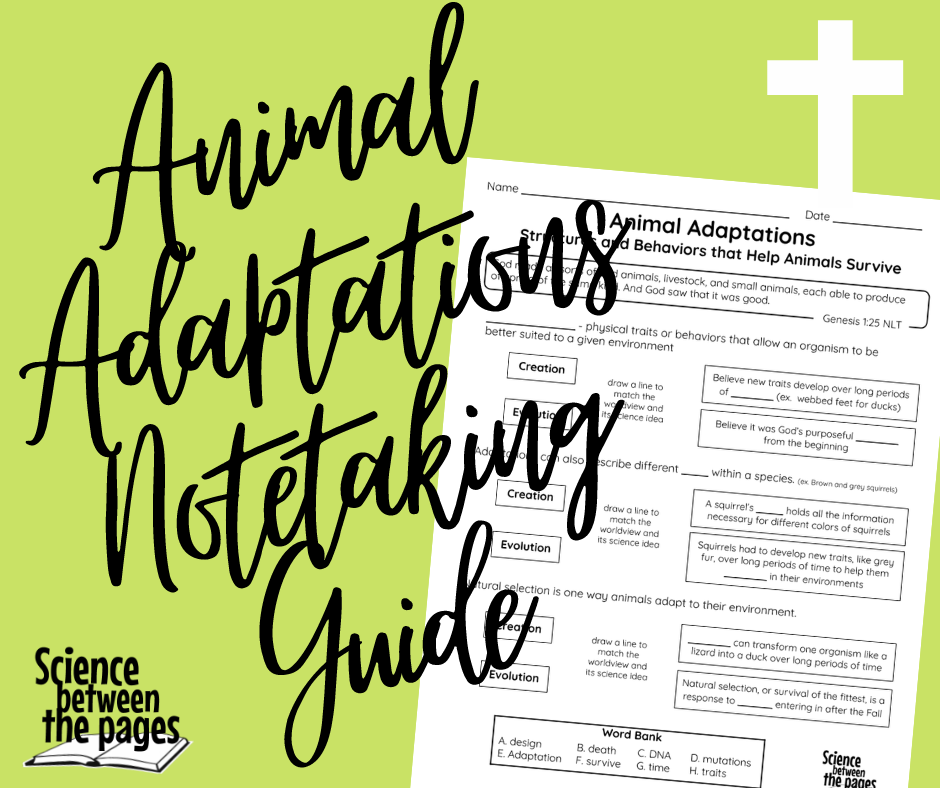
lesson 10: Animal Adaptations
|
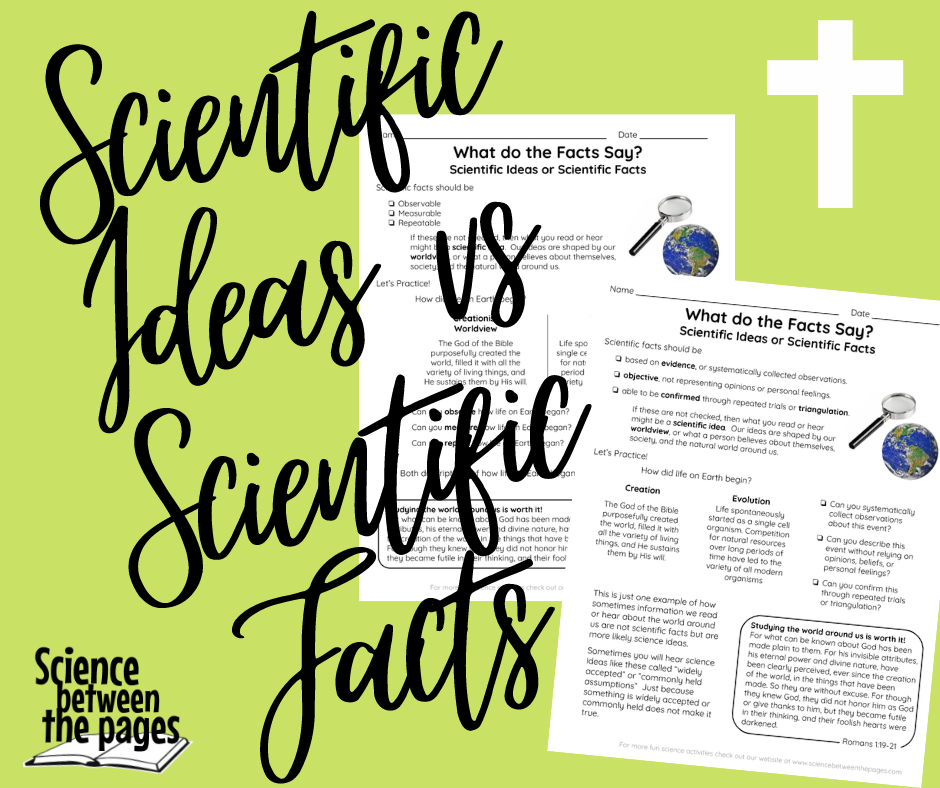
Before I could teach about Animal Adaptations, I had to teach the students about what the difference is between a science fact and a science idea.
I used this handout to help us out. Please go by our TpT store and check it out. |
|
Science Fact versus Science Idea
Science Facts, in order to be called a fact, must be
Where do science ideas come from? From scientists who have ideas about science concepts. However, much of what a person believes about the world around them is dictated by their worldview.
There are two main worldviews here:
Creation and Evolution
Creationists believe that God created the world and everything in it.
Evolutionists believe that life spontaneously happened and we evolved from a single-cell organism over a very long period of time.
The origin of life:
Can we observe it? No
Can we measure it? No
Can we repeat it? No
Therefore any science that deals with how long ago something happened and how it happened is a science idea and not a science fact. Many books published use science ideas as facts and it just isn't accurate.
We practiced learning to discern science ideas and what worldview they come from in class. I read phrases from different books and had the students determine if a book was evolution based or creation based. I wanted to make them aware of this as most science books you might find in the library or elsewhere have evolutionary undertones and ideas. Once they can recognize these, they can be able to discern what is truly a science fact from a science idea.
Science Facts, in order to be called a fact, must be
- Observable
- Measurable
- Repeatable
Where do science ideas come from? From scientists who have ideas about science concepts. However, much of what a person believes about the world around them is dictated by their worldview.
There are two main worldviews here:
Creation and Evolution
Creationists believe that God created the world and everything in it.
Evolutionists believe that life spontaneously happened and we evolved from a single-cell organism over a very long period of time.
The origin of life:
Can we observe it? No
Can we measure it? No
Can we repeat it? No
Therefore any science that deals with how long ago something happened and how it happened is a science idea and not a science fact. Many books published use science ideas as facts and it just isn't accurate.
We practiced learning to discern science ideas and what worldview they come from in class. I read phrases from different books and had the students determine if a book was evolution based or creation based. I wanted to make them aware of this as most science books you might find in the library or elsewhere have evolutionary undertones and ideas. Once they can recognize these, they can be able to discern what is truly a science fact from a science idea.
|
We then delved in Animal Adaptations.
Creationists and Evolutionists both use this term but they mean different things to each worldview which is why I had to introduce the distinct worldviews first. I used this handout to help me out in explaining to the students about animal adaptations. Adaptations to Evolutionists requires a lot of time and a lot of death. Adaptations in animals for a Creationist requires an awesome Creator God who designed His Creation superbly. The adaptation of webbed feet in a duck, evolutionists may believe came from another species of animals just because we see webbed feet in all kinds of animals not just ducks. So evolutionists think they were all from the same ancestor. However, the Bible states that God created each animal according to its own kind. Every animal has its own kind with its own DNA. So you can see how an evolutionist would think of adaptation as an animal's DNA changing to make a new type of animal, creationists believe that these adaptations were part of Creator God's design to provide for His creation. Plus, if you see a reptile with webbed feet and a duck with webbed feet, it doesn't mean that it came from the same ancestor animal, it could mean that God thought that design was a good match for these particular animals. He is the Creator, He can use His designs as much as He wants. |
|

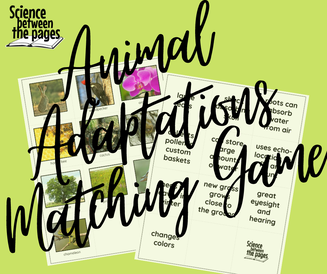
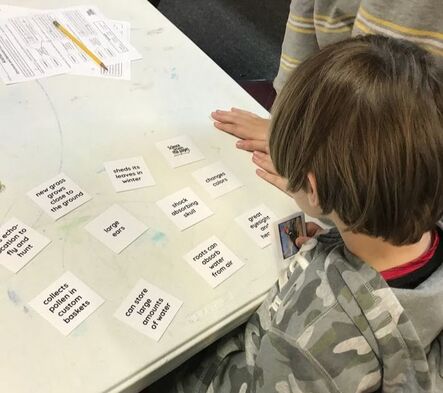
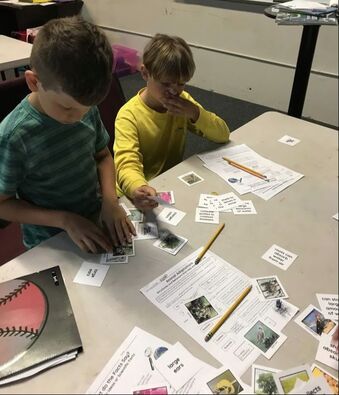
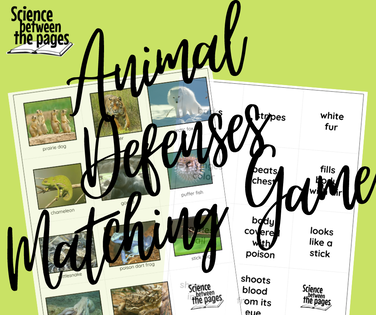
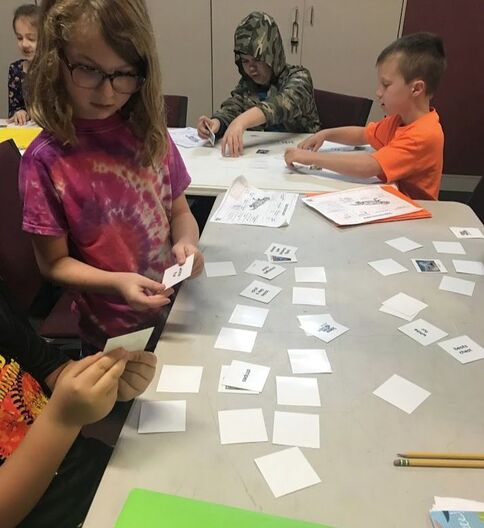
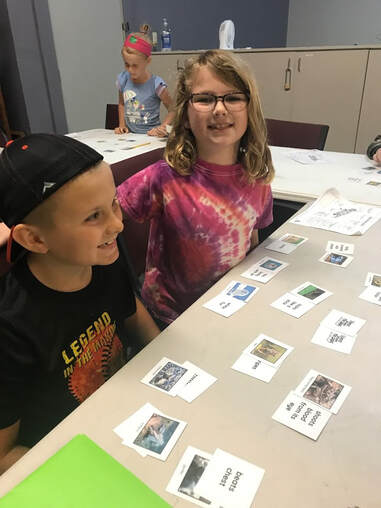
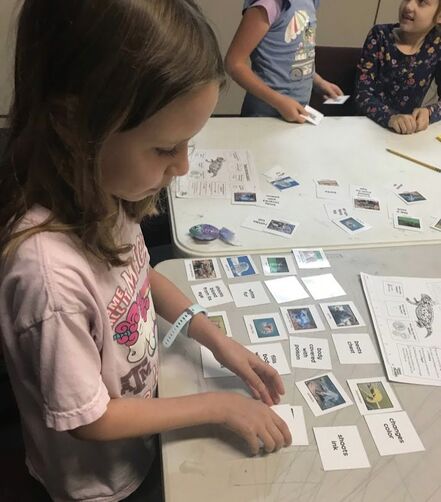
We had some great discussion and the students were participating well but it was a lot of information. I gave them a brain break and had them do another matching game using animal adaptations God has designed.
I found these animal adaptations in Answers in Genesis Properties of Ecosystems Teacher Supplement and then made these matching cards like the Animal Defense cards from last week.
As they placed the matches together, I would be reading out the adaptations.
I found these animal adaptations in Answers in Genesis Properties of Ecosystems Teacher Supplement and then made these matching cards like the Animal Defense cards from last week.
As they placed the matches together, I would be reading out the adaptations.
|
|
|
|
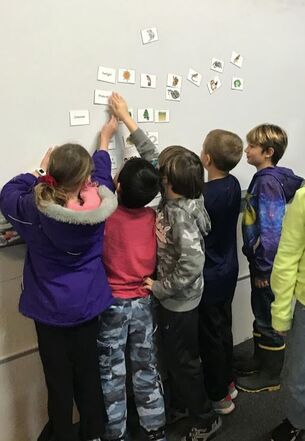
Lesson 9: Animal Defenses
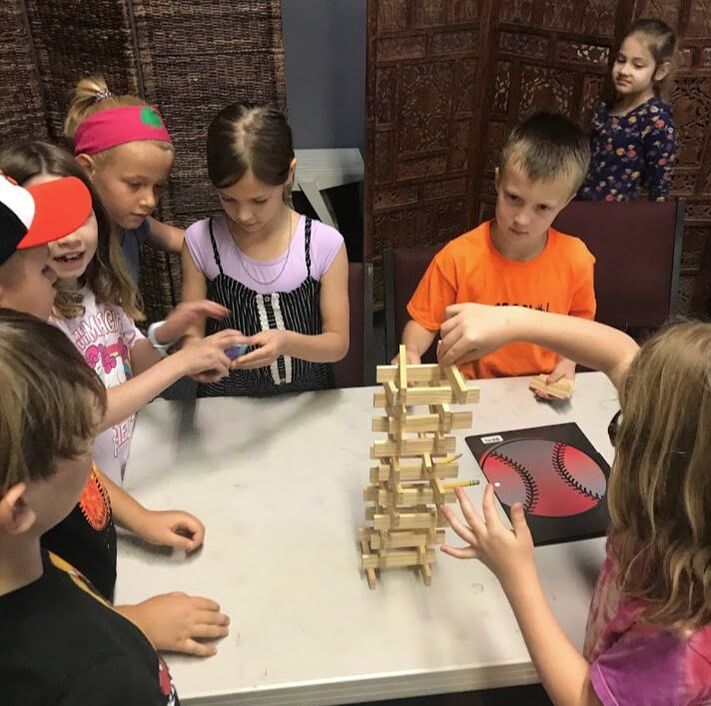
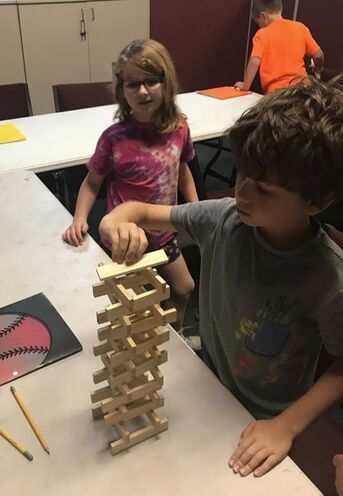
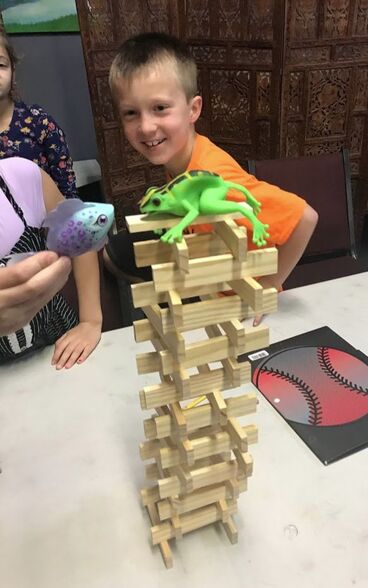
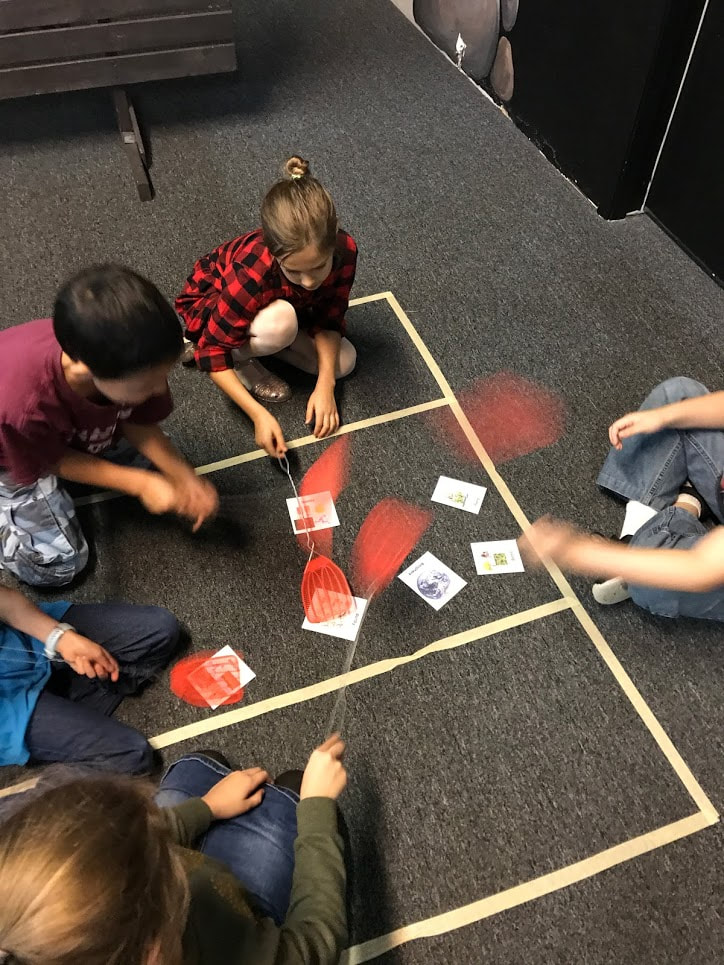
We began class today with our Building Towers Cooperative Activity.
During this activity, I ask review questions and whoever answers the question correctly, will receive a building block. When I am done asking questions, they can use the blocks to build the highest tower they can.
Usually one student would have 2 or 3 blocks which by themselves cannot build a very massive tower, however, if they collaborate and share their blocks with others in the class who have also earned blocks, they can build a much higher tower.
This is hard. This is hard for elementary students, middle school students, high school, college, and adults. We want to do everything on our own, we don't want to work together, we don't want to share and we definitely want to do everything OUR way. The science community is no different. I pray that by having this activity, the students can learn to collaborate, share and build each other up.
I did this same activity with my older students and it seems that my younger students are quicker to work together than my older students. This reminds me of how Jesus says that those who are like children can enter the kingdom of God. Perhaps the younger we are, the less we hold on to things that aren't good for us...just a thought.

|
|
In introducing this lesson, I brought the students back to the Garden of Eden. In the beginning, before the Fall of Man, animals did not prey on other animals. Man did not kill, there was no death. However, after the Fall, God cursed the earth and one of the consequences of sin was death entered the world thus now we have food chains and are learning about the spectacular ways that God equipped animals to defend themselves in this now fallen world. Just as God clothed Adam and Eve before He sent them out of the Garden, so He provided for the animals as well with some great defenses.
All of the animal defenses that we learned about today fit into three categories:
Flight- run, fly, swim away fast
Trickery-camouflage, intimidation, shooting ink/blood from their bodies
Fight- horns, antlers, claws, teeth, quills, poison
I wrote these on the board and had the students call out to me how these defenses were used.
I showcased a native animal to Texas and Texas' state reptile, the Texas Horned Lizard.
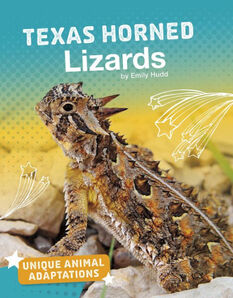
I passed out a note taking sheet on the Texas Horned Lizard that corresponds to our interactive read aloud, Texas Horned Lizards by Emily Hudd
I passed out a note taking sheet on the Texas Horned Lizard that corresponds to our interactive read aloud, Texas Horned Lizards by Emily Hudd
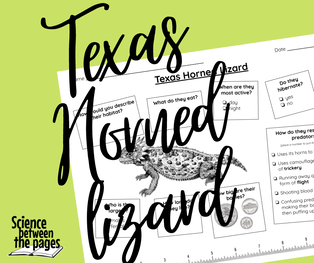
The note taking sheet that I used for this read aloud is here.
I went over some of the questions that this guide was asking so they could be listening for the answers as I read to them about these amazing lizards.
On the side of this guide has a list of defenses this lizard uses to defend themselves. I had the students number them in order of which defenses they use first, next etc.
For example: Their first line of defense is camouflage (trickery). I would have them place a number 1 next to that defense.
Their second line of defense is making their body's flat and puffed up to confuse their predators which is another form of trickery
Their third line of defense for larger animals is shooting blood out of their eyes.
Their fourth line of defense is their horns.
There is a fifth mentioned in the sheet for running away but I am not sure they are that fast so I did not have them label this one.
I really liked using this note taking guide for these 2nd and 3rd graders. They could easily jot a word down or check a box or circle an answer. The ruler on the bottom really gave them a realistic picture of just how big these reptiles are.

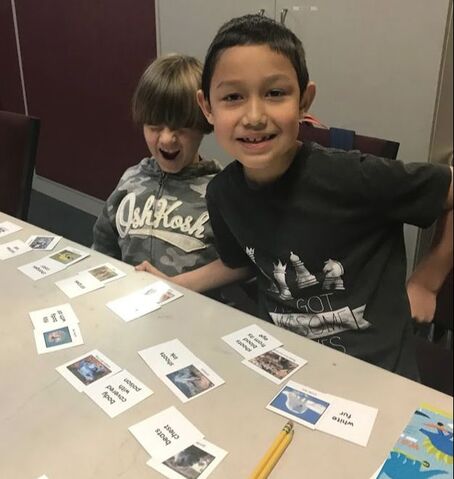
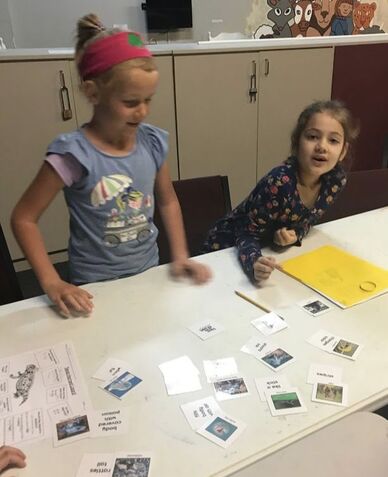
I have mentioned in past posts that I am using Answers in Genesis' God's Design Science Series Properties of Ecosystems as my foundation for developing this class. In this curriculum, it has the information I need to make the Biome/Ecosystem sheets we have been making for The World in His Hands. They have some imbedded activities within the different topics and one of the activities they suggested was making some Animal Defense cards for this section. We went ahead and took their suggestion and made the cards. If you are using this curriculum in your homeschool, you can get these cards to supplement your science learning.
|
For our final activity, I made several of these cards. I printed them on card stock and laminated them for durability.
There are three ways I wanted to use these cards and I only had time to use them the first way. 1. Simply match the animals to their animal defense 2. Flip the cards over and play a matching game 3. Play a card game like 'War' where one student has all the animals and the other student has all the defenses and they flip cards. If they match, slap first and they get those cards. The first person with all the cards wins. If they match the Science Between the Pages logo and slap it, they get those cards too. |
|
|
|
Even in our fallen world, God still loves and provides and wants all to come to a saving knowledge of Jesus Christ. This is Nicole at Science Between the Pages, proclaiming God's Excellencies through Science.
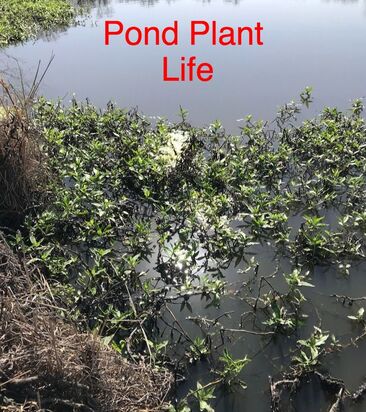
Lesson 8: The measure of a pond
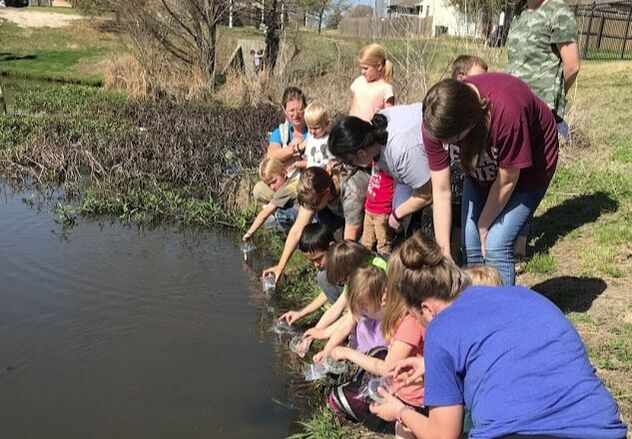
This week, I merged the Kindergarten/1st grade class with the 2nd/3rd grade class to study Pond Science.
We began at the beginning.
In the beginning God created the heavens and the earth. Genesis 1:1
The Kindergartners and 1st graders rocked the review of the days of creation we have covered so far.
Day 1- God created the Light
Day 2- God created the sky, separating the waters top from bottom
Day 3- God made the land and made the vegetation
As an extension from last week, I handed them a scavenger hunt. They were to go around the pond and look for pollinators around that would be pollinating the flowers which would then produce seeds.
I grabbed this scavenger hunt from here.
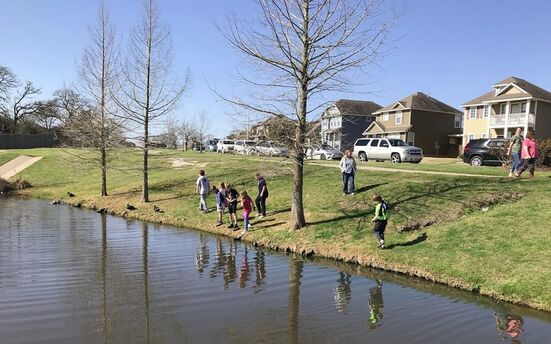
I had a few questions that I wanted to answer while at the pond today.
1. How clear was the water?
2. How deep was the pond?
3. What can we find using our homemade pond scope?
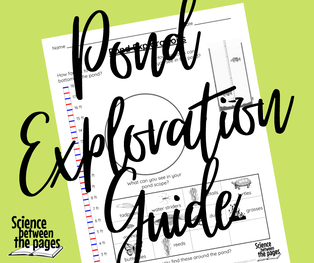
I had a Pond Explorations handout for them to document all their information or for the parents to have and they could fill it in when they arrived at home. Either way, I find that having a handout gives us a focus in our explorations and allows for a space to document our findings as in-training scientists.
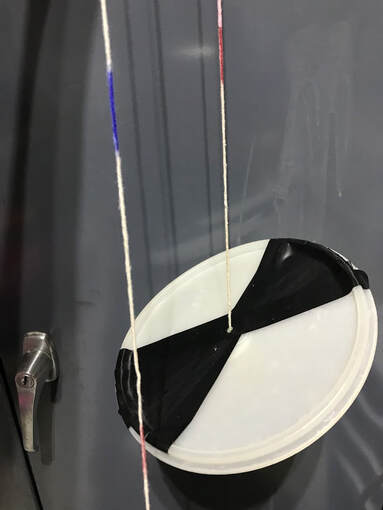
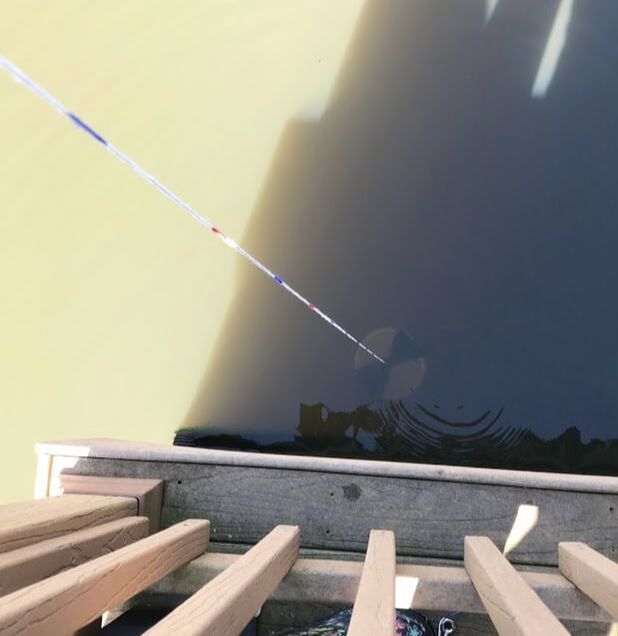
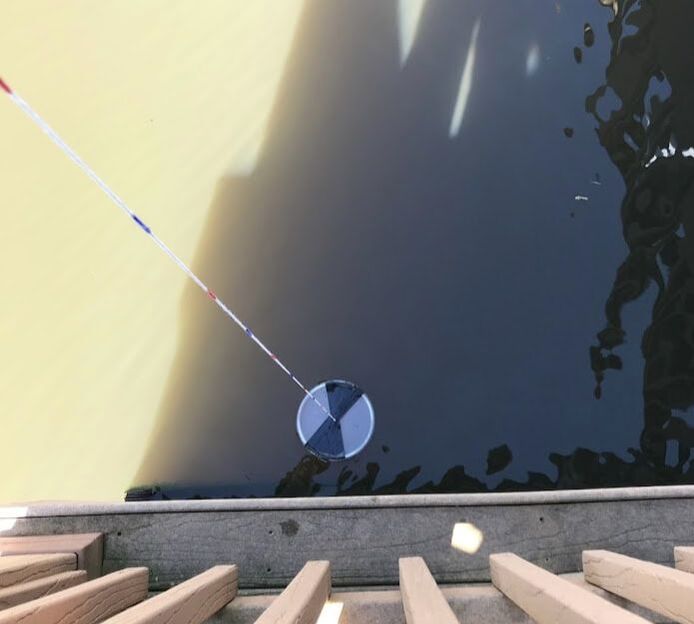
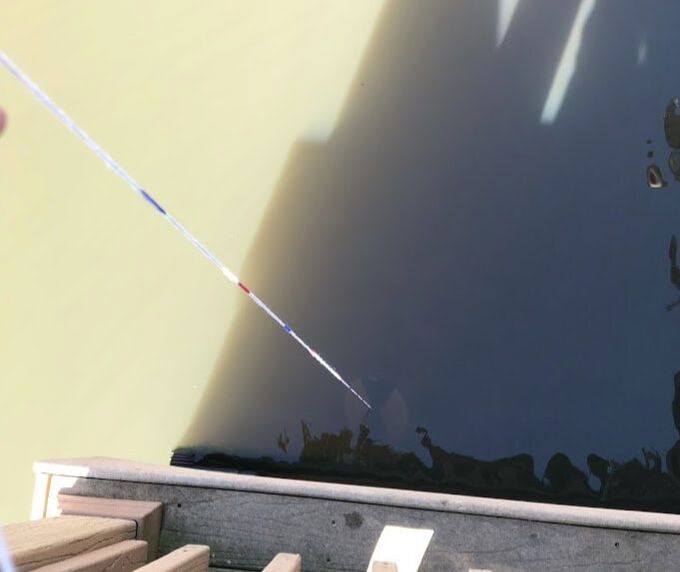
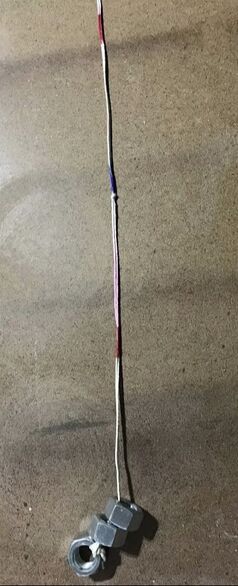
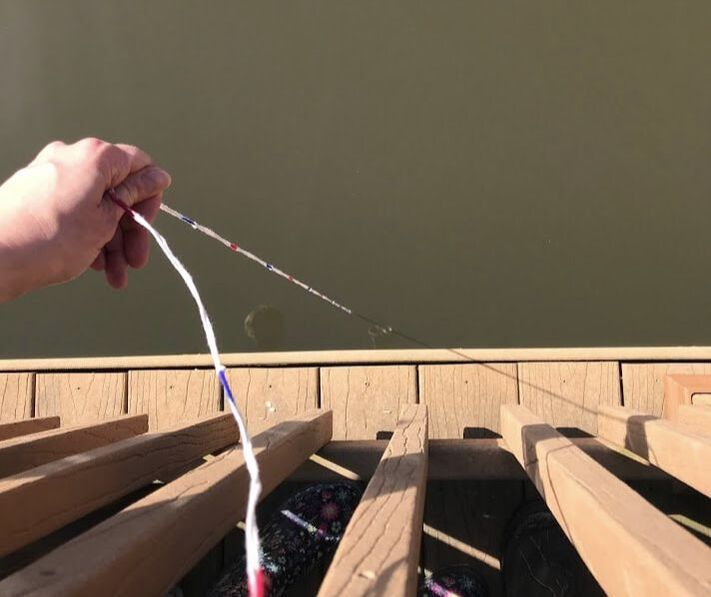
In order to see how clear the water was, my husband made me a homemade Secchi which is an instrument used to document how clear ponds and rivers are in order to determine pollution and sediment in the water.
The materials you would need to make one of these yourself is:
White plastic lid (I used a lid to an old Tupperware container)
Electric tape
Screwdriver or something else to puncture a hole in the middle of the lid
An inch long washer and bolt
String
First puncture a hole in the middle of the lid.
Place the electric tape so that the pattern on the lid is white, black, white, black
Use string and tie your washer and bolt underneath the plastic lid
Measure out your string into feet and every 6 inches. I had blue marks for every foot and red marks for every 6 inches after the foot mark.
To measure the clarity of the water, I would drop the secchi in the water and dabble it in the water until the water covers the lid and it starts sink, then using my marks, I would measure how far down I could still see the secchi.
1. How clear was the water?
2. How deep was the pond?
3. What can we find using our homemade pond scope?
I had a Pond Explorations handout for them to document all their information or for the parents to have and they could fill it in when they arrived at home. Either way, I find that having a handout gives us a focus in our explorations and allows for a space to document our findings as in-training scientists.
In order to see how clear the water was, my husband made me a homemade Secchi which is an instrument used to document how clear ponds and rivers are in order to determine pollution and sediment in the water.
The materials you would need to make one of these yourself is:
White plastic lid (I used a lid to an old Tupperware container)
Electric tape
Screwdriver or something else to puncture a hole in the middle of the lid
An inch long washer and bolt
String
First puncture a hole in the middle of the lid.
Place the electric tape so that the pattern on the lid is white, black, white, black
Use string and tie your washer and bolt underneath the plastic lid
Measure out your string into feet and every 6 inches. I had blue marks for every foot and red marks for every 6 inches after the foot mark.
To measure the clarity of the water, I would drop the secchi in the water and dabble it in the water until the water covers the lid and it starts sink, then using my marks, I would measure how far down I could still see the secchi.
|
|
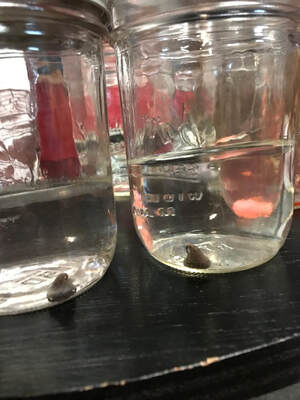
Our depth of clarity was a foot and a half.
Now, how deep is the water here?
Now, how deep is the water here?
|
|
The depth that I measured around the dock was 5 feet in one spot and then further out it was 6 feet.
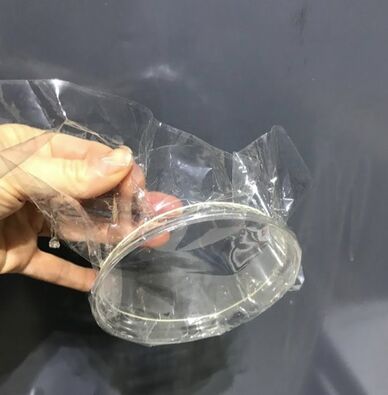
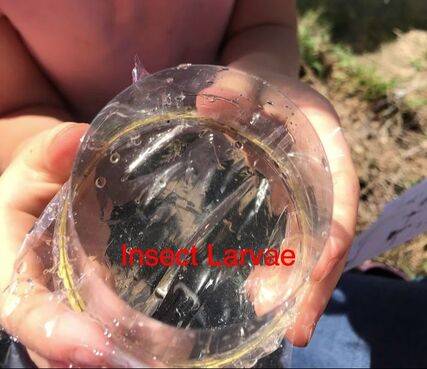
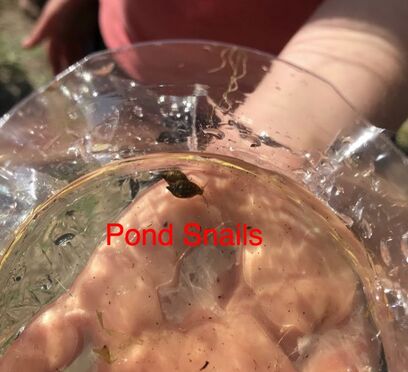
Next, I made some homemade pond scopes. These were plastic cups with their bottoms cut off covered in clear cellophane attached with a rubber band. They could either use the cellophane side as a sort of lens to see clearer under the water OR what most students did was use it to scoop up water and see what organisms they could find.
Next, I made some homemade pond scopes. These were plastic cups with their bottoms cut off covered in clear cellophane attached with a rubber band. They could either use the cellophane side as a sort of lens to see clearer under the water OR what most students did was use it to scoop up water and see what organisms they could find.
|
|
|
|
|
|
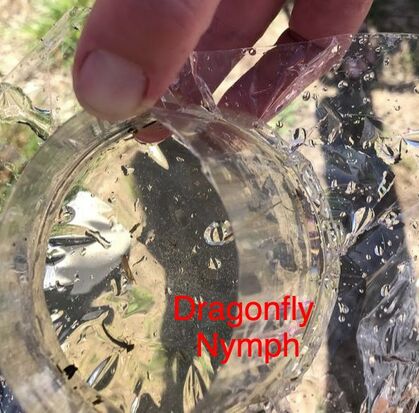
I have always loved watching dragonflies. I marvel at how they fly. I am thankful that they love to eat mosquitoes but I didn't know that they were SO carnivorous as nymphs!!! These babies eat small fish and newts and probably anything else that moves. One parent told me that they placed one of these in their pond aquarium with their son's small fish and this nymph killed every one of them. It had to go! What a great learning experience. She is the one who found this nymph at the pond. So grateful to learn new things and for all the wonderful discoveries we made at the pond!! It is spring and it is teeming with life. God is good and it was a glorious day to be out.
Now it was time to feed the ducks! Or duck...There are always a handful of ducks out at this pond and they greeted us at the beginning of class but they were definitely scarce when it was actually time to feed them. They obviously did not coordinate times with me.

My older students were studying mixtures for their science class earlier today and so I had them make a mixture of duck feed for the younger students at the pond. For details on the older students class, you can go here
This was easy.
2 cups of Old Fashioned Oats
1 cup of brown rice
1 cup of frozen mixed veggies
This is good for us, its good for the ducks! They always eat it!
This was easy.
2 cups of Old Fashioned Oats
1 cup of brown rice
1 cup of frozen mixed veggies
This is good for us, its good for the ducks! They always eat it!
Lesson 7: Rivers and Streams
|
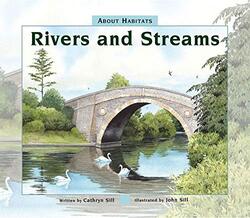
To begin our exploration of rivers and streams, we read Rivers and Streams by Cathryn Sill. What encouraged me most about reading this book was it's dedication--"To the One who created rivers and streams. Genesis 1:1"
I really enjoyed the illustrations being drawn of actual places and each place and animal drawn was named. Each page had just enough information and if you wanted more information about a particular illustration, there was more details in the back of the book. This author has a whole About Series that focuses on different science concepts like habitats. For our Ecosystem sheet, I have defined some terms for them on the bottom in relation to rivers as well as provided for different kinds of plants and animals that they can place on their river. |
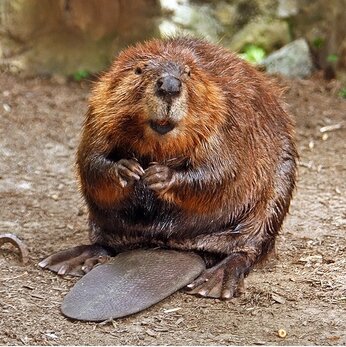
The animal that I wanted to focus on this week is a beaver. I showed them pictures of the different parts of a beaver, how they build dams, what they eat and where they live.
Beavers can live near lakes, ponds, rivers or streams. Beavers are nocturnal and for good reason. Most of their predators are active during the day. Some of their predators include wolves, bears, coyotes, otters and people.
Beavers are tremendous builders. They build dams which are walls that block the flow of moving water. They will cut down trees with their teeth, eat all the leaves off the limb and then use that limb to build their home. They are strategic in that they place the opening to their home underwater under the dam that they built.
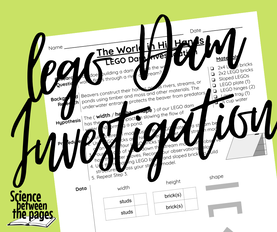
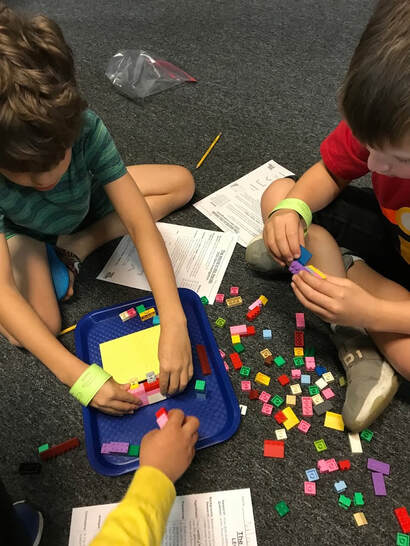
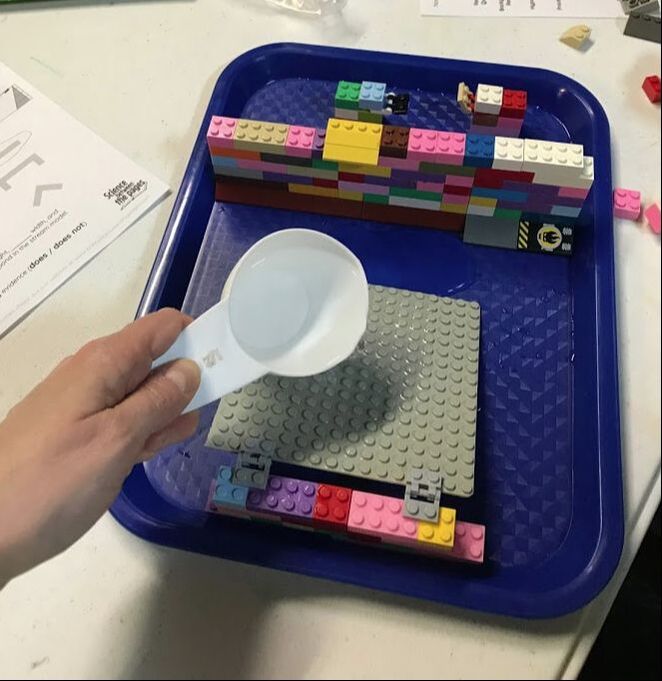
In honor of the beaver, I had the students work in teams to build their own dam using an item that is very common to them; Legos.
I wanted them to do some scientific investigating so we began with a research question: How does building a dam change the way water flows through a river or stream? They were to make their hypothesis based on whether the width, height, and/or shape of the dam had the greatest impact on slowing the flow of water and creating a pond.
We used this investigation sheet to guide our project.
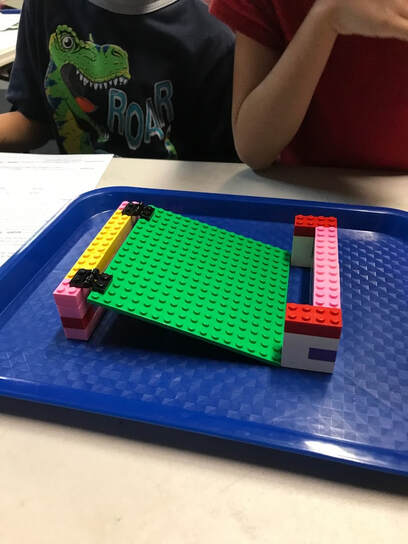
First, the students created the stream model. This is the the structure that will act like a flowing stream made out of Legos.

|
|
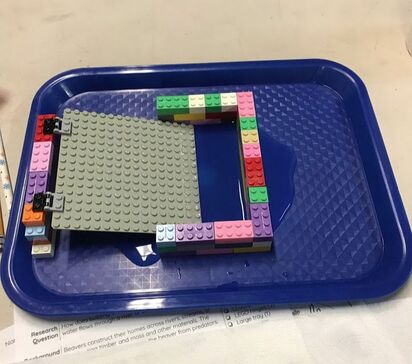
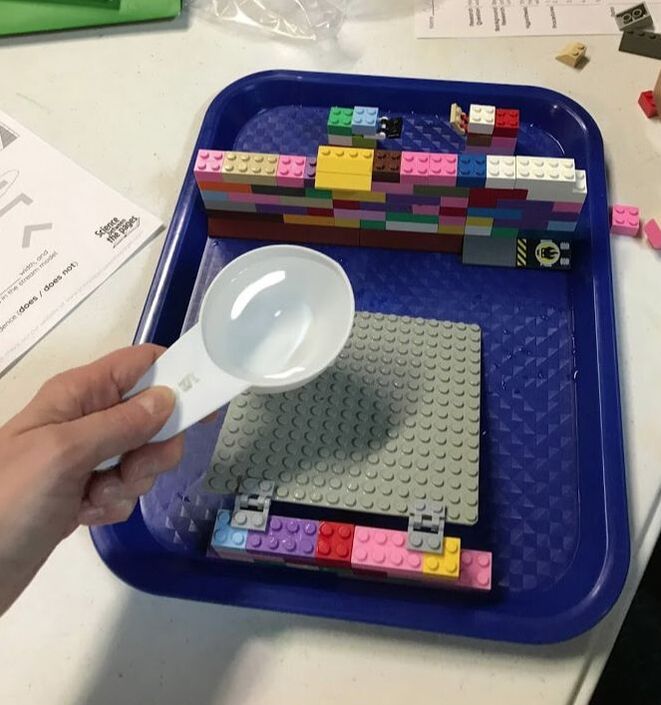
After they build their stream model (the ramp), the students then needed to construct a dam. The instructions say that the dam must hold back 1/2 cup of water. The Investigation sheet above has all the materials and procedure that you would need to re-create this activity with your students.
|
|
|
|
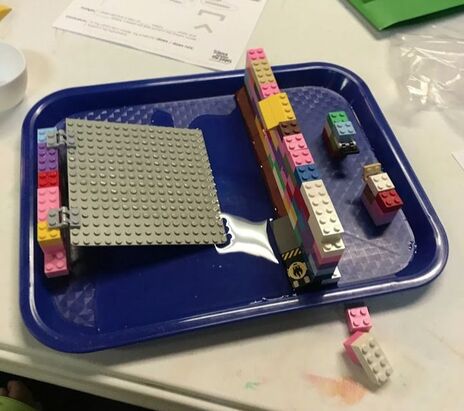
This Lego Dam ended up being the most successful. It blocked all of the water from getting to the other side and formed a shallow pond. One team member decided to build some Lego beavers to go with their dam. Very creative.
If you have more time you can take this activity a step further and design obstacles for the water to go around to see if that would effect how the dam functions.
Lesson 6: Lakes & Ponds
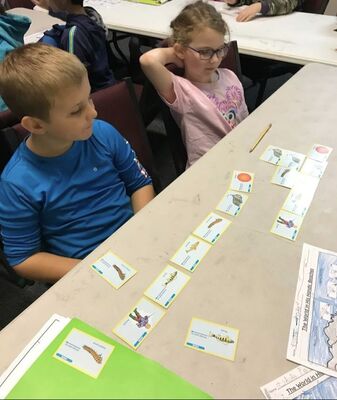
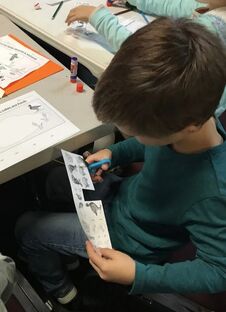
Today's class focused on aspects of Lakes and Ponds. As the students walked into class, I shuffled and distributed some Dyno Cards that have a food chain for a Pond ecosystem. They were to put these together correctly. The correct food chain started with the Sun, then algae, insect larvae, minnow, perch, and then humans.
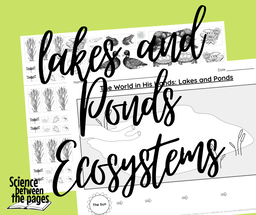
A way for me to teach them all about this ecosystem was giving them a paper ecosystem to put together while I talked to them about the different flora and fauna of this ecosystem. You can grab this at our TpT store.
What is the difference between a Lake and a Pond?
One student replied, "A lake is bigger than a pond." Yes.
Lakes and ponds are beautiful ecosystems that can remind you of our Creator God.
A common idea about how the lakes formed is that they were carved by glaciers during the Ice Age. Please understand that this is an idea of how lakes are formed, no one was there to see them and so this cannot be a fact without being able to observe it. However, creation scientists have theorized that after the worldwide flood, the Ice Age happened forming these glaciers which then carved lakes into our land.
Other lakes formed from the craters of extinct volcanoes.
Lakes are large bodies of freshwater and can be similar to oceans in that they have a sunlit zone and, if deep enough, can have a midnight zone. Just as with the ocean, the plant and animal life in each zone is different.
Ponds are lakes that are shallow and do not have a midnight zone but are still made of freshwater.
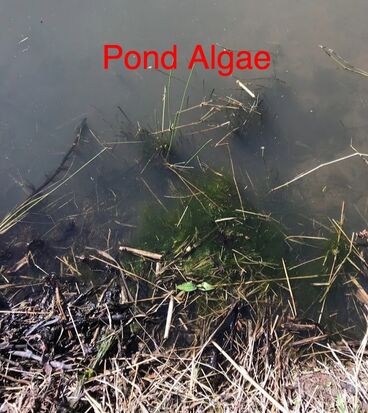
The main source of food in a lake or pond is algae which uses photosynthesis to make food.
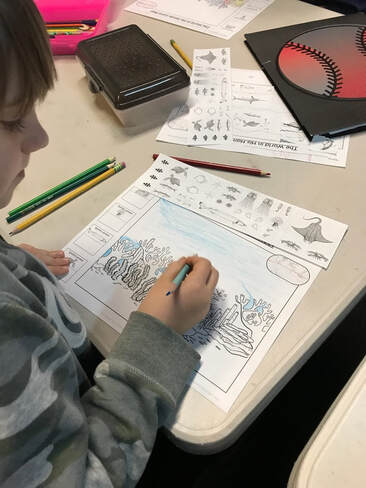
The plants in this beautiful ecosystem are algae, water lilies, and cattails. There are pictures of these that your students can past to their ecosystem in the above handout at our TpT store.
The animals in this ecosystem are frogs, toads, salamanders, fish like trout or perch, bass, cranes, pelicans, ducks. The students in class came up with another one...water striders!!! There is a picture of this one too on the handout.
When the season changes from winter to spring, an occurrence called Overturn happens. This is when enough ice has melted, the cold dense water sinks to the bottom and warmer water floasts to the top stirring up the mud on the bottom of the lake. Overturn releases oxygen and nutrients that were trapped at the bottom of the lake bringing nutrients for algae and other plankton.
In the spring when overturn happens it can produce algae blooms which is a spontaneous growth explosion of algae that turns lakes or ponds green.
Floating ice is a design of our Creator
"No other common substance becomes less dense when it freezes" Liquid water is more dense than frozen water. This allows fish and other organisms to survive during the winter.
One student replied, "A lake is bigger than a pond." Yes.
Lakes and ponds are beautiful ecosystems that can remind you of our Creator God.
A common idea about how the lakes formed is that they were carved by glaciers during the Ice Age. Please understand that this is an idea of how lakes are formed, no one was there to see them and so this cannot be a fact without being able to observe it. However, creation scientists have theorized that after the worldwide flood, the Ice Age happened forming these glaciers which then carved lakes into our land.
Other lakes formed from the craters of extinct volcanoes.
Lakes are large bodies of freshwater and can be similar to oceans in that they have a sunlit zone and, if deep enough, can have a midnight zone. Just as with the ocean, the plant and animal life in each zone is different.
Ponds are lakes that are shallow and do not have a midnight zone but are still made of freshwater.
The main source of food in a lake or pond is algae which uses photosynthesis to make food.
The plants in this beautiful ecosystem are algae, water lilies, and cattails. There are pictures of these that your students can past to their ecosystem in the above handout at our TpT store.
The animals in this ecosystem are frogs, toads, salamanders, fish like trout or perch, bass, cranes, pelicans, ducks. The students in class came up with another one...water striders!!! There is a picture of this one too on the handout.
When the season changes from winter to spring, an occurrence called Overturn happens. This is when enough ice has melted, the cold dense water sinks to the bottom and warmer water floasts to the top stirring up the mud on the bottom of the lake. Overturn releases oxygen and nutrients that were trapped at the bottom of the lake bringing nutrients for algae and other plankton.
In the spring when overturn happens it can produce algae blooms which is a spontaneous growth explosion of algae that turns lakes or ponds green.
Floating ice is a design of our Creator
"No other common substance becomes less dense when it freezes" Liquid water is more dense than frozen water. This allows fish and other organisms to survive during the winter.

This information is from Answers in Genesis Properties of Ecosystems
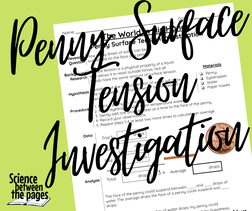
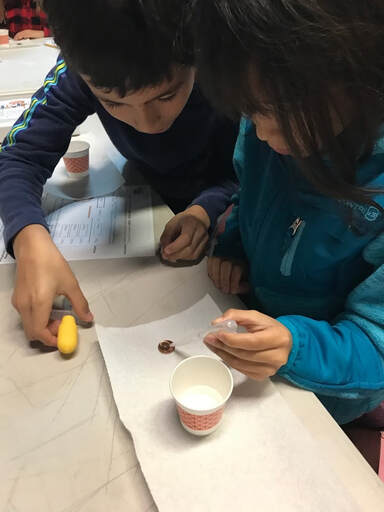
Going back to the water striders. How are they able to walk on water like Jesus?
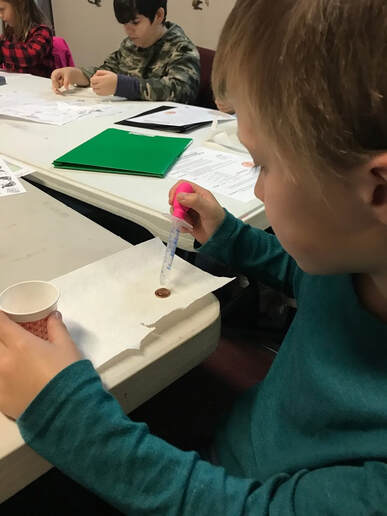
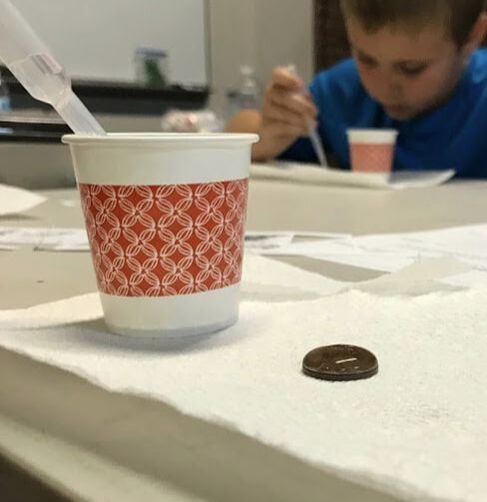
Well, one of the reasons could be that water has an incredible amount of surface tension. Find out for yourself as you do this very simple but fun science experiment. This handout is in the form of a science fair project and so other projects could come from this idea.
This experiment only requires:
This handout has everything laid out for you including repeating your experiment, calculating a range and average and then analyzing the data.
Well, one of the reasons could be that water has an incredible amount of surface tension. Find out for yourself as you do this very simple but fun science experiment. This handout is in the form of a science fair project and so other projects could come from this idea.
This experiment only requires:
- penny
- water
- eyedropper or straw
This handout has everything laid out for you including repeating your experiment, calculating a range and average and then analyzing the data.
|
|
|
|
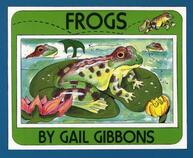
I wanted to showcase one animal from this amazing ecosystem and it was the frog. So with our last minutes of class, I read to the students about frogs. I used the book Frogs by Gail Gibbons
I love how this book laid out the whole life cycle of the frog. I thought it was perfect for these second and third graders. |

As the students left, I was supposed to hand each one a Frog Life Cycle Bracelet but I forgot. There are seven of these on a page. Print them on green or yellow paper for your students and they will look great.
I love the idea of a bracelet as it models a cycle.
I love the idea of a bracelet as it models a cycle.
Click here for a video playlist of today's lesson
|
Lesson 5: Wetlands & Estuaries |
|
We are having some uncharacteristic weather here in central Texas and so my classes for this week are online.
The context of this week's lesson reflects redemption. While it seems that there were men that orchestrated the redemption of a devastated wetland, it was the processes set up by our Creator God that allowed the redemption to happen for this wetland. May God receive the Glory. When I think of redemption, I think of the greatest redemption that has ever happened, God's adoption of us as sons and daughters. Galations 4:4-5 "But when the fullness of time had come, God set forth His Son, born of woman, born under the law, to redeem those who were under the law, so that we might receive adoption as sons." |
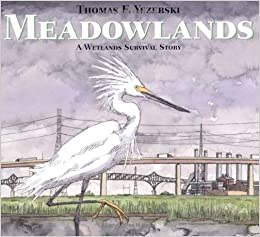
The first video is reading aloud of Meadowlands A Wetland Survival Story by Thomas E. Yezerski
This will be the basis for learning about the wetlands this week.
The Wetlands is a broad category and under it are estuaries, bogs, swamps and marshes. The Meadowlands in New Jersey is an estuary.
An estuary is a type of wetland where freshwater flows into saltwater. These are very productive ecosystems. Some of its characteristics are:
The common flora in estuaries include salt-tolerant grasses like a rush and/or mangrove trees. These plants help filter the salt out of the water for the freshwater side and then help filter out silt and other materials so that these don't flow into the ocean. This is especially helpful to coral reefs as they need clear water in order for the algae to perform photosynthesis.
Some of the animals that you might find in the wetlands include:
This will be the basis for learning about the wetlands this week.
The Wetlands is a broad category and under it are estuaries, bogs, swamps and marshes. The Meadowlands in New Jersey is an estuary.
An estuary is a type of wetland where freshwater flows into saltwater. These are very productive ecosystems. Some of its characteristics are:
- there is a constant flow of freshwater into the ocean
- the consistency of tides (set up by our Creator God) stirs up and delivers nutrients to many plants and algae
- more plants in an area bring more animals
- the amount of salt in the water is always changing depending on the season. (More salt in the summer with more evaporation and less rainfall, less salt in the winter with less evaporation and more rainfall)
- flora and fauna in this ecosystem must learn to live with strong currents from the ever-changing water flow.
The common flora in estuaries include salt-tolerant grasses like a rush and/or mangrove trees. These plants help filter the salt out of the water for the freshwater side and then help filter out silt and other materials so that these don't flow into the ocean. This is especially helpful to coral reefs as they need clear water in order for the algae to perform photosynthesis.
Some of the animals that you might find in the wetlands include:
- mud snails and marine worms (our resident decomposers that help turn dead organisms into nutritive soil that can grow plants)
- shellfish
- fish like mullet, flounder, sole
- birds like shorebirds, heron, tern, egrets


|
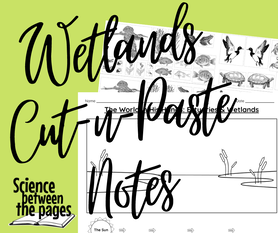
An activity that you can do to help apply this learning to your students is creating a record of this ecosystem. Here is a wonderful handout that has animals already there for you where you can just color, cut and paste. Make this your own and draw any animals that you really want to have on your sheet.
|
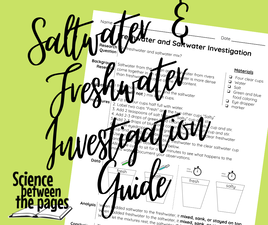
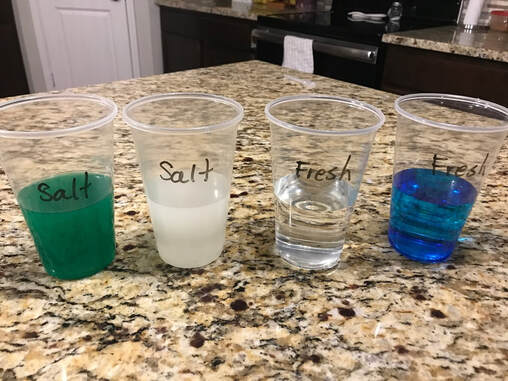
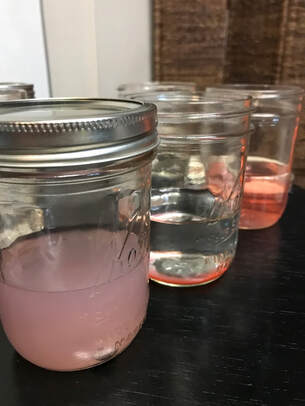
The third video that I uploaded is doing this science experiment.
Let's learn about saltwater and freshwater and if they mix well or not.
We will do a simple investigation to see what happens. Make sure to grab your investigation sheet here. This will walk any student through the scientific process which will be very helpful for any student who is aspiring to create a science fair project.
|
|
|
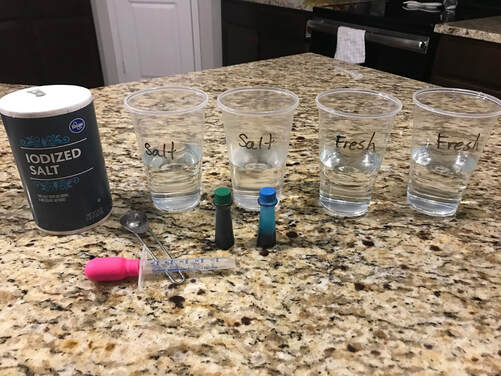
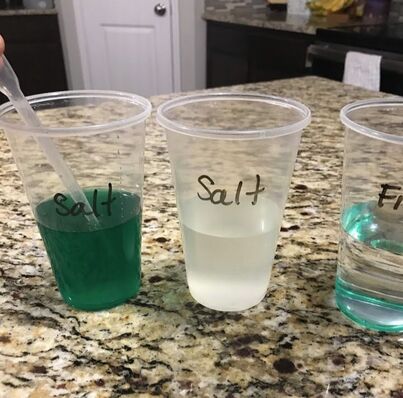
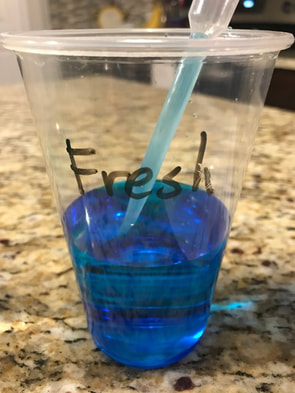
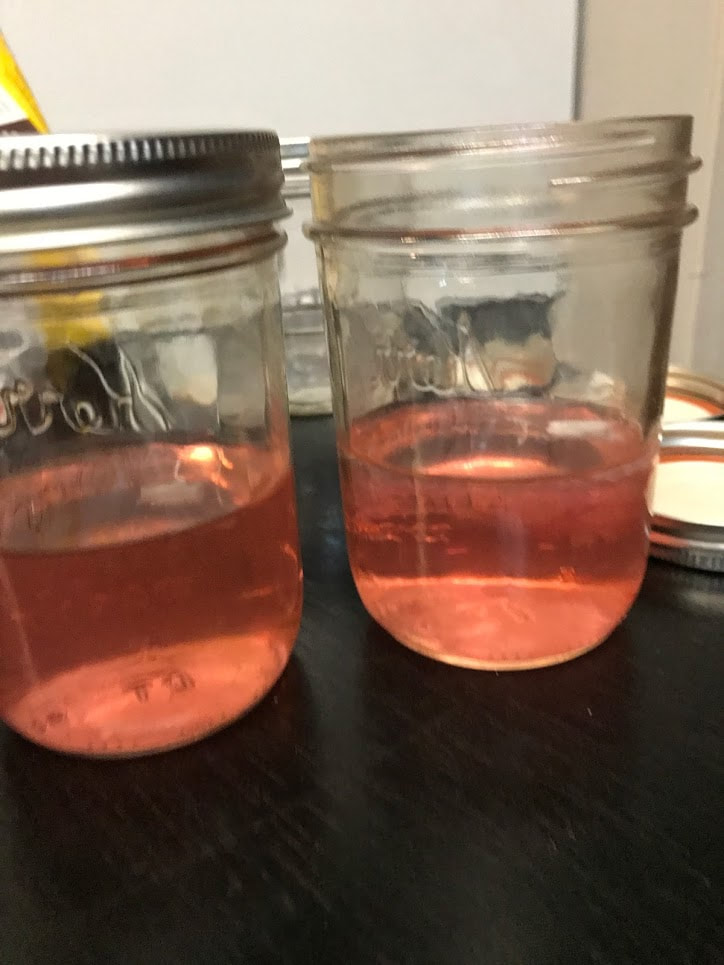
On the video, I placed the saltwater just on top of the freshwater. As it sank to the bottom, it would mix.
When I took these pictures, I decided that I would let the saltwater out on the bottom. The saltwater then remained on the bottom for a better illustration. |
|
|
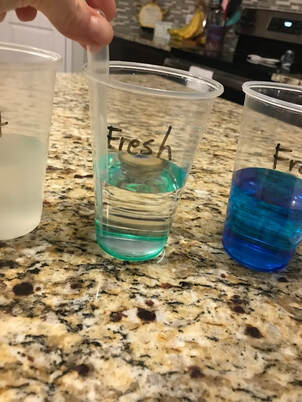
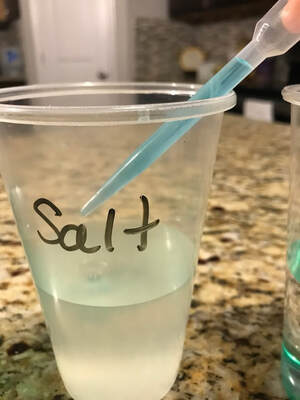
Adding the freshwater to the saltwater
|
|
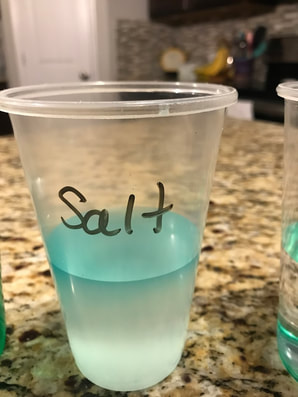
The result of adding freshwater to the saltwater.
These are the results just after I finished the experiment.
For a more details guide to the procedure, please grab your investigation guide.
For a more details guide to the procedure, please grab your investigation guide.
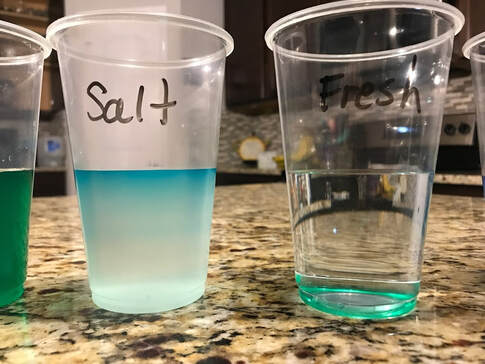
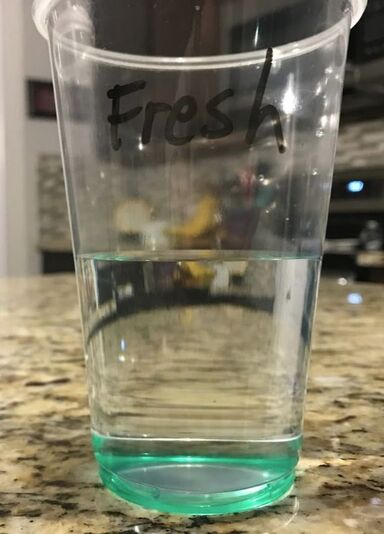
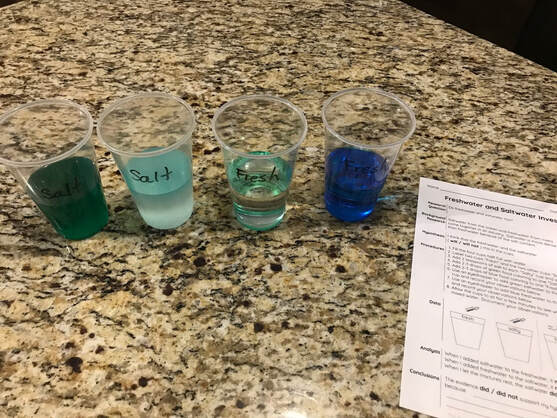
These are the results of the freshwater mixing with the freshwater and the saltwater mixing with the freshwater after waiting a few minutes to see if they would mix.
These are extra websites that document more of the story of the Meadowlands for your enjoyment.
https://theculturetrip.com/north-america/usa/new-jersey/articles/why-you-should-explore-the-meadowlands-in-new-jersey/
https://theculturetrip.com/north-america/usa/new-jersey/articles/why-you-should-explore-the-meadowlands-in-new-jersey/
Lesson 4: Beaches & Erosion
|
I asked the students that if I had a nice floppy hat, a beach towel, a beach ball and a pair of sunglasses, where they thought I would be going. They all answered "The Beach"
Yes! Off to the beach we went to learn about the flora and fauna in this ecosystem. The book that I focused on today during our interactive read aloud time was actually a Shine-A-Light Book from Usborne. I had never used one of their books in my science classes but this actually lent itself well to having interaction during the read aloud time. We read Secrets of the Seashore by Carron Brown and Alyssa Nassner 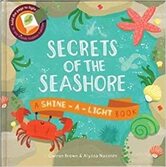
|
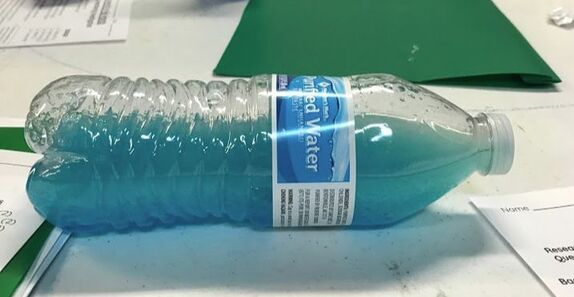
One of the significant features of every beach are the waves from the ocean. So I had all the students make a wave bottle.
I filled empty water bottles a third of the way full with vegetable oil.
Then I poured another third of the bottle with water.
Finally, I placed four drops of blue food coloring in each bottle.
It was neat to watch how the food coloring acted in the oil versus the water but that is a chemistry lesson for another day. I wanted the students to focus on making waves within the bottle. It seemed to work best if the bottle was on its side on the table and then you move it side to side.
After making the wave bottles, I went into a lesson on weathering, erosion and deposition. On the back of their ecosystem sheet, I have a sketch of a landscape where they can label the different places where weathering occurs, erosion occurs and then deposition.
- Weathering is about breaking up rocks. So I placed rocks falling off a mountain headed towards a stream.
- Erosion is about taking that sediment or broken up rock to another place so I drew the falling rocks in the stream
- Deposition is about dropping that sediment in a new location so I drew rocks re locating on the ocean floor
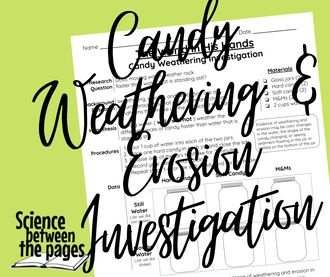
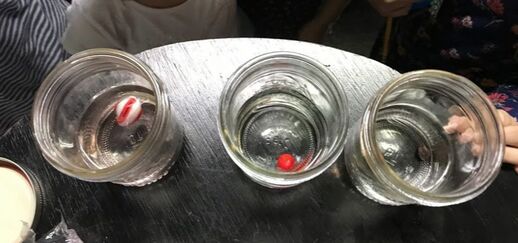
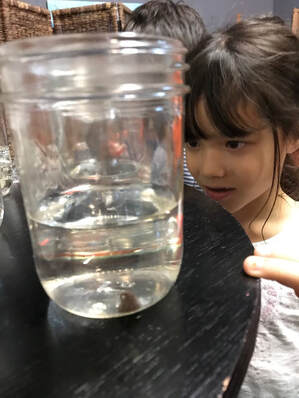
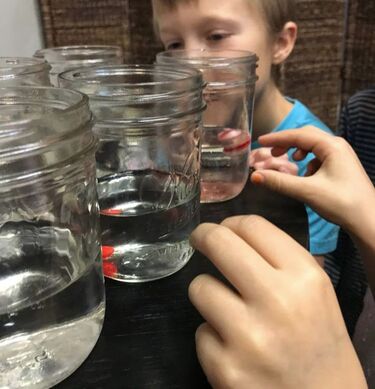
The last activity that I was able to do was a Candy Weathering Experiment. I am gearing my students up to get ready for a science fair and so this experiment was done using the scientific process.
First, we asked our question of whether moving water would weather rock faster than standing water. We reviewed the information that I had just presented about weathering, erosion and deposition.
The students made their hypothesis and then we tested it.
We used
Next I would put a piece of each type of candy in another jar and shake each candy for about two minutes.
After we finished, we documented our analysis and made our conclusion. The guide that is provided here helps with all the wording so that the students can focus on the experiment and not on the writing aspect. This a is a great scaffolding experiment.
First, we asked our question of whether moving water would weather rock faster than standing water. We reviewed the information that I had just presented about weathering, erosion and deposition.
The students made their hypothesis and then we tested it.
We used
- 6 glass jars
- 2 peppermints
- 2 chocolate chips
- 2 M&Ms
- 3 cups of water
Next I would put a piece of each type of candy in another jar and shake each candy for about two minutes.
After we finished, we documented our analysis and made our conclusion. The guide that is provided here helps with all the wording so that the students can focus on the experiment and not on the writing aspect. This a is a great scaffolding experiment.
|

|
|
|
|
|
|
I was wanting to wrap up all of the class with some more information about the two different kinds of beaches and the animals and plants that live in each one but time was not my friend so I will share here what I didn't get to share in class. Many of the following animals are provided in the above Cut and Paste handout mentioned above where I had mentioned the weathering diagram.
Beach- where the ocean meets the land. Beaches are actively changing ecosystems because of the waves always bringing in and taking away different organisms
Dynamic equilibrium- This is where the amount of material brought into the shore is almost equal to the amount of erosion happening
Inter-tidal zone- This is an area of land along the beach that is covered by high tide and uncovered by low tide.
What plants and animals you find at a beach depends on what the beach is made of.
Rocky beaches have soil and crevices which gives plants an area to become attached well. These plants provide food and protection for animals that can't live on a sandy shore. Some of these plants include sea lettuce, swamp periwinkle and seaweed (enteromorpha).
The animals that can live on a rocky beach are
Tide pools are areas that fill at high tide an stay full at low tide.
Animals that live on sandy beaches are:
Beach- where the ocean meets the land. Beaches are actively changing ecosystems because of the waves always bringing in and taking away different organisms
Dynamic equilibrium- This is where the amount of material brought into the shore is almost equal to the amount of erosion happening
Inter-tidal zone- This is an area of land along the beach that is covered by high tide and uncovered by low tide.
What plants and animals you find at a beach depends on what the beach is made of.
Rocky beaches have soil and crevices which gives plants an area to become attached well. These plants provide food and protection for animals that can't live on a sandy shore. Some of these plants include sea lettuce, swamp periwinkle and seaweed (enteromorpha).
The animals that can live on a rocky beach are
- sea stars
- mussels
- oysters and
- barnacles
- gulls
- shorebirds
Tide pools are areas that fill at high tide an stay full at low tide.
Animals that live on sandy beaches are:
- Gulls
- Shorebirds
- Sand dollars
- Crabs
- Clams
- Turtles

The information here was gleaned from Answers in Genesis God's Design Curriculum Properties of Ecosystems
Lesson 3: Coral Reefs
|
From Louie Giglio's How Great is Our God science devotion book, there is a devotion about coral reefs. We read this today in class to correlate a science concept to our daily living. This devotion emphasized the importance of unity among believers as the coral unite to form the coral reefs and creates an amazing ecosystem that provides animals of the ocean with safety from predators, food and sunlight for organisms, the unity of believers can create the same kind of refuge from the world as Christ leads us to be unified.
|
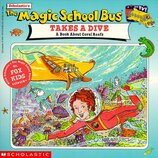
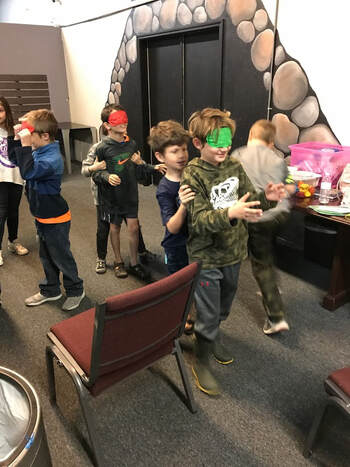
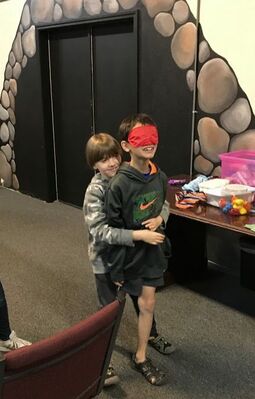
We then took a dive with the Magic School Bus into a coral reef to learn about symbiotic relationships.
Note: As much as I love the creative stories that teach science concepts in this series of books, these are not written with a biblical worldview.
Note: As much as I love the creative stories that teach science concepts in this series of books, these are not written with a biblical worldview.
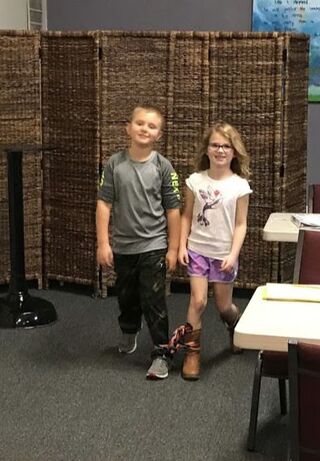
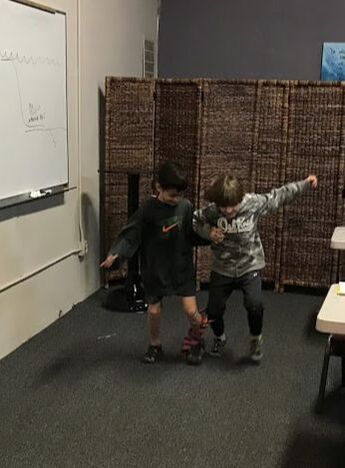
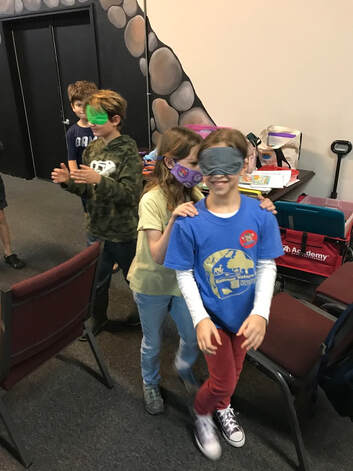
The specific symbiotic relationships that we learned about were mutualistic where both animals in the relationship benefit.
To demonstrate this, I had the students partner up and do three legged walks (some chose to run) and then made a maze out of chairs for a blindfolded partner to be guided through. It was wonderful to see how they all worked together.
To demonstrate this, I had the students partner up and do three legged walks (some chose to run) and then made a maze out of chairs for a blindfolded partner to be guided through. It was wonderful to see how they all worked together.
|
|
|
|
|
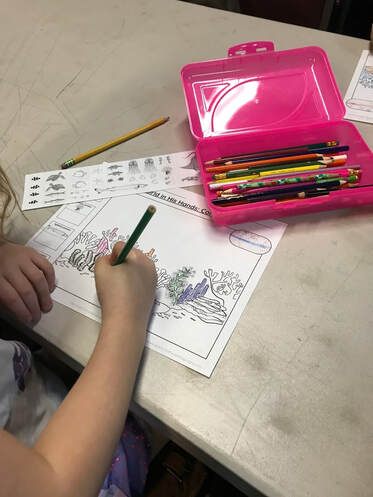
As with all the ecosystems that we have been learning, here is a handout that reviews all the animals and plants that we went over today in class.
We did do a brief review at the beginning of class of the animals and the ocean zones. I was so proud that most of the students were able to complete their handout.
We also reviewed photosynthesis using the relay race game. One student ran to put 'water' in the envelope attached to a large construction paper leaf. Then the next student in line ran to put 'carbon dioxide' in the envelope. The third student had to use a flashlight to shine light on the leaf and flip the leaf over. The next student brought back one of the products of photosynthesis ie: glucose and then the final student in the relay brought back oxygen. The line that completed that cycle the most, won.
Photosynthesis is important in the ocean and especially coral reefs. If the waters are murky or polluted, the algae that helps the coral survive can't make food through photosynthesis because its not getting the energy it needs from the sun.
Providentially, coral reefs are found in the tropical zone of our world where sun can shine the most. The students below were able to locate the equador signifying the middle of the tropical zone
|
|
Instead of having the students complete another food chain, I had them complete the symbiotic relationships that we had talked about during class.
Here is a wonderful video of a green sea turtle being cleaned
https://oliveridleyproject.org/blog/sea-turtle-hitchhikers-symbiotic-relationships-of-sea-turtles
- Coral and algae- Algae attach themselves to the coral and make food that the coral uses to survive while the coral provides a safe place for algae to live as to not be consumed by hungry ocean animals.
- Hermit crabs and Anemones- The anemones protect the hermit crabs from predators and the hermit crabs can transport anemones along the ocean floor.
- Sharks and remoras- Remoras are fish that have suction like mouths that eat the copepods off of sharks. This is a meal for them and it also cleans the sharks
- Green sea turtle and the yellow tang- The yellow tang is a cleaner fish for the sea turtle. So the cleaning provides food for the yellow tang and the turtle can stay clean.
Here is a wonderful video of a green sea turtle being cleaned
https://oliveridleyproject.org/blog/sea-turtle-hitchhikers-symbiotic-relationships-of-sea-turtles
Coral Reefs are beautiful ecosystems made of limestone built from the exoskeletons of many tiny invertebrates called corals.
Corals are tiny tube-like creatures with tentacles that look like upside down jellyfish. They build a protective exoskeleton around itself and receive most of their energy from a special type of algae that lives inside them and performs photosynthesis.
Coral reefs grow fastest in areas with strong wave action. The waves bring in calcium and other minerals necessary for them to build their exoskeleton.

A great resource that I have been using for these ecosystems if the Properties of Ecosystems by Answers in Genesis God's Design Curriculum
Lesson 2: Oceans
Review! I love reviewing what we have already learned to keep the concepts fresh in our brains so we can attach new information to it.
I began class today with a review of our vocabulary words from last semester: Habitat, Biosphere, Abiotic, Biotic, Flora and Fauna. Here is the matching sheet that I used.
After the warm up, I had the students get in groups with fly swatters. As soon as I called out a definition they would yell the answer and 'swat' that 'fly' aka flashcard. These are the same flashcards I used last semester but you can find them here.
|
|
|
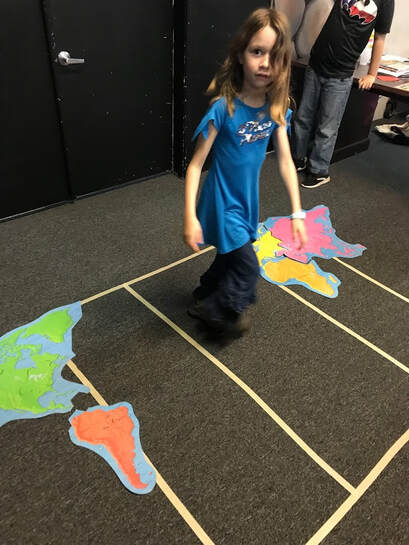
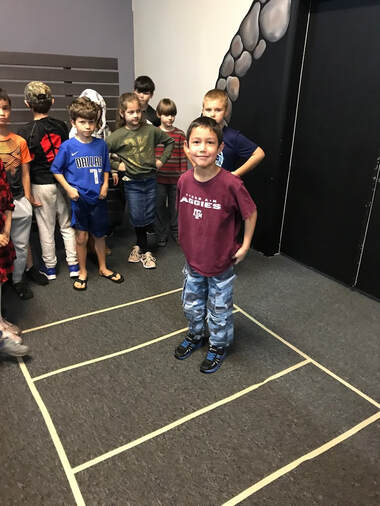
Since, we were learning about Oceans today, I thought we would go ahead and jump into the different oceans and learn where the different oceans are located. Here my student is jumping into the Atlantic Ocean. We learned where the Atlantic, Pacific, Indian, Arctic, and Antarctic Oceans were located.
|
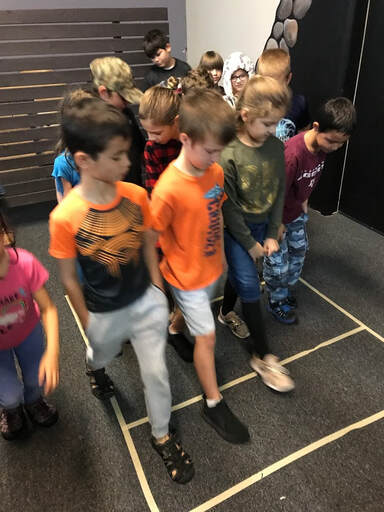
Next, I taught them about the different zones in the ocean.
The Sunlit/Euphotic Zone The Twilight/Disphotic Zone The Midnight/Aphotic Zone. I had the students jump into each of these sections as I named them so they would become familiar with the names. |
|
|
Along with the three ocean zones, I introduced three types of living organisms that live in the ocean.
Benthos- plants and animals that live on the ocean floor in areas near the shore. Examples include clams, crabs, worms, starfish, snails and sponges.
Nekton- free moving animals. These are not dependent on the ocean currents to take them places. Examples include fish, whales, shrimp, lobsters, squid.
Plankton- algae and animals that go where the ocean currents take them and live on the surface of the ocean.
This information I gleaned from the Answers in Genesis God's Design curriculum Properties of Ecosystems.
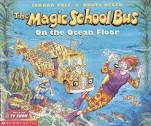
I did an interactive read aloud for the students using the Magic School Bus On the Ocean Floor. The Magic School Bus series are not creation based but I like to use the illustrations and story line to help apply what we are learning. As I was reading through this book, I would stop at an animal mentioned and ask what kind of living organism it is; a Benthos, Nekton, or Plankton. As we traveled through the book, I would ask which ocean zone we were in as well.
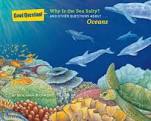
Lastly, I gave them their Biome sheet to do for homework. They were to match animals that I had on the sheet with the different zones of the ocean. This might be a little difficult for them so I am supplying a key for parents to look at in order to help their student succeed. The information for this I gleaned from Why is the Sea Salty? and Other Questions About Oceans by Benjamin Richmond
Sunlit/Euphotic Zone:
Twilight/Disphotic Zone
Midnight Zone
Sunlit/Euphotic Zone:
- Plankton
- Blue Whale
- Green Sea Turtle
- Bottlenose dolphin
- Jack Mackerel
- Harbor Seal
- Clownfish
Twilight/Disphotic Zone
- Swordfish
- Comb jelly
- Longfin inshore squid
Midnight Zone
- Cookiecutter shark
- Angler fish
- Opossum shrimp
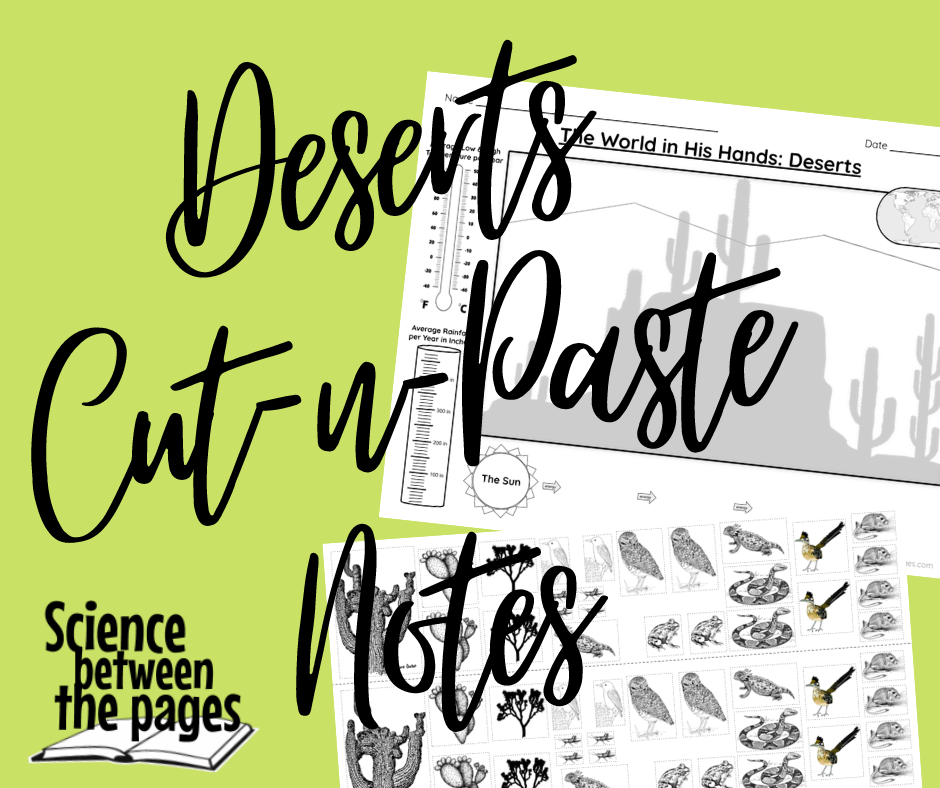
Lesson 1: Sustaining Life in the desert
We are continuing our study of Ecology and Ecosystems this semester for the second and third grade science class.
For a quick review of some of the objectives that we covered last semester, I had the students make food chains using Dyno Cards for the Desert. When they finished making a food chain, they were to go to the board and put into order which animals were producers, consumers, herbivores, carnivores, omnivores and decomposers. From this review, I introduced primary, secondary and tertiary consumers.
For a quick review of some of the objectives that we covered last semester, I had the students make food chains using Dyno Cards for the Desert. When they finished making a food chain, they were to go to the board and put into order which animals were producers, consumers, herbivores, carnivores, omnivores and decomposers. From this review, I introduced primary, secondary and tertiary consumers.
|
|
|
I used these biome sheets to introduce the students to the characteristics of a desert. We filled in where in the world deserts are located (Africa, Asia, North America, South America, and Australia), the average and high temperatures of deserts (68-77 degrees Fahrenheit, 109-120 degrees Fahrenheit). We also mentioned that Antarctica is a desert as well as it receives 0 inches of rain a year. Any biome that receives 10 inches or less of rainfall each year is considered a desert.
The students did think that it was odd that the average temperature of the desert is about 70 degrees Fahrenheit. This is because temperatures in dry areas can drop below freezing during different parts of the year. Some examples of deserts that do this are the Atacama Desert in Chile, Gobi Desert in China, and the Great Basin in the United States. |
|
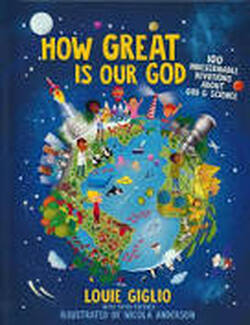
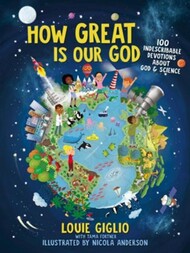
I asked the students if they had drank any water before class because we were going to the desert today! As they gathered around I read to them a devotion about the desert. Often times the physical can parallel the spiritual. I read to them "Rain or Shine" from How Great is Our God by Louis Giglio. This devotion focused on the extremes of life just as the desert is an extreme environment. God is still present and working even in the extremes of life.
|
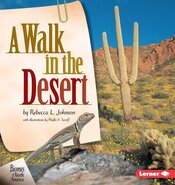
I gathered some books from the library to show them what kind of research we can do when we are studying something like biomes. I particularly enjoyed A Walk in the Desert by Rebecca Johnson. This book allowed us to see the common plants and animals of this biome.
|
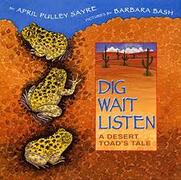
I wanted to showcase one animal from the desert, the spadefoot toad. I read this short, interesting and informative book called Dig, Wait, Listen A Desert Toad's Tale by April Pulley Sayre. This was a wonderful book about the spadefoot toad that keeps itself under the desert ground until there is a huge downpour of rain. As soon as it begins to rain, they immediately dig their way up to the service to find a mate, mate, lay eggs and allow their tadpoles to mature into frogs before all the water evaporates from the desert and they go underground again.
Most of the animals in the desert are omnivores because they need to be able to eat whatever is available to them. Animals of the desert include lizards, scorpions, roadrunners, burrowing owls, rattlesnakes, coral snakes, sidewinders, and camels.
How do these animals cope with the heat? Most of the animals in the desert are nocturnal meaning that they are active during the night. Other animals such as camels can store water well and then other animals estivate or go into a deep sleep in the summer. Estivation is like hibernation except it is done throughout the summer instead of the winter.
Let us not forget the clean up crew of the desert, the scavengers and the decomposers. Some carnivores can be scavengers and eat dead animals. The desert decomposers are worms, termites, and snails which eat on dead animals and plants and turn those dead things into nutrients for soil in order to grow more plants. From death there is life. God's redeeming fingerprint.
|
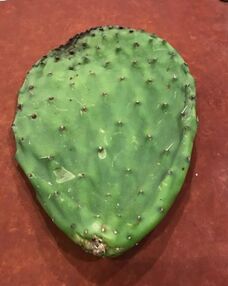
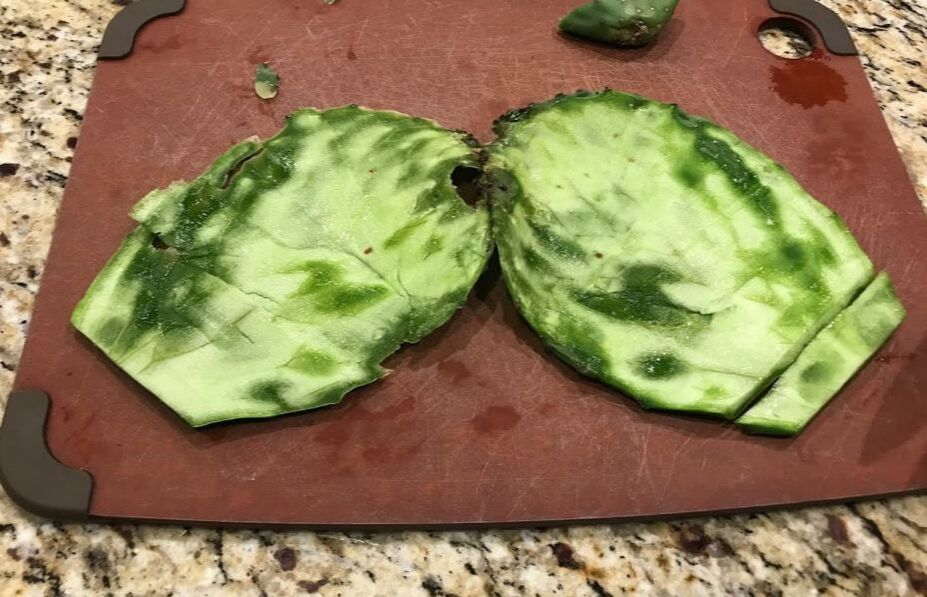
Next, we delved into the plant life of the desert and focused on cacti and other succulents. Succulents are plants that store water. These plants are perfect for the desert as they do not have a continual access to water. As we were talking about cactus, one student asked if the spikes on cactus pads were there to protect the cactus. I told him that they were and for more than one reason.
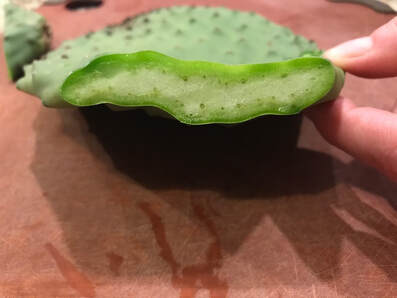
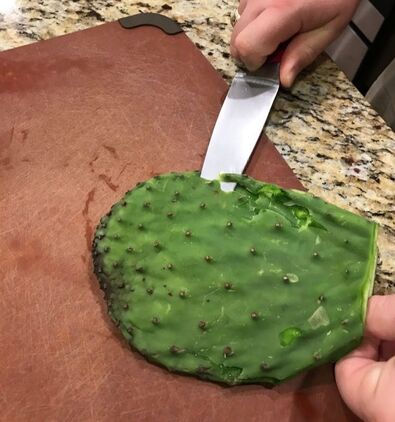
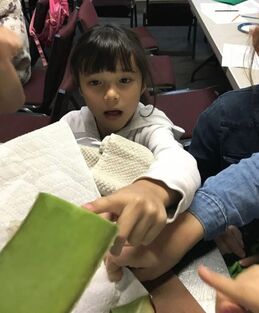
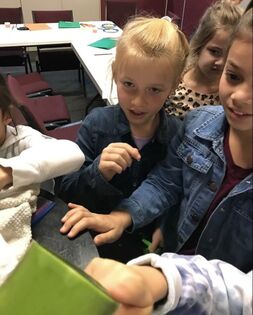
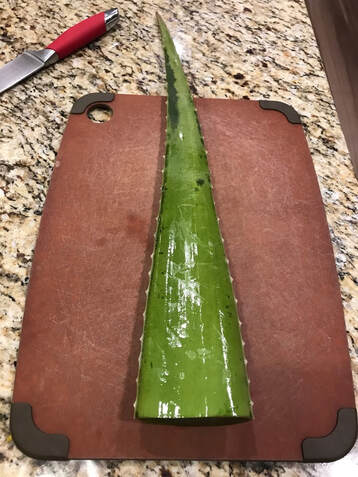
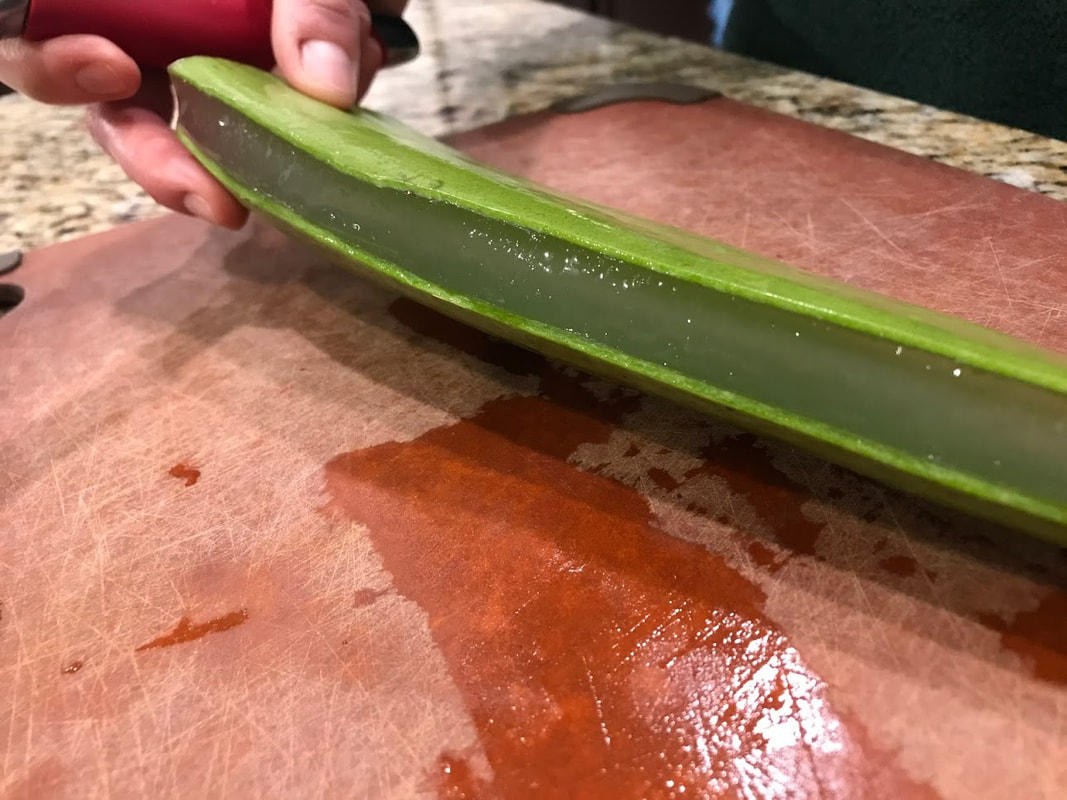
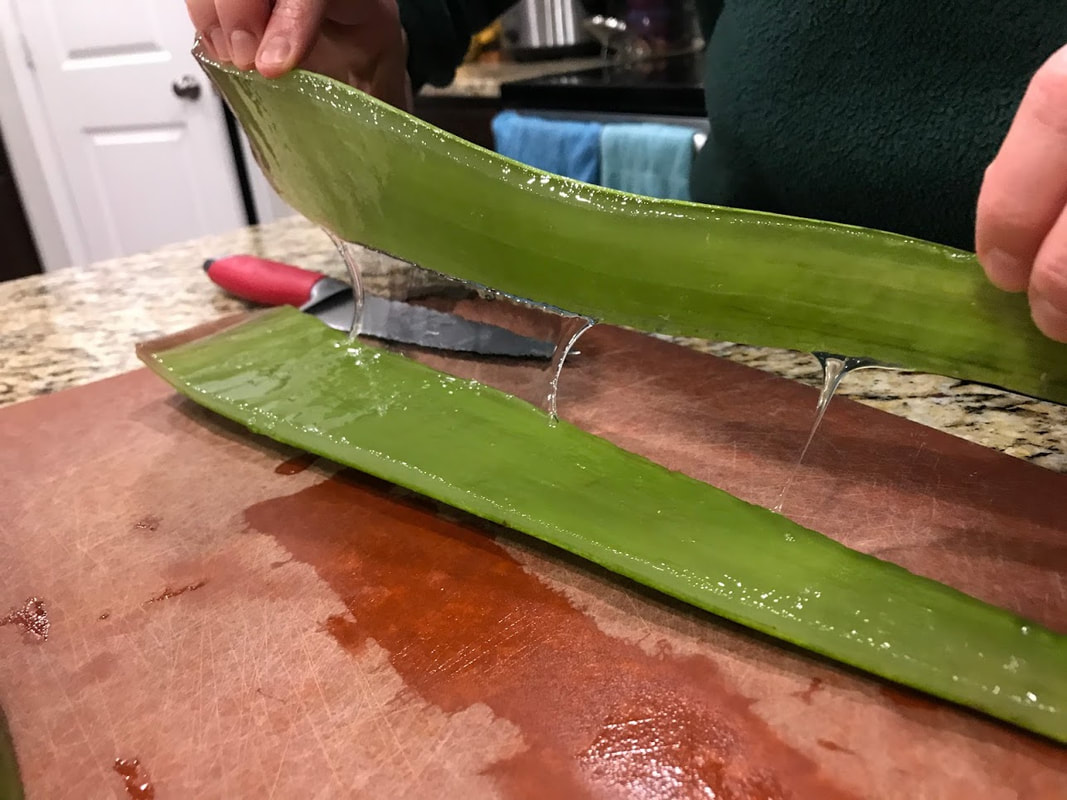
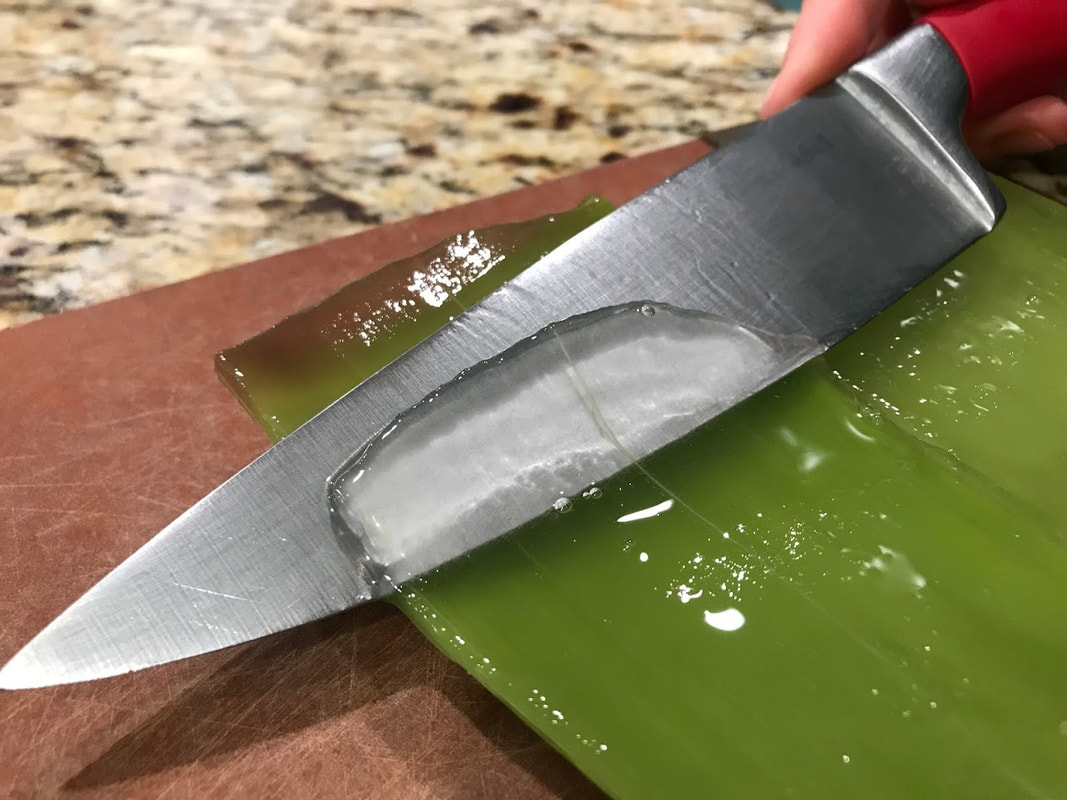
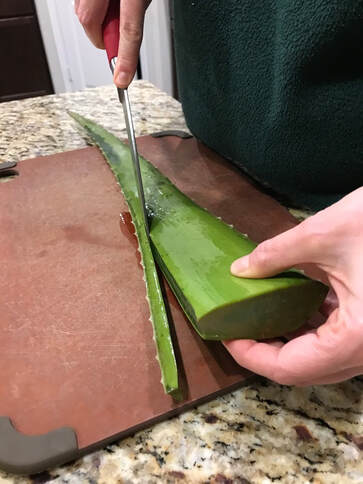
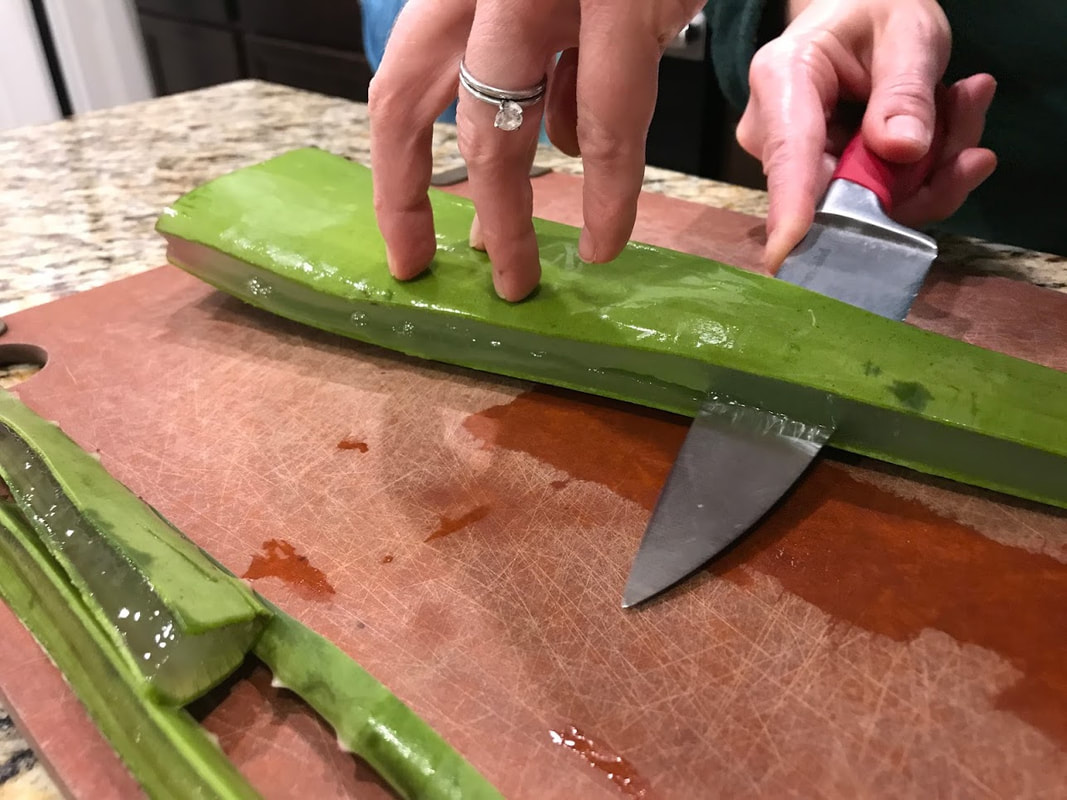
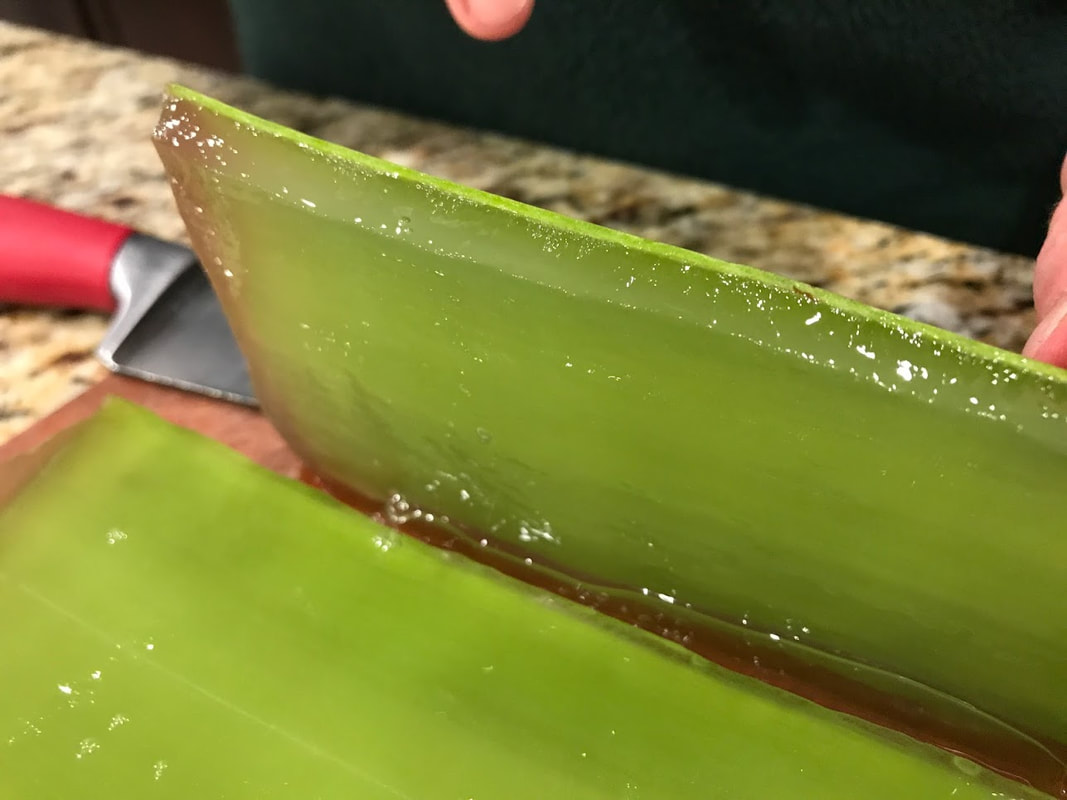
1. The spikes on a cactus do protect it from animals trying to sap them of their stored water but also 2. Cacti do not have leaves like other plants. This was an intentional design by our Creator. He purposefully knew that the cactus could not spare any water leaving this plant through transpiration like other plants with regular leaves. Cacti needed to conserve their water thus they have spikes instead of leaves so as not to lose any water through transpiration. Cactus also have a waxy coat. This also prevents water from evaporating from the cactus. We live in Texas and Nopalitos is a common food here. I bought some nopalitos and made cactus queso. Some really enjoyed having some chips and queso while others were more reserved. To go with their chips and cactus queso, I served Aloe juice to them. This juice comes from another succulent, the aloe vera plant. I brought in part of an aloe vera plant to class to dissect and observe. This is also a plant that stores water. Aloe has many healing properties. It was interesting to see that the Aloe Vera plant was firm yet spongy to the touch. The outside waxy coat is green but the aloe within is completely clear and slimy. The students were fascinated. You can also eat aloe and some of my students did try this. I believe only one came back for more. |
|
|

|
|
|