manna momentMatthew 8:26-27- "And [Jesus] said to them, "Why are you afraid O you of little faith?" Then He rose and rebuked the winds and the sea, and there was a great calm. And the men marveled, saying, "What sort of man is this that even winds and the sea obey Him?" The Sun, the yellow dwarf star at the center of our Solar System, governs our days and gives us an enormous amount of energy. A good portion of this energy comes in the form of heat. We learn in this lesson that the heat given by our Sun is what is responsible for most of the wind on our planet. There is no coincidence in the parallel to our physical Sun and the Son of God. The same LORD who created the physical Sun (Genesis 1:14-19; Col 1:16) also has the authority and power to tell the winds it creates to stop (Matt. 8:26-27). When Jesus calls out into the storm and commands the wind and waves to stop, they have no choice but to obey. When the wind and waves seem tumultuous in your life, trust the Lord, He is in control of the wind and waves. He can make them stop or can use them to fill your sails and set you on a course along His good and perfect will. wilbur and orville wrightThe students in my class have been amazing at reading their note-taking sheet before they come to class each week. This allows me some freedom to not read to them word for word but be able to have some conversation about what has been read. Today we talked about the similarities and differences between Wilbur and Orville Wright. Wilbur was particularly interested in reading and intellectual challenges and was four years older than Orville. Orville, on the other hand, was motivated by the prospect of making money. Wilbur and Orville worked well together. Eventually, Wilbur helped Orville be able to make and fly kites. Orville ended up selling kites that he had made to the kids in his neighborhood. Both Wilbur and Orville were good at tinkering and were known as being 'handy', able to fix things. When bicycles were becoming the popular mode of transportation, people would bring their broken bicycles to Wilbur and Orville to fix. Eventually this turned into a business. As their experience grew, they didn't just repair bikes, they began to make custom new bikes for customers. These things all contributed to Wilbur and Orville's success in discovering heavier than air controlled flight. What is needed to fly a kite?If the answer you chose to the question is 'wind', then you are correct. You need wind to be able to fly a kite. Wind is moving air and we need warm air and cool air to change places in order to have wind. Warm, less dense air rises and expands and as it does, cooler, more dense air takes its place. The heating and cooling of the air creates air pressure shifts which coincide to precipitation that is needed all over the earth. Wind is very important as it keeps temperatures mild and moves air masses and Earth's evaporated water supply around the world. coriolis effectOne factor that contributes to the direction and speed of air is the Coriolis Effect. This is the phenomenon that typically produces winds that move from west to east. To demonstrate the Coriolis Effect during class, I brought in a Lazy Susan and an 8 in round piece of cardstock paper. I placed the round circle on top of the Lazy Susan and centered a ruler across it. As I held the ruler in place and placed my pencil up against the ruler, I asked a student to assist me in turning the Lazy Susan to see the 'Effect' As I drew a straight line, because the Lazy Susan was turning, it caused my 'straight' line to curve. This is what happens to wind on our planet.
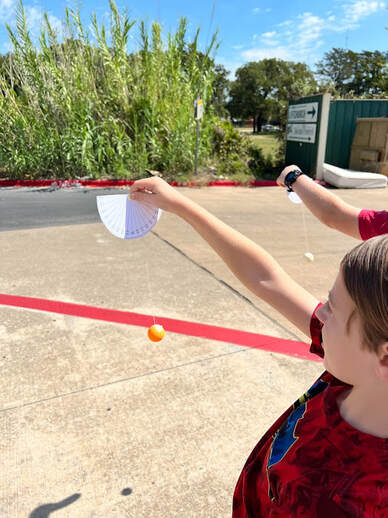
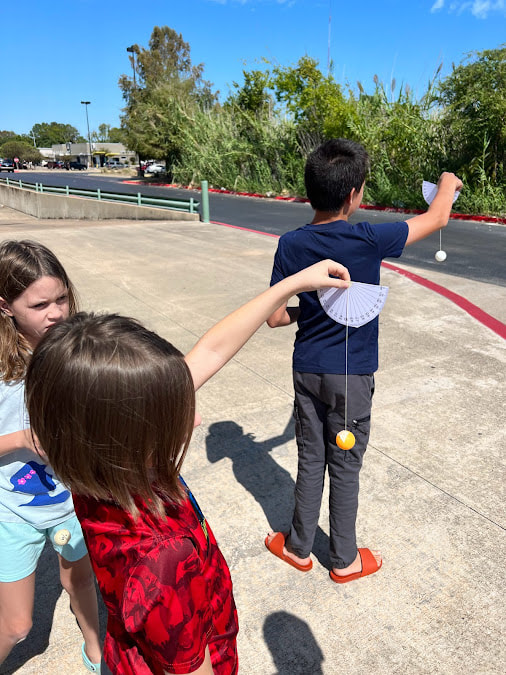
Making an AnemometerAnemometers are used to measure wind speed. How to construct an Anemometer: 1. Tape one end of thread to a ping-pong ball and the other end to the center of the base of a protractor. There is a template of a protractor in the back of the Student Guidebook on pg. 69. 2. Make sure to hold your anemometer level, away from your body and facing the wind. How to calculate wind speed with your anemometer. A five-degree shift from 90 degrees (hanging straight down) is a wind speed of about 6 miles per hour. For every five additional degrees add 2 more miles per hour of speed. For example: If the ping pong ball moves from straight down (90 degrees) to 70 degrees (20 degree shift), then the wind is moving about 12 miles per hour (6 miles per hour for 90-85, and an additional 6 miles per hour from 85 to 70.)
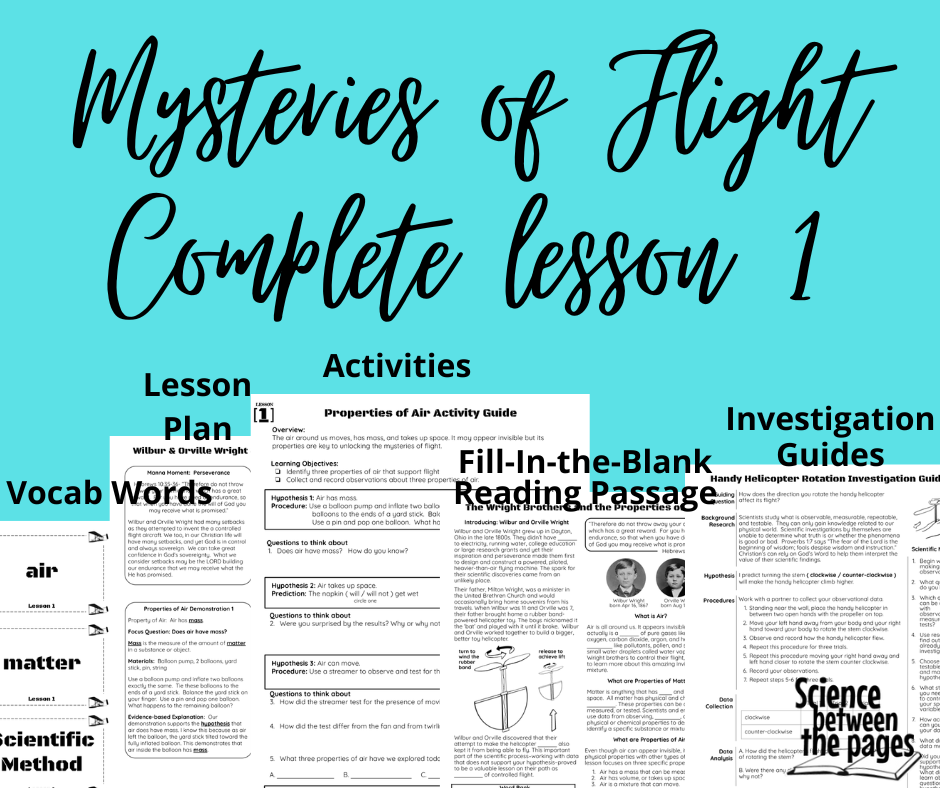
We calculated the breezes from 6 mph to 24 mph this morning. This is one way to estimate the wind speed. Building a WindsockWe are building a windsock this week at home so that we can determine the wind direction. Wind direction is typically communicated by where the wind is coming from. How to construct a Windsock: 1. Color and cut a piece of cardstock. There is a great template that correlates with the manna moment in our Lesson 3 bundle and on page 70 if you have the Student Guidebook. 2. Bend the template to make a long tube and use a stapler to secure its corners. 3. Fasten streamers or ribbon to one end of the tube. 4. Use a hole puncher to place two holes int he opposite end of the wind sock to attach it to the string. It is helpful to document the wind direction and speed each day. Mysteries of Flight Curriculum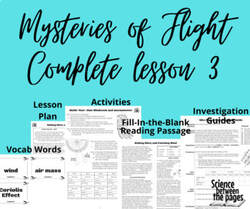 This is all of the sheets that you might need for the Lesson 3. It includes the note taking guide, lesson plan, instructions on how to build the anemometer, windsock and kite along with the vocabulary words.  The whole 12 lessons is right here for you.
0 Comments
Review of Notes and vocabulary = FunWe reviewed our vocabulary words by playing Four Corners. The students had 5 seconds to pick a corner. I would pick the corner with the most students and ask them to tell me the vocabulary word to the definition I called out. Manna moment-AirRomans 1:20- "For His invisible attributes, namely, His eternal power and divine nature, have been clearly perceived, ever since the creation of the world, in the things that have been made. So they are without excuse." There are some people in the world who struggle with the idea of an invisible, omnipresent God. They think that since they cannot see God with their physical eyes, He must not exist. Whether they understand it or not, they believe that only what they can physically see must be real. Do you struggle with believing in a God you cannot see with your physical eyes? This week we are continuing to learn new things about air- something that is invisible and yet all around us. Jesus, our Emmanuel, is invisible to us now yet all around us too. Often Jesus would use parables rooted in our physical world to help us understand a spiritual truth. Romans 1:20 reminds us that God made sure that man would have no excuse not to believe in Him because He has demonstrated His eternal power and divine nature through creation. Properties of Air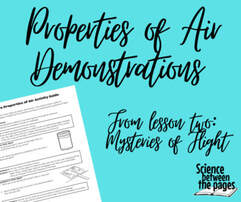 1. Air Takes Up Space AND Exerts a Force Using a grocery bag, wide-mouthed jar, and a rubber band, we wanted to see air pressure exert a force on the grocery bag and see how air takes up space in this demonstration. We pushed the empty grocery bag into a wide mouth jar leaving the edges hangin over the sides. Using a rubber band, we tied the sides of the grocery bag hanging off the side to secure the bag. Carefully, we attempted to pull the bag out of the jar. We could not easily pull the bag out of the jar because of the pull force from air pressure. A vacuum was created between the jar and the bag where no air could fill the space and allow the bag to be removed from the jar. However, once the air, which takes up space, was allowed between the bag and the jar, the bag was released and easily removed from the jar. 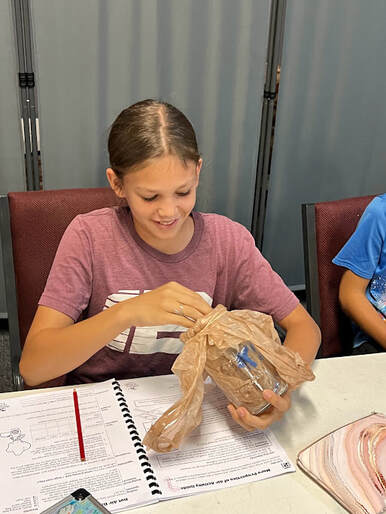 2. Air Has Mass and Exerts a Force For this demonstration, we used a ruler, table and newspaper. We set the ruler on the edge of a table or desk with a part of the ruler hanging off the table. We placed a large piece of newspaper across the ruler resting on the table. Then applying some pressure to the ruler hanging off the table, attempted to move the ruler up. Air has mass and therefore exerts a push force. The air on top of the paper is resisting moving which pushes it down and prevents the ruler from flipping off the table.
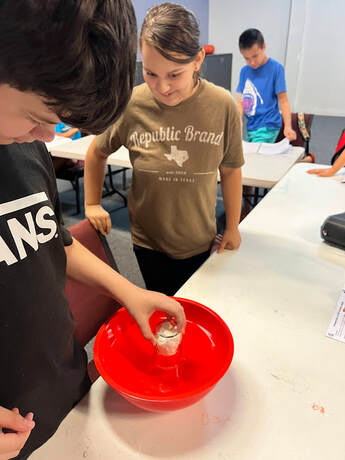
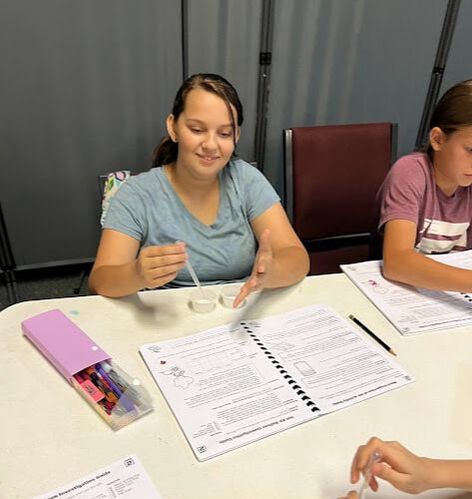
3. Air Pressure Can Be Put to Work Using straws, you can demonstrate how air pressure can exert a pull force when the top of the straw is covered. Placing a straw in a cup of water, covering the top of the straw with your finger, you created a vacuum. The air, by covering the top of the straw, was cut off allowing the air pressure to pull the water up the straw. Once you release your finger, the vacuum was broken and gravity pulled the water down and out of the straw and back into the cup.
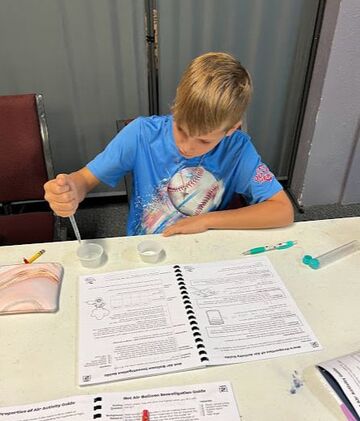
Hot air balloon investigation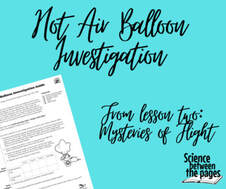 Guiding Question: Which plastic bag will climb the highest when you fill it with hot air? We used regular grocery plastic bag and then a bigger kitchen trash bag. I wrapped the plastic bag around the mouth of the blow dryer, secured a rubber band, then taped above the rubber band. Removed this from the blow dryer and cut off the excess handles. Placing it back on the blow dryer, turn on the blow dryer and fill the bag with hot air. When full release the bag quickly and document how high it went up. There is room on this investigation sheet to have three trials and then calculate the average. This isn't the easiest thing to do but much of what the Wright brothers did to try and accomplish flight was hard. This is a good practice activity. Flying High Work To learn about Air pressure and Wind, here is a great Study Jams video accompanied by our Video Guide
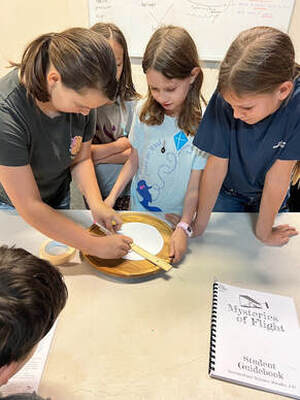
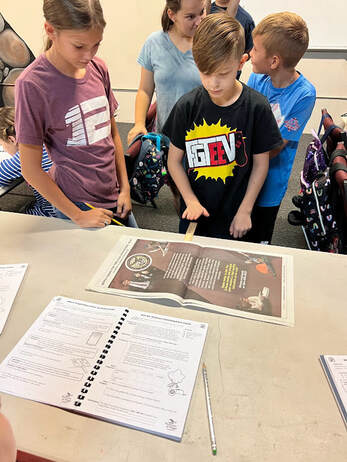
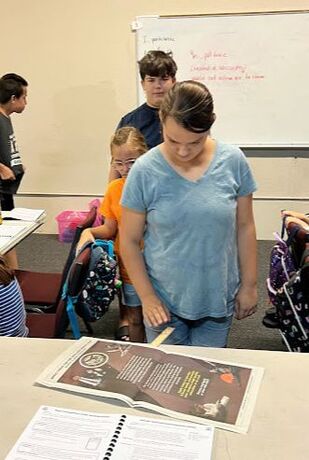
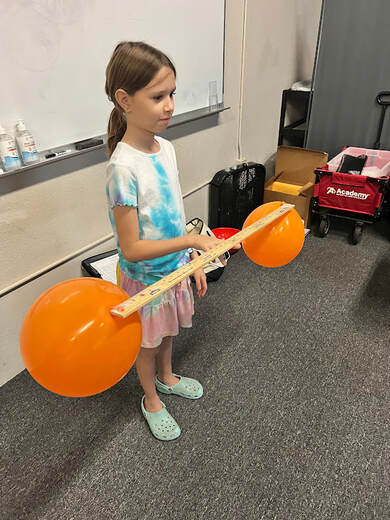
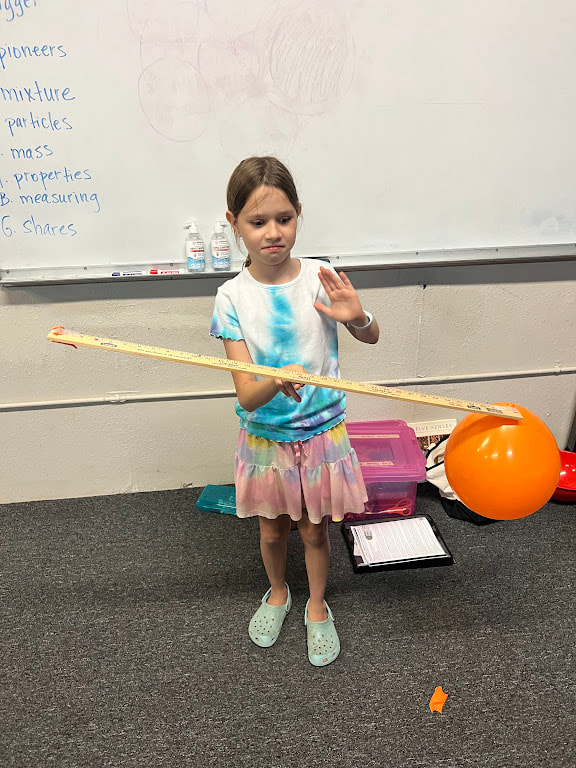
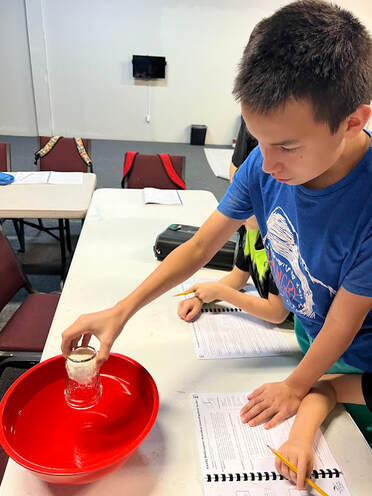
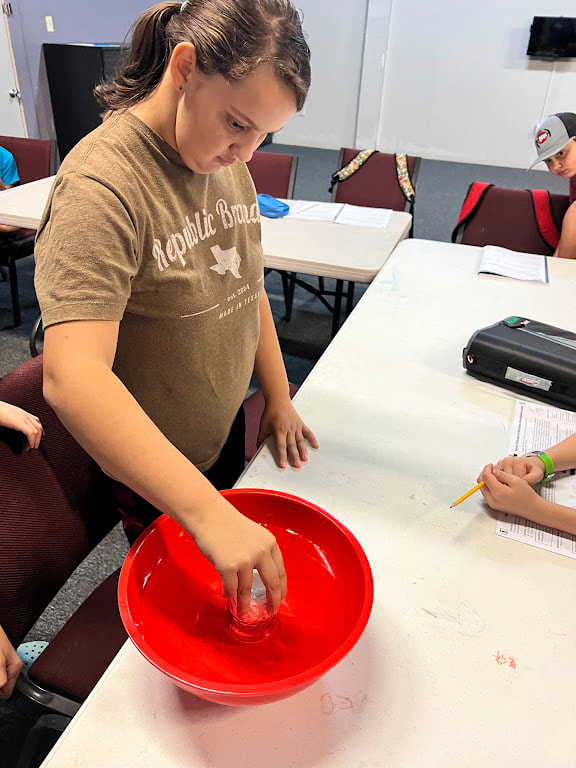
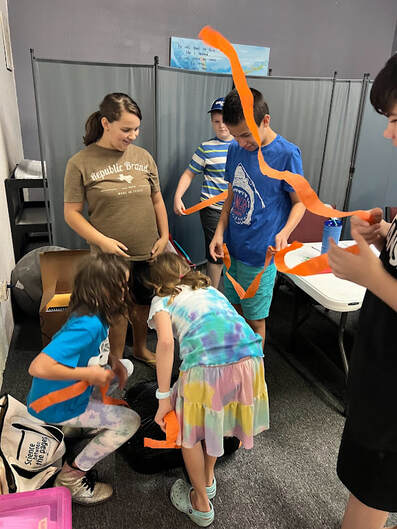
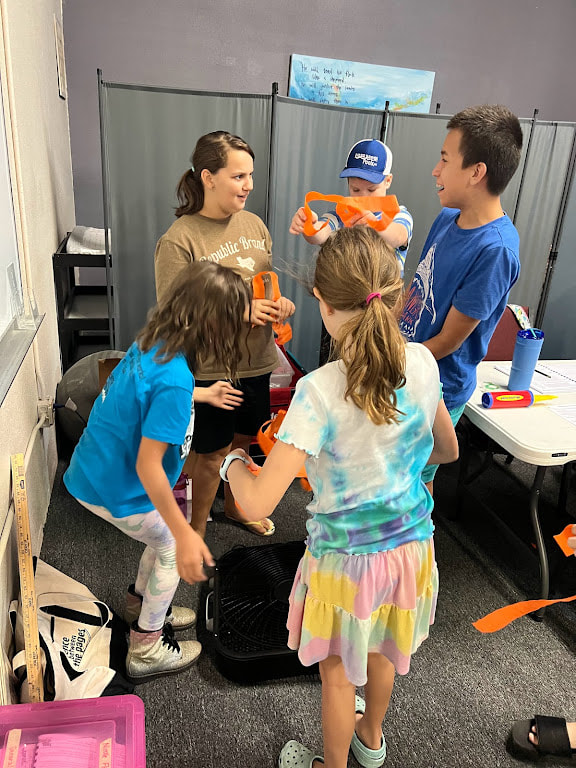
Manna momentHebrews 10:35-36- "Therefore do not throw away your confidence, which has a great reward. For you have need of endurance, so that when you have done the will of God you may receive what is promised." Wilbur and Orville Wright had many setbacks as they attempted to invent a controlled flight aircraft in the early 1900s. We too, in our Christian life will have many setbacks, and yet God is in control and always sovereign. We can take great confidence in God's sovereignty. What we consider setbacks may be the LORD building our endurance that we may receive what He has promised. note taking sheetThe first lesson's note taking sheet guides us as we learn about Wilbur and Orville's early years beginning to see where they received inspiration, knowledge and information. Along with these tidbits of history, I couple science concepts about the properties of air that support us as we learn more about the mysteries of flight. Feel welcome to follow along with our free lesson, or buy the whole 12-week science adventure. This unit will teach your students not only about the physics of flight, but also character traits that honor the Lord in doing His work. A wonderful bonus is that this unit is full of science investigations where students get to use the scientific method in a hands on way. So if your student wants to participate in a science fair this year, this is a great unit to do with many ideas on different science fair projects. Properties of AirA little review: Matter is anything that has mass and takes up space. All matter has physical and chemical properties. These properties can be observed, measured, or tested. Scientists and engineers use data from observing, measuring, and testing physical or chemical properties to describe or identify a specific substance or mixture. Air is a mixture of pure gases made up of nitrogen, oxygen, carbon dioxide, argon, and helium with tiny particles like pollutants, pollen, soot and water vapor (small water droplets). Even though air can appear invisible to us, it shares physical properties with other types of matter. In order for the Wright brothers to discover controlled flight, they had to get to know this mixture very well. The properties of air that we investigated today in class are: 1. Air has a mass. We used a balloon pump to inflate two balloons with exactly the same number of pumps in each balloon. We taped the balloons to the end of a yardstick and balanced the yardstick on our fingers. Using a pin, we popped one balloon. Some of the force of popping the balloon made the yardstick unsteady, however, when you went to balance the balloon again, you would see that the side of the yardstick where the balloon was tied was lower than the other side. We know that air has mass because the inflated balloon's weight pulled the yardstick down where the side with the popped balloon went up signifying a difference in mass. 2. Air takes up space or has volume. Taking a bowl of water, a cup and a paper towel. I wadded up the paper towel and stuffed it into the cup making sure that when I tipped the cup over, the paper towel did not slide out. After stuffing the cup with the paper towel, I submerged the cup into the water so that the water completely covered the cup. I asked the students if they thought the paper towel would be wet when we brought it out of the water. When we brought the cup out of the water and felt the paper towel, it was dry. This signifies that the air within the cup takes up space because the water could not be in the same space as the air. 3. Air can move. Wind is actually defined as moving air. We observe wind all the time. But can air move inside a room or house? I gave the students streamers to place in front of a fan but also so they could spin in a circle and see how the moving air pushes the streamers up. "Faith is the gift of God. So is the air, but you have to breath it; so is bread, but you have to eat it; so is water, but you have to drink it." D.L. Moody
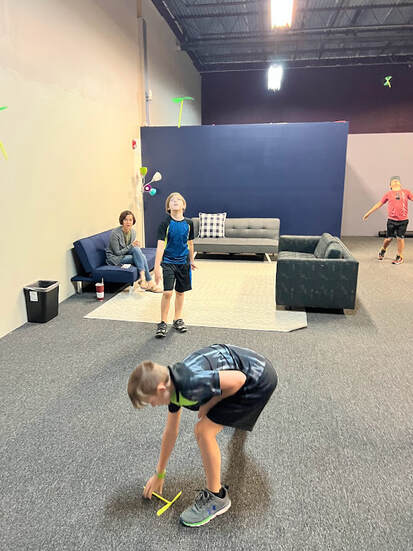
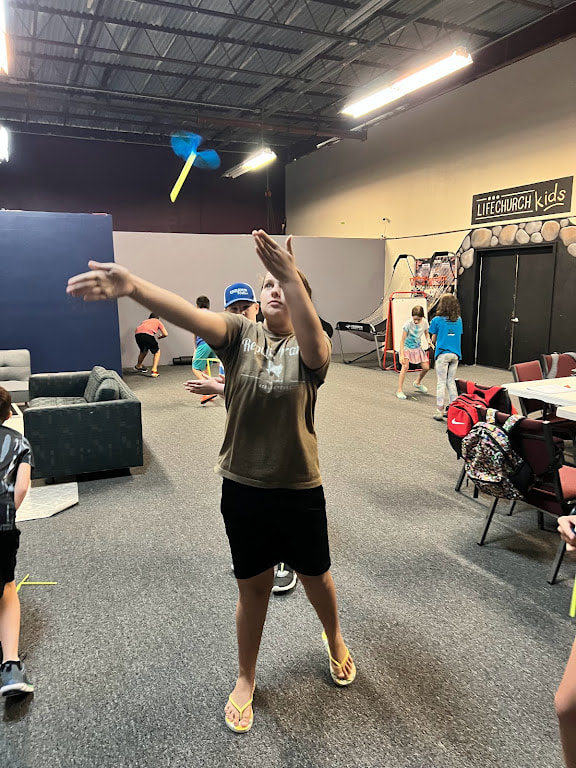
Air moves. One student suggested laying the fan on the floor pointing up to see the streamers 'fly'. It was great to see that air moves, otherwise, we wouldn't be able to fly. Handy helicopter rotation investigationAs noted in the history of Wilbur and Orville Wright note taking guide, their first inspiration towards flight was a souvenir that their father brought them home from his travels. It might have been similar to this handy helicopter. We used the handy helicopter and handy helicopter investigation guide to investigate the guiding question: How does the direction you rotate the handy helicopter affect its flight? Here are the procedures we followed 1. Mark a wall with a yardstick and tape where the students can observe the height of each helicopter take off. Standing near the wall, place the handy helicopter in between two open hands with the propeller on top. 2. Move your left hand away from your body and your right hand toward your body to rotate the stem clockwise. 3. Observe and record how the handy helicopter flew. 4. Repeat steps 2 and 3 for three trials. 5. Repeat this procedure moving your right hand away and left hand closer to rotate the stem counter clockwise. 6. Record your observations 7. Repeat steps 5-6 for three additional trials. We wrapped up our investigation by analyzing our data to see if our data supported or did not support our hypothesis (Spinning the handy helicopter clockwise or counter-clockwise will cause it to climb higher).
Note: I could NOT get these students to go back and write down their data on their handy helicopters. They mostly practiced and learned which way was counter-clockwise and which was was clockwise. This is perfectly fine and fun, however, I am expecting them to collect data for this investigation at home. The investigation sheets are in their Mysteries of Flight student books. Mysteries of Flight Curriculum
|
LEAD LEARNERWelcome! My name is Nicole Fleming and I have been leading science learning in the Bryan/College Station homeschool community for over 10 years. Archives
November 2022
Categories |


 RSS Feed